CITCO Review Workflow
1. Purpose
Automate the transfer of AML/KYC review data and document check statuses from CITCO into the FundSub dashboard—eliminating the need for manual data entry between systems.
2. Key Benefits & Features
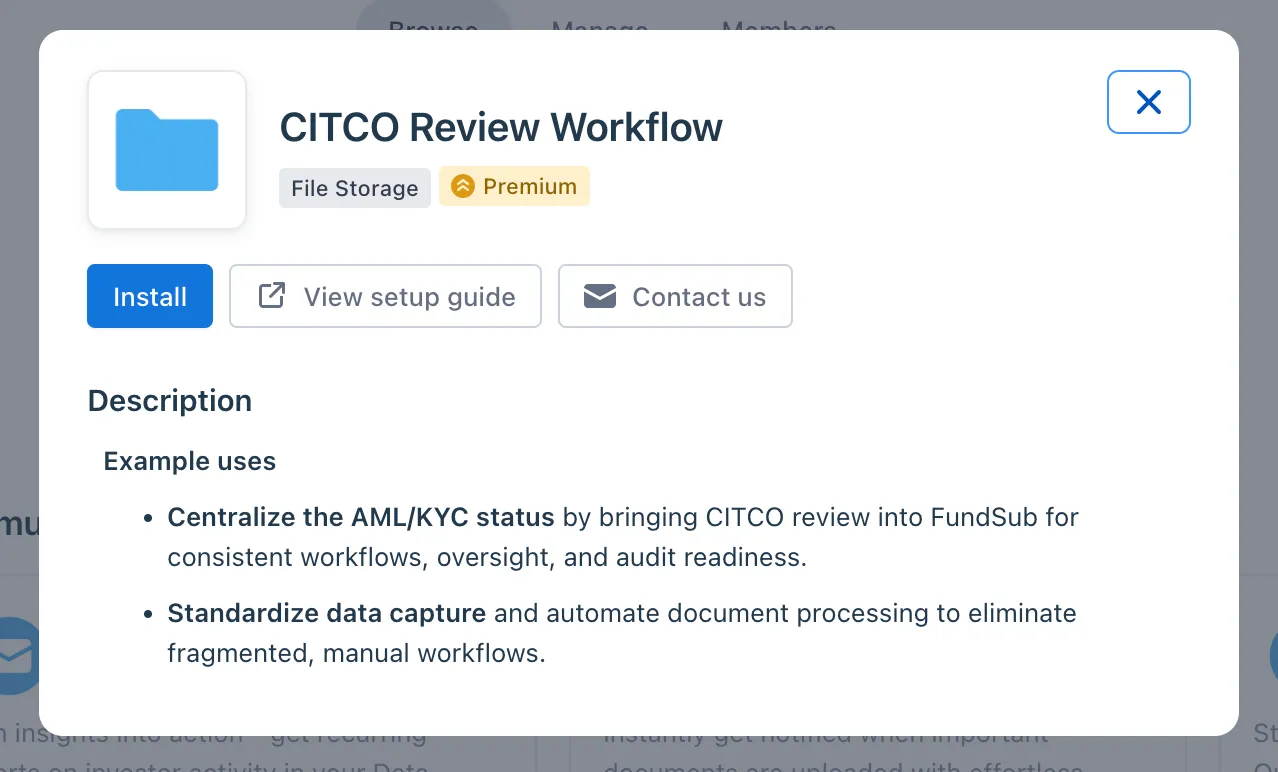
- Centralized status tracking: Bring CITCO’s AML/KYC review results directly into FundSub for consistent workflows, oversight, and audit readiness.
- Standardized data capture: Automate document processing to remove fragmented, manual workflows.
- Time savings at scale: Reduce repetitive administrative work for fund managers handling multiple subscriptions.
3. Target Personas
- Any FundSub customer working with CITCO.
- Particularly valuable for teams managing large subscription volumes who want to avoid manual file transfers between systems.
4. Prerequisites
4.1 Third party app requirements
- SFTP Credentials: Customers must provide valid SFTP credentials for use during setup.
- Excel Requirements: The excel file must follow below rules
- Row rule
- First row = header (flexible naming)
- Each subsequent row = one investor subscription per fund
- Column rule
- Must include one column containing the Anduin subscription ID.
- Include any additional columns that should appear in the FundSub dashboard.
- Row rule
4.2 Anduin app requirements
- Fund access - the user must either:
- Have admin access to the intended funds, or
- Know a team member with admin access who can grant the necessary permissions during setup
5. Pre-Setup Checklist
| Task | Owner | Note | Anduin guide |
|---|---|---|---|
| SFTP Credentials | Customer | https://developers.anduintransact.com/docs/authentication-2 | |
| Excel file | Customer | Consulted by Anduin | Row rule
|
| Fund access | Customer | Consulted by Anduin |
6. Step-By-Step Setup Guide
6.1 Grant access to the Integration Hub
- Customers need to contact their Implementation manager to ensure they have access to the Integration Hub and this specific integration
6.2 Locate the solution
-
In the Browse tab of the Integration Hub, the customer can locate the CITCO review workflow solution, lookout for either Key-Pair or Username/Password suffix depending on your preferred authentication method.
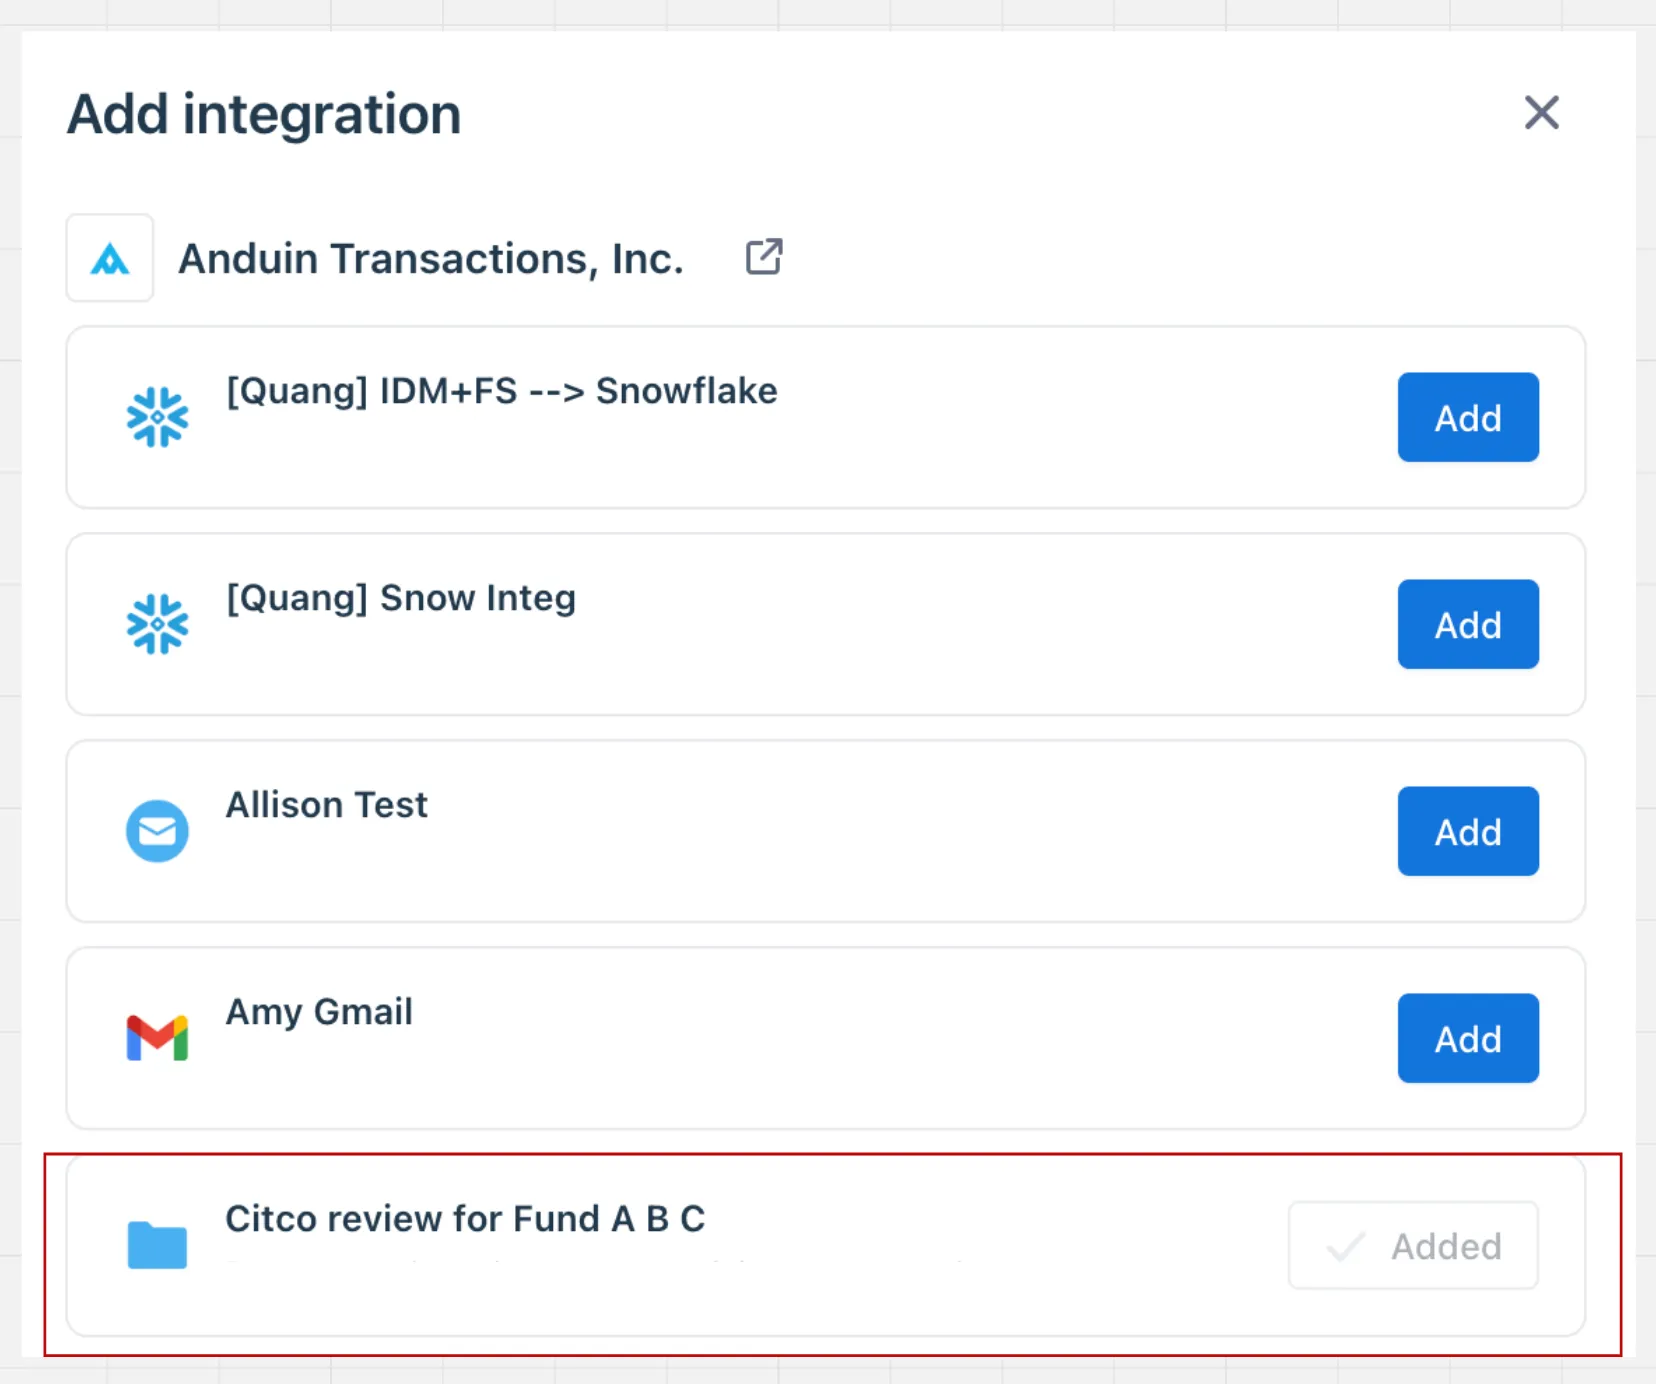
6.3 Install the solution
-
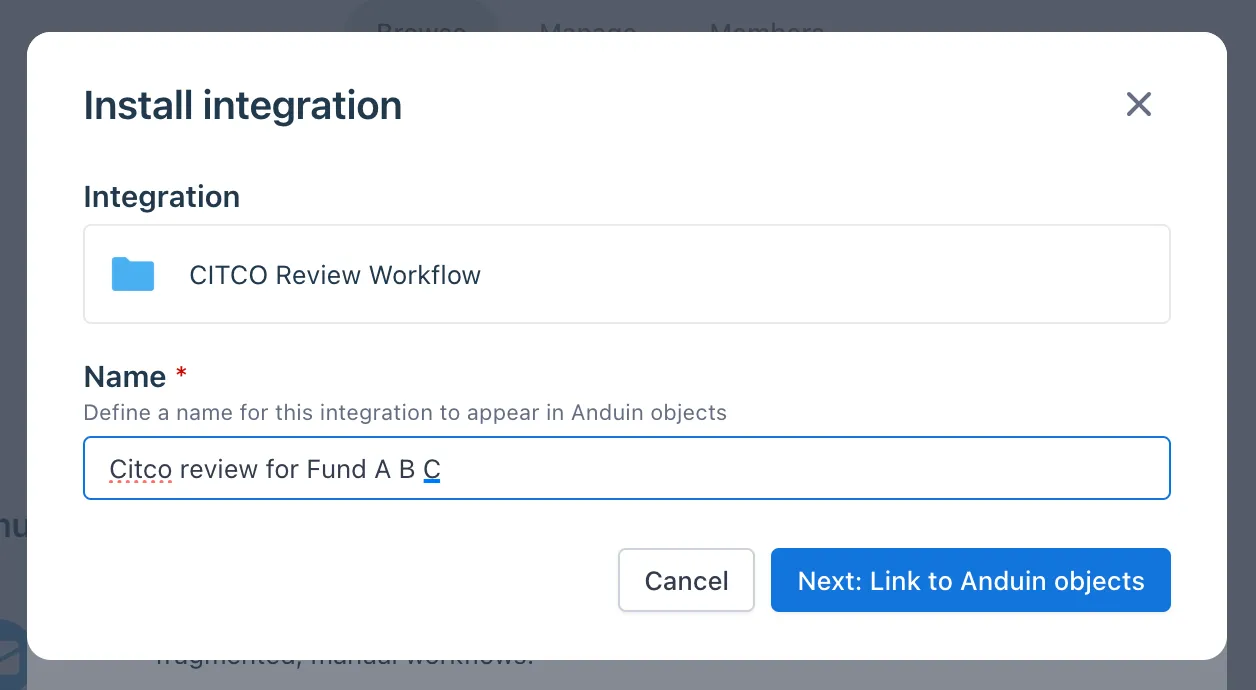
Step 1: Click Install to begin setup
-
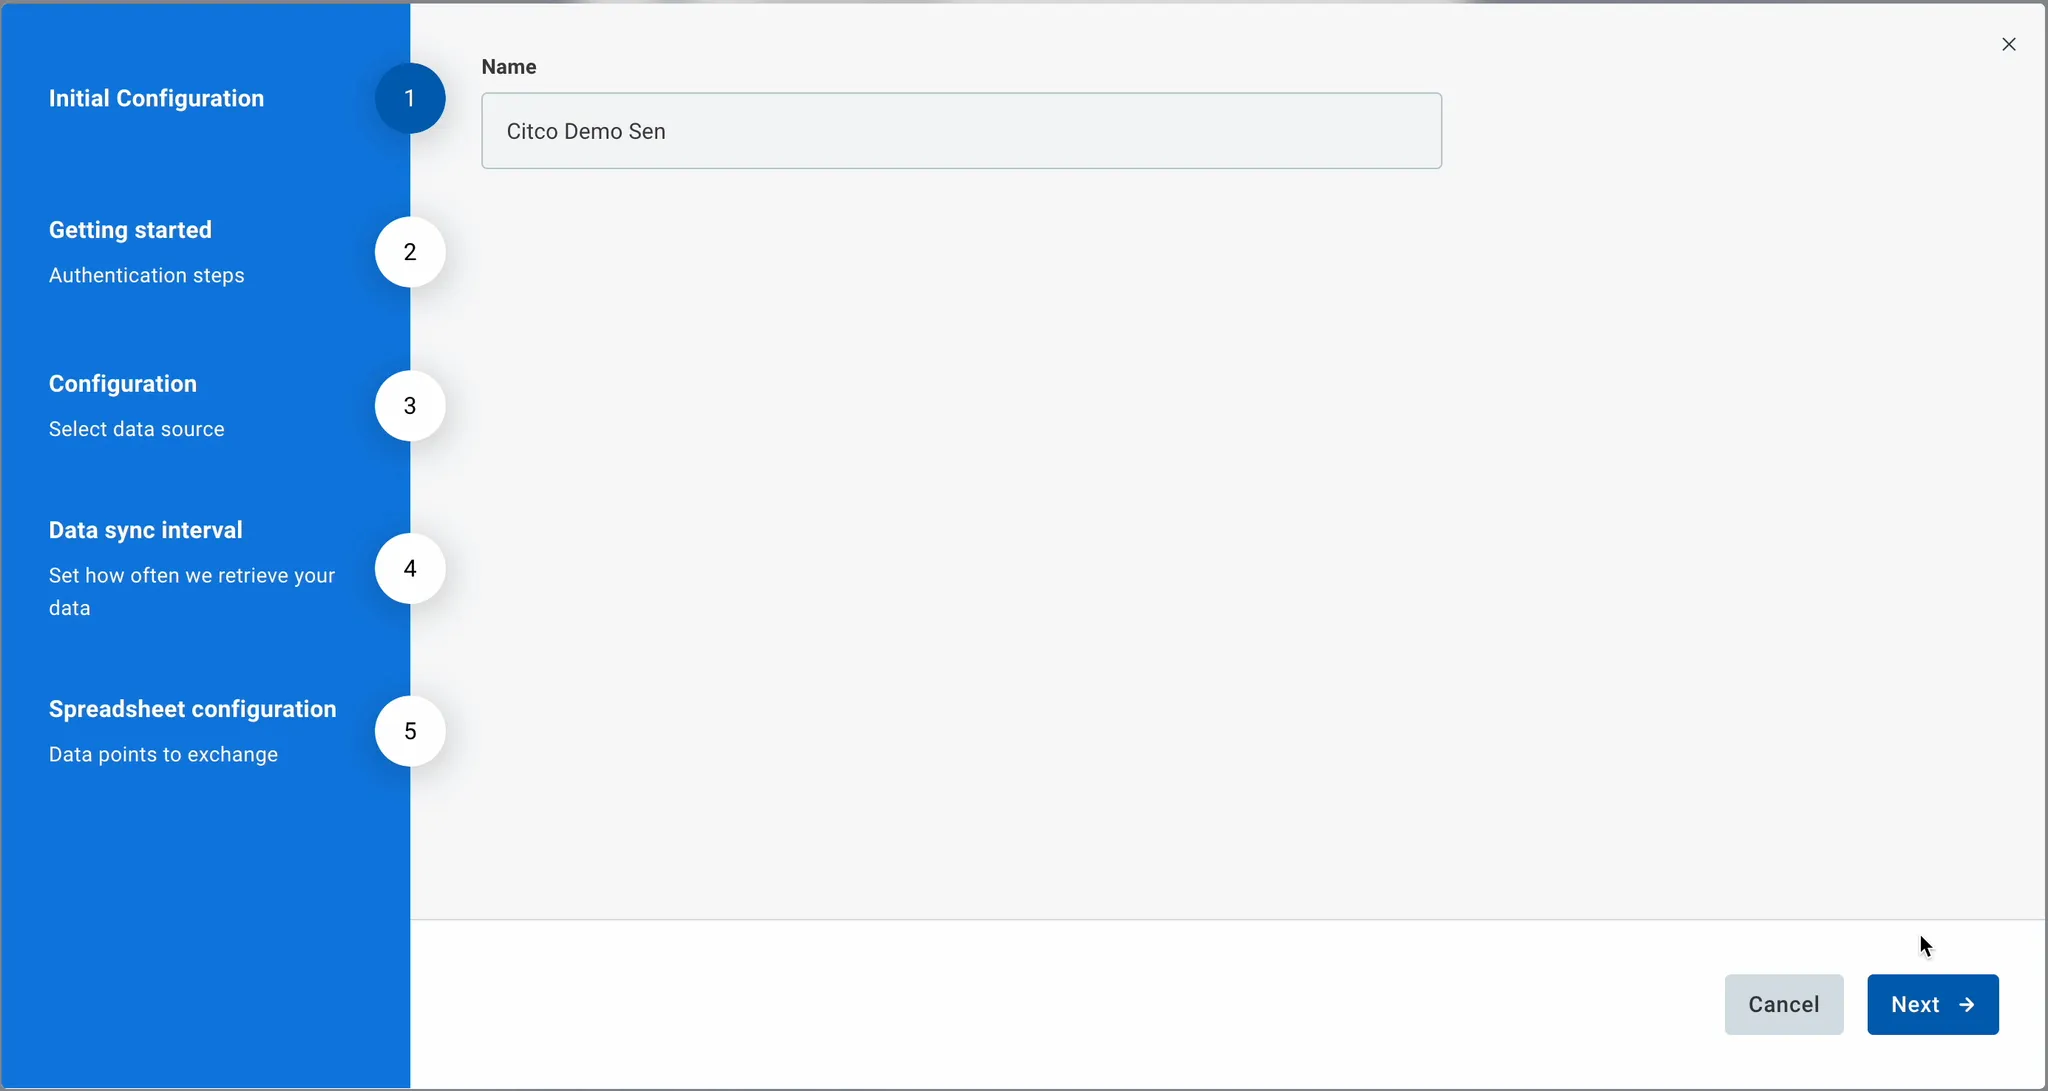
Step 2: Name the Integration
-
Recommend a clear and descriptive name (e.g., “CITCO review setup by John Smith”)
-
Click Next: Link to Anduin objects
-
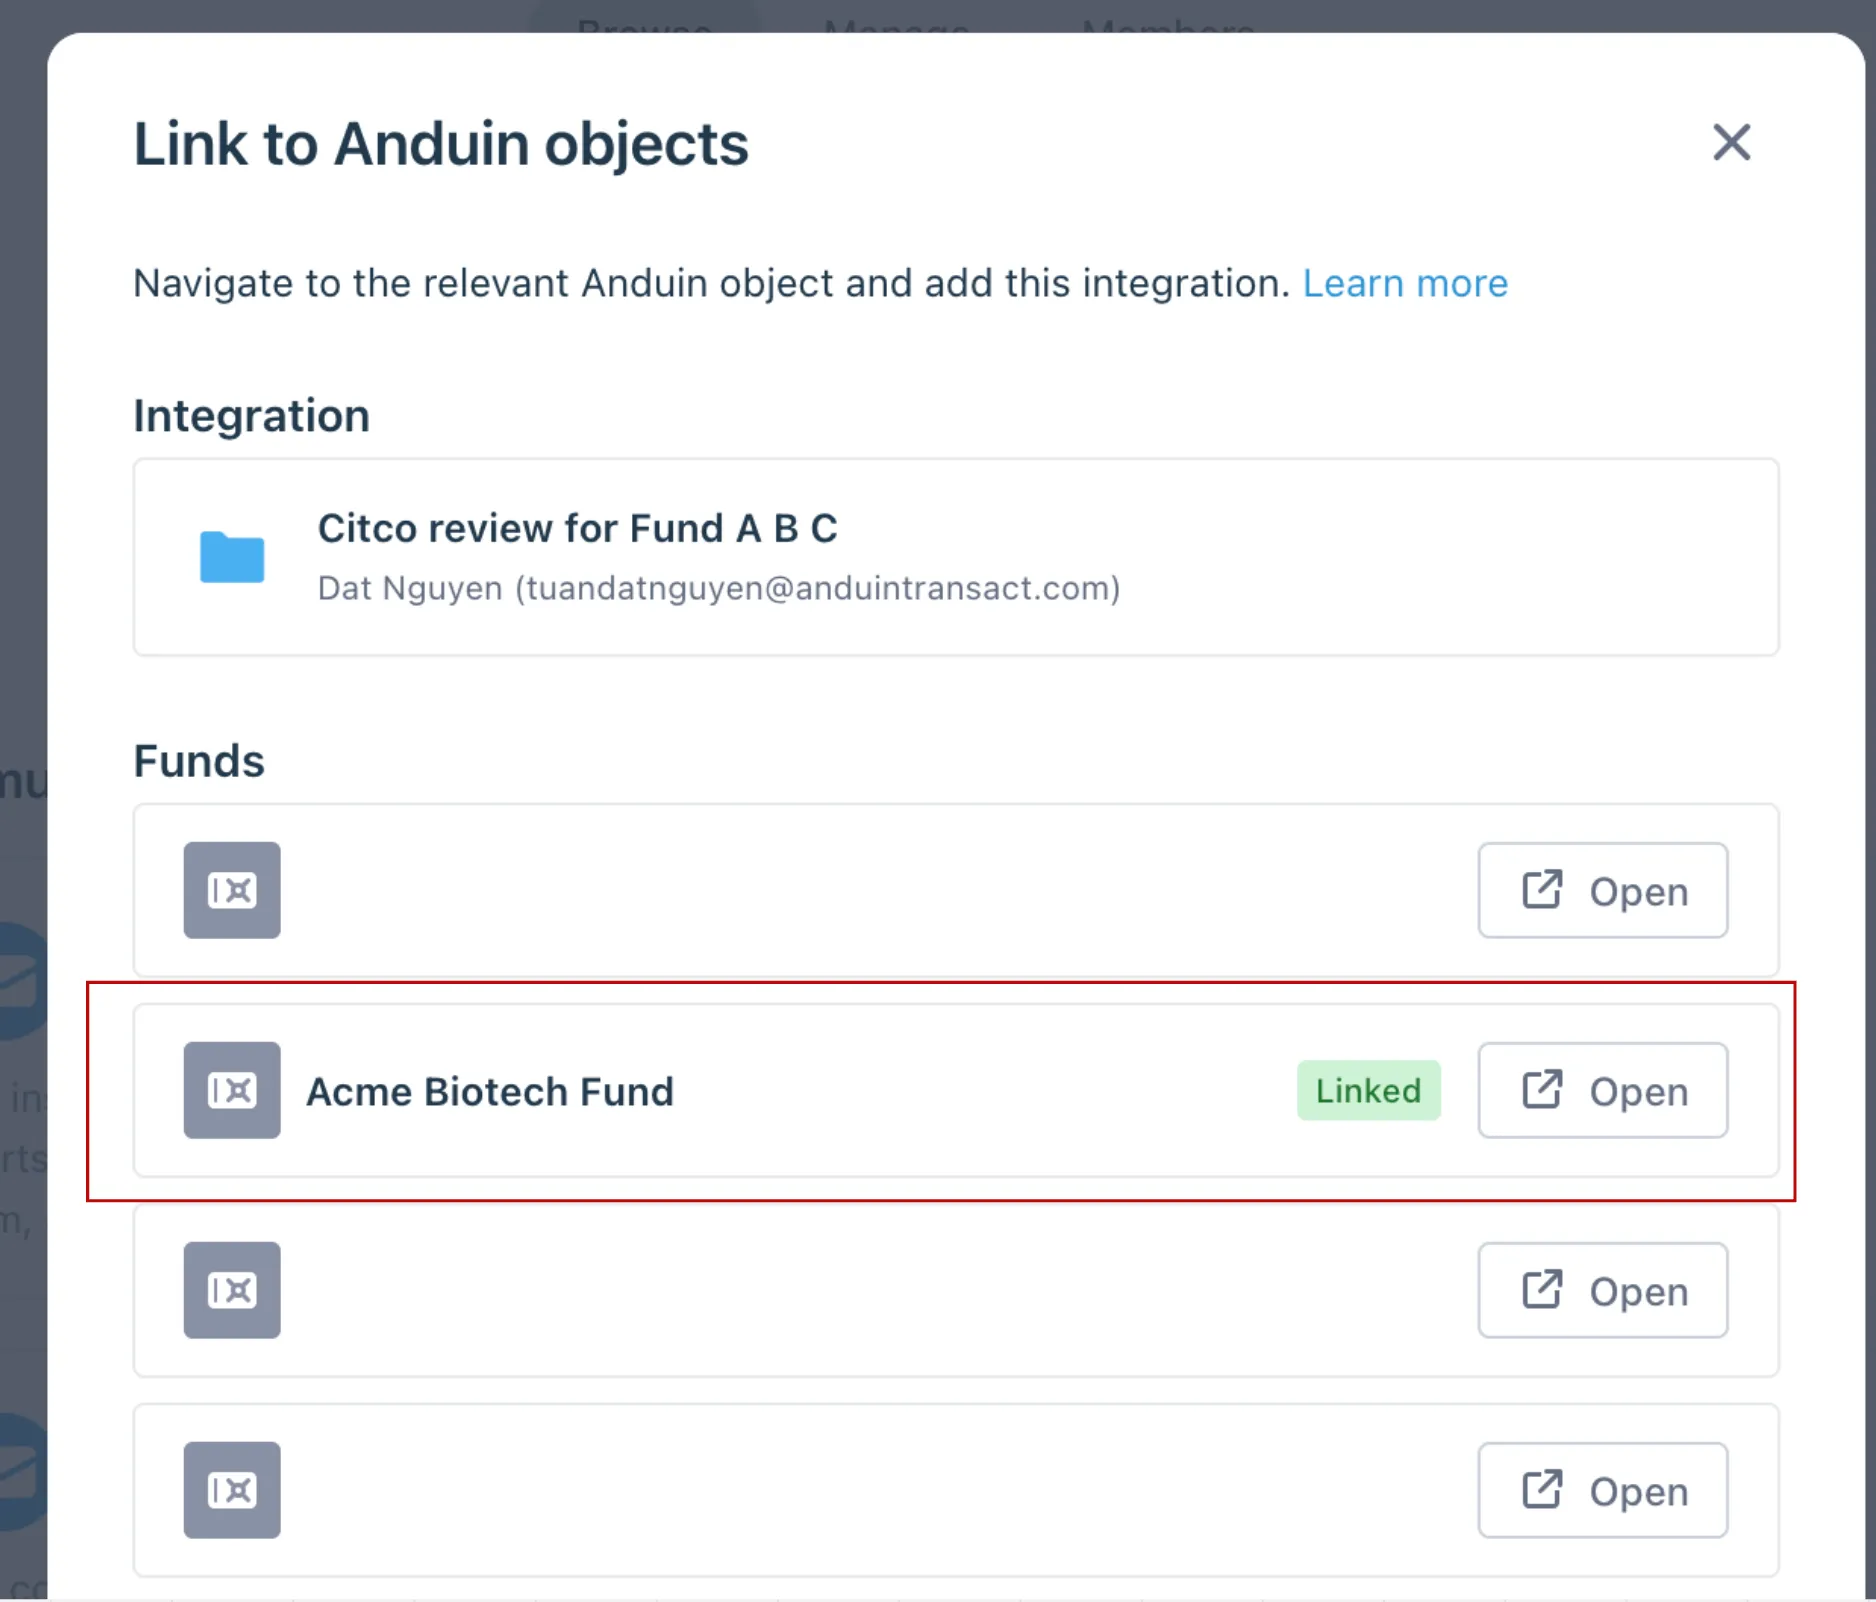
-
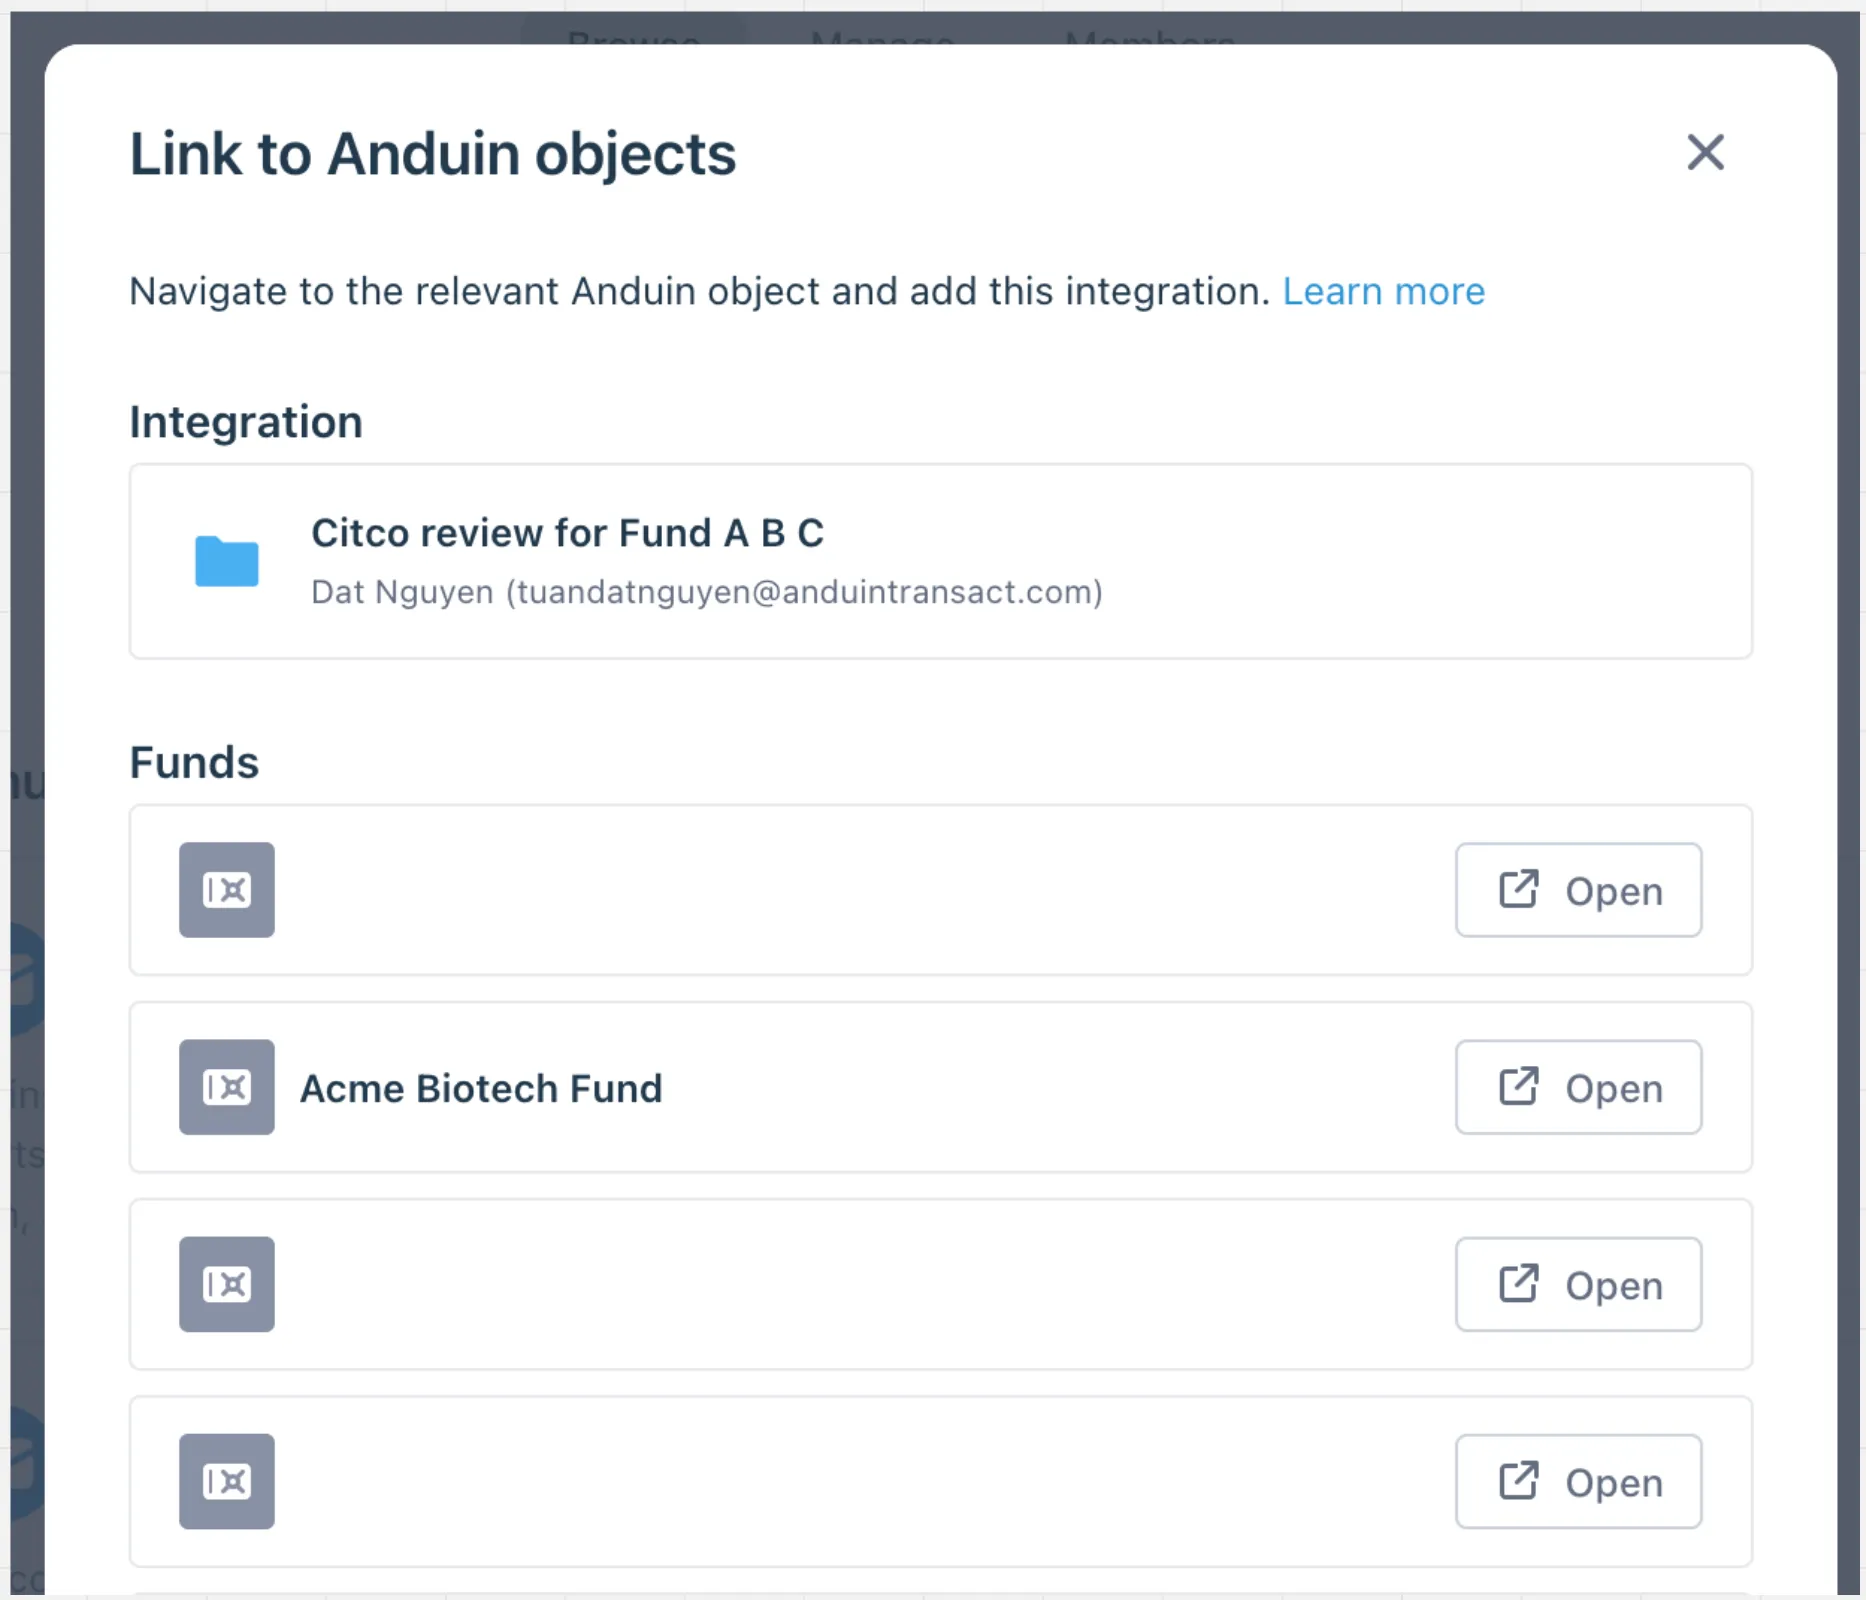
Step 3: Grant integration permission to customer’s intended objects (funds)
-
Step 3.1: A list of accessible Anduin objects (e.g., Funds) will appear
-
Step 3.2: Click Open next to the relevant fund
-
Step 3.3: In the permission module, find the integration name and click Add
-
Step 3.4: Return to the Integration Hub - the fund should now show a “Linked” tag
-
If the target fund is not listed, there are 2 options
- Customer needs to be added with admin role for that fund, then return to the step 3.2. Customer should be able to see the target fund there
- Customer requests their team member who has admin role in that fund to perform step 3.3 using Settings > Integrations in the FundSub app and they can continue with step 3.4
6.4 Configure the solution
-
The customer may rename the integration or proceed as-is
-
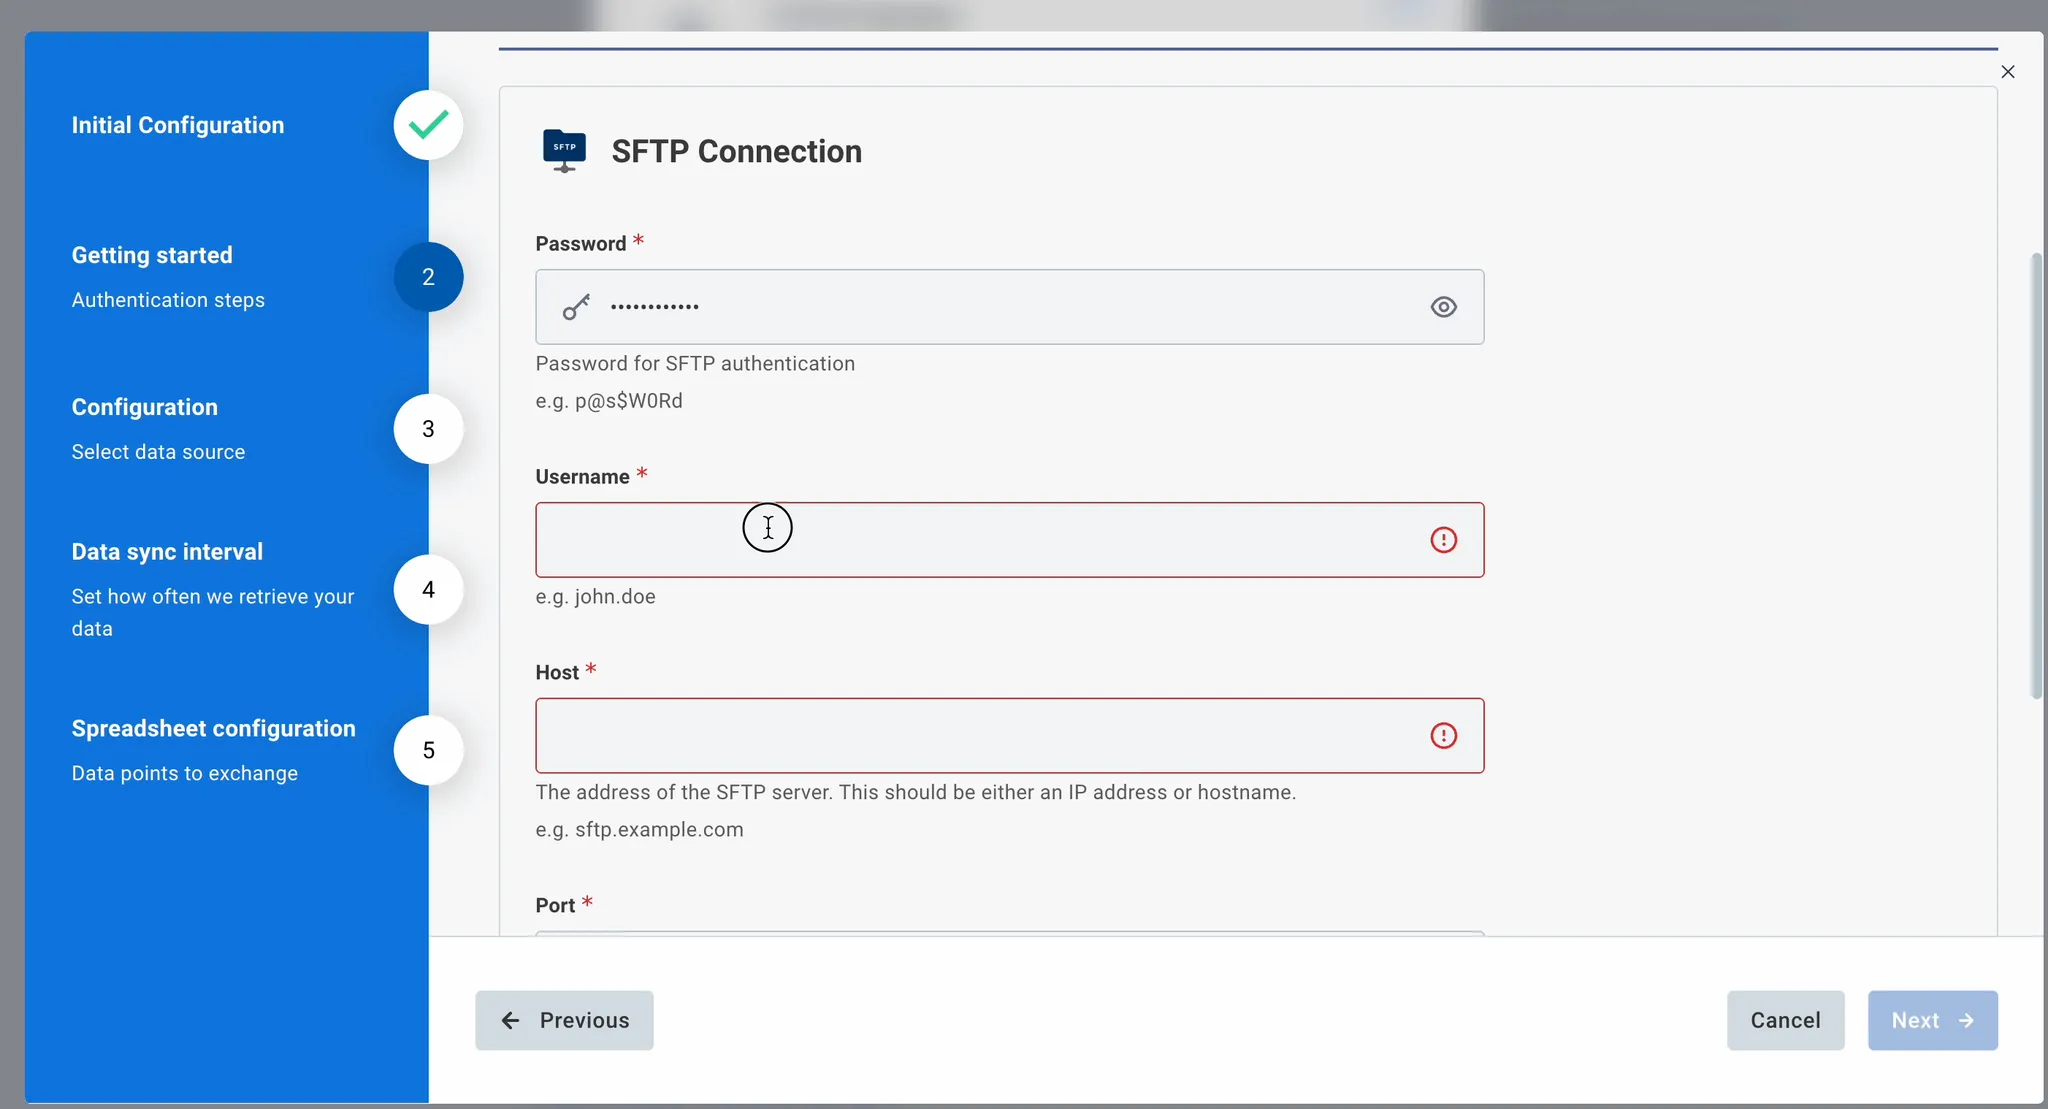
Enter SFTP credentials
-
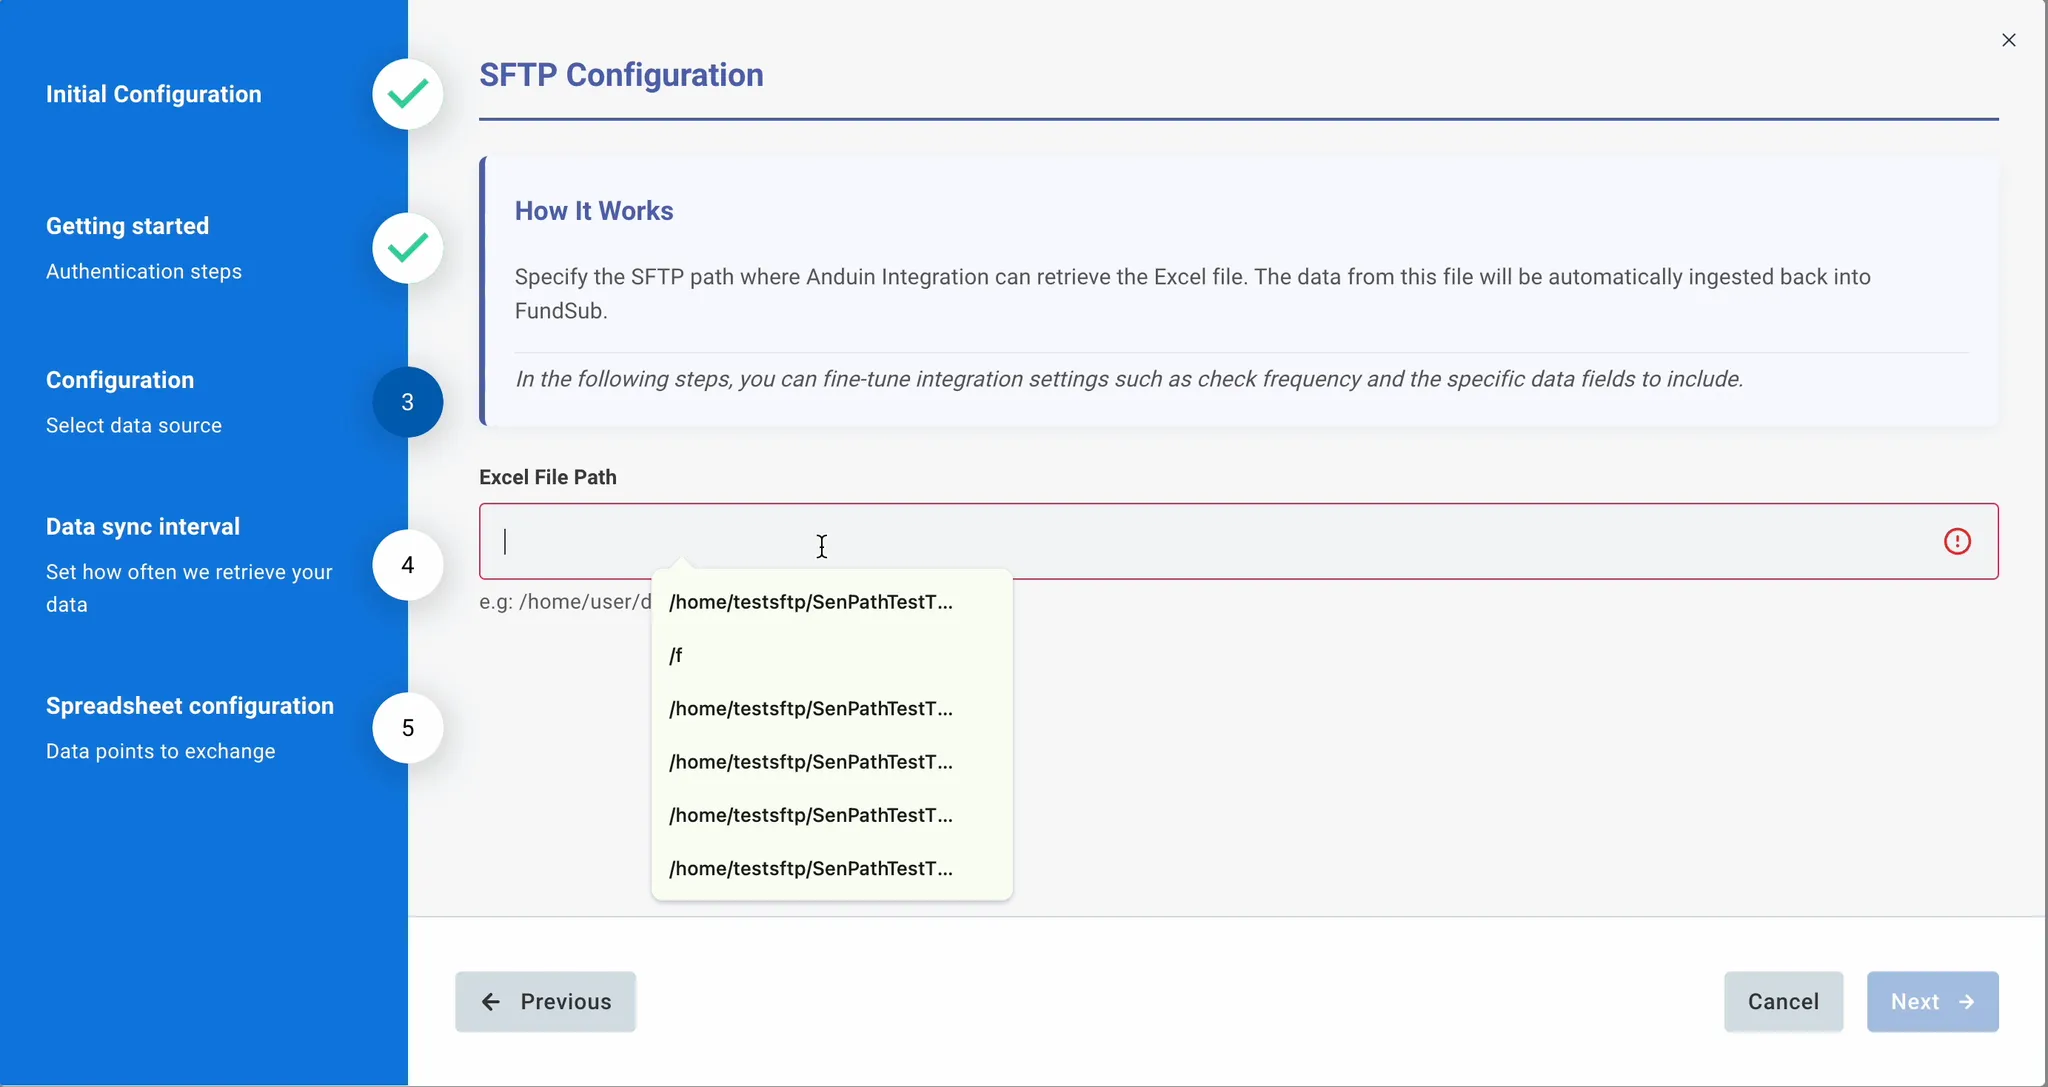
Specify the SFTP path where we can access the Excel
-
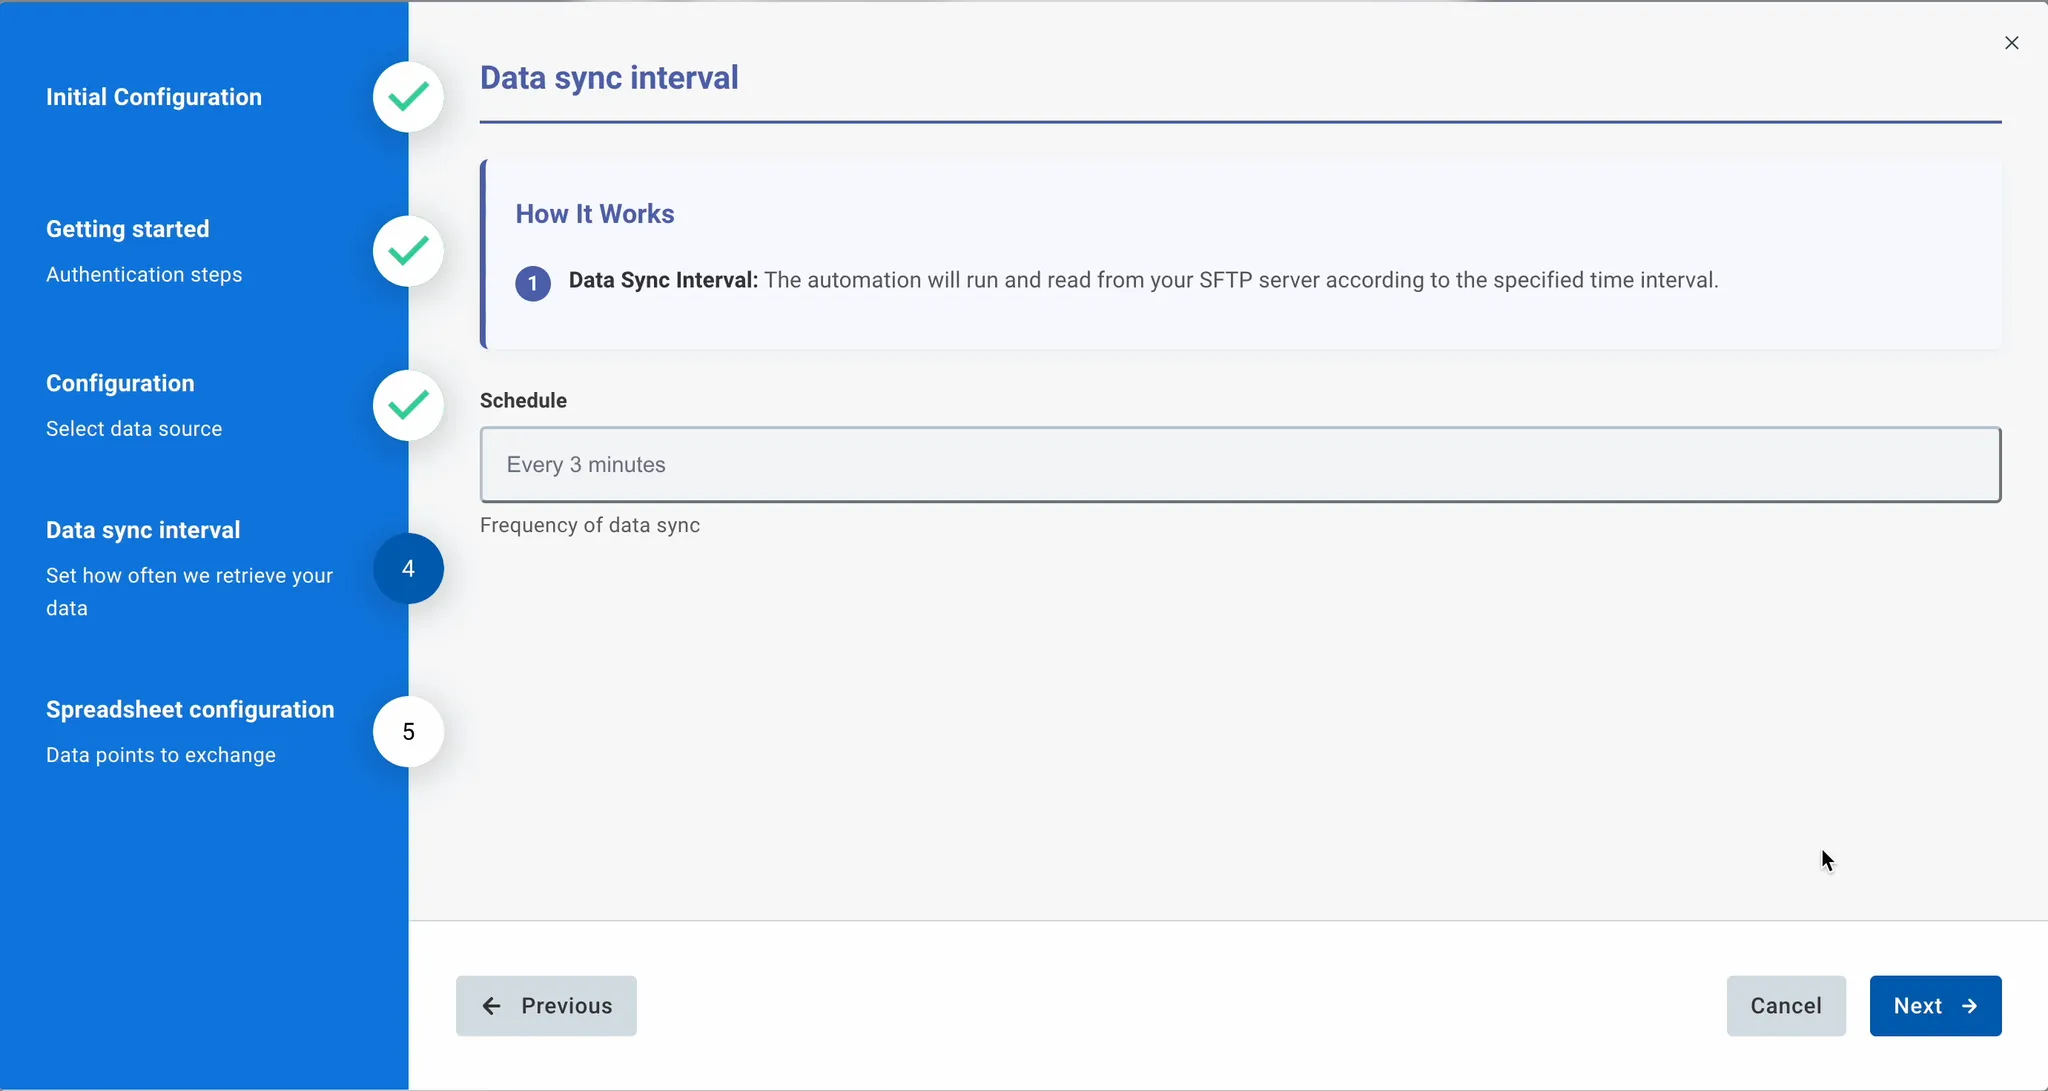
Specify the data sync frequency. The automation will run and read from customer’s SFTP server according to the specified time interval.
-
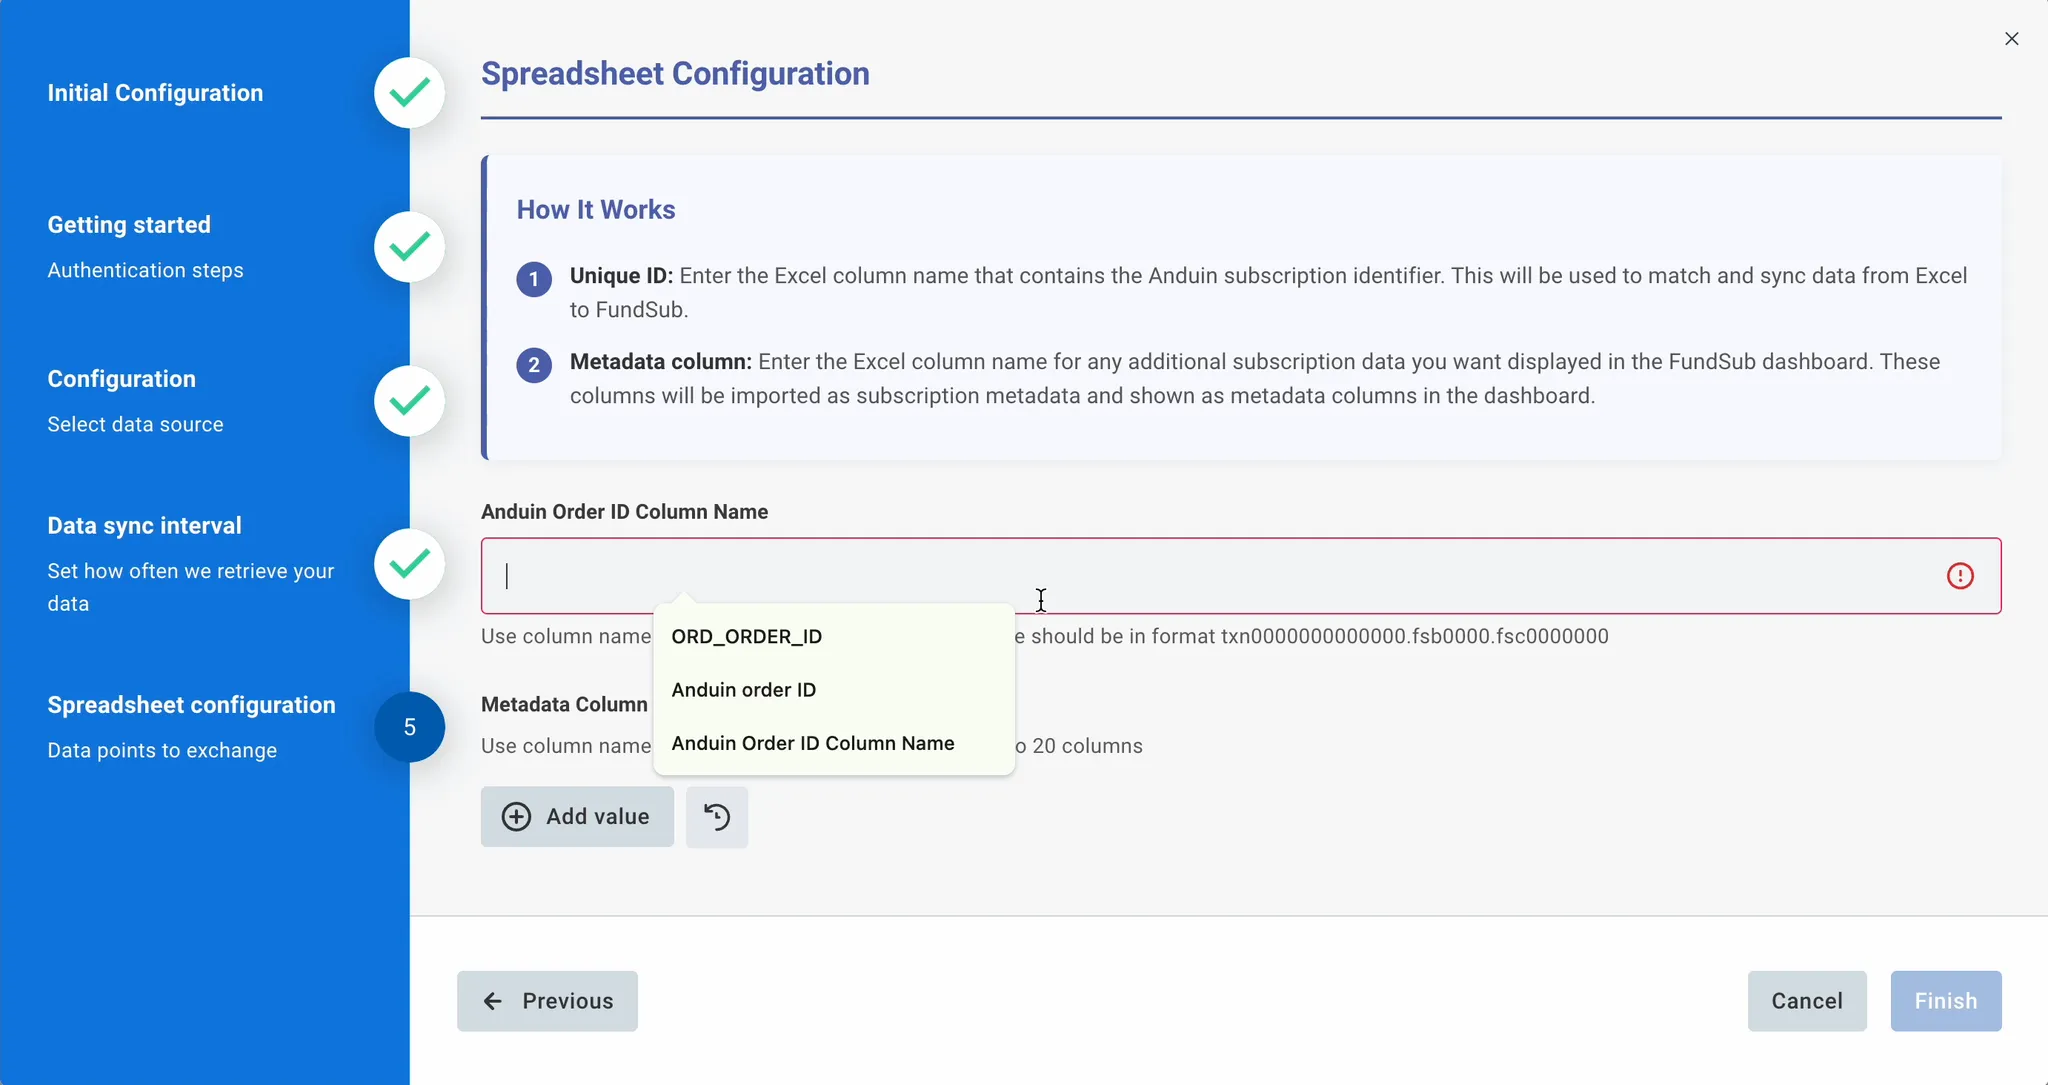
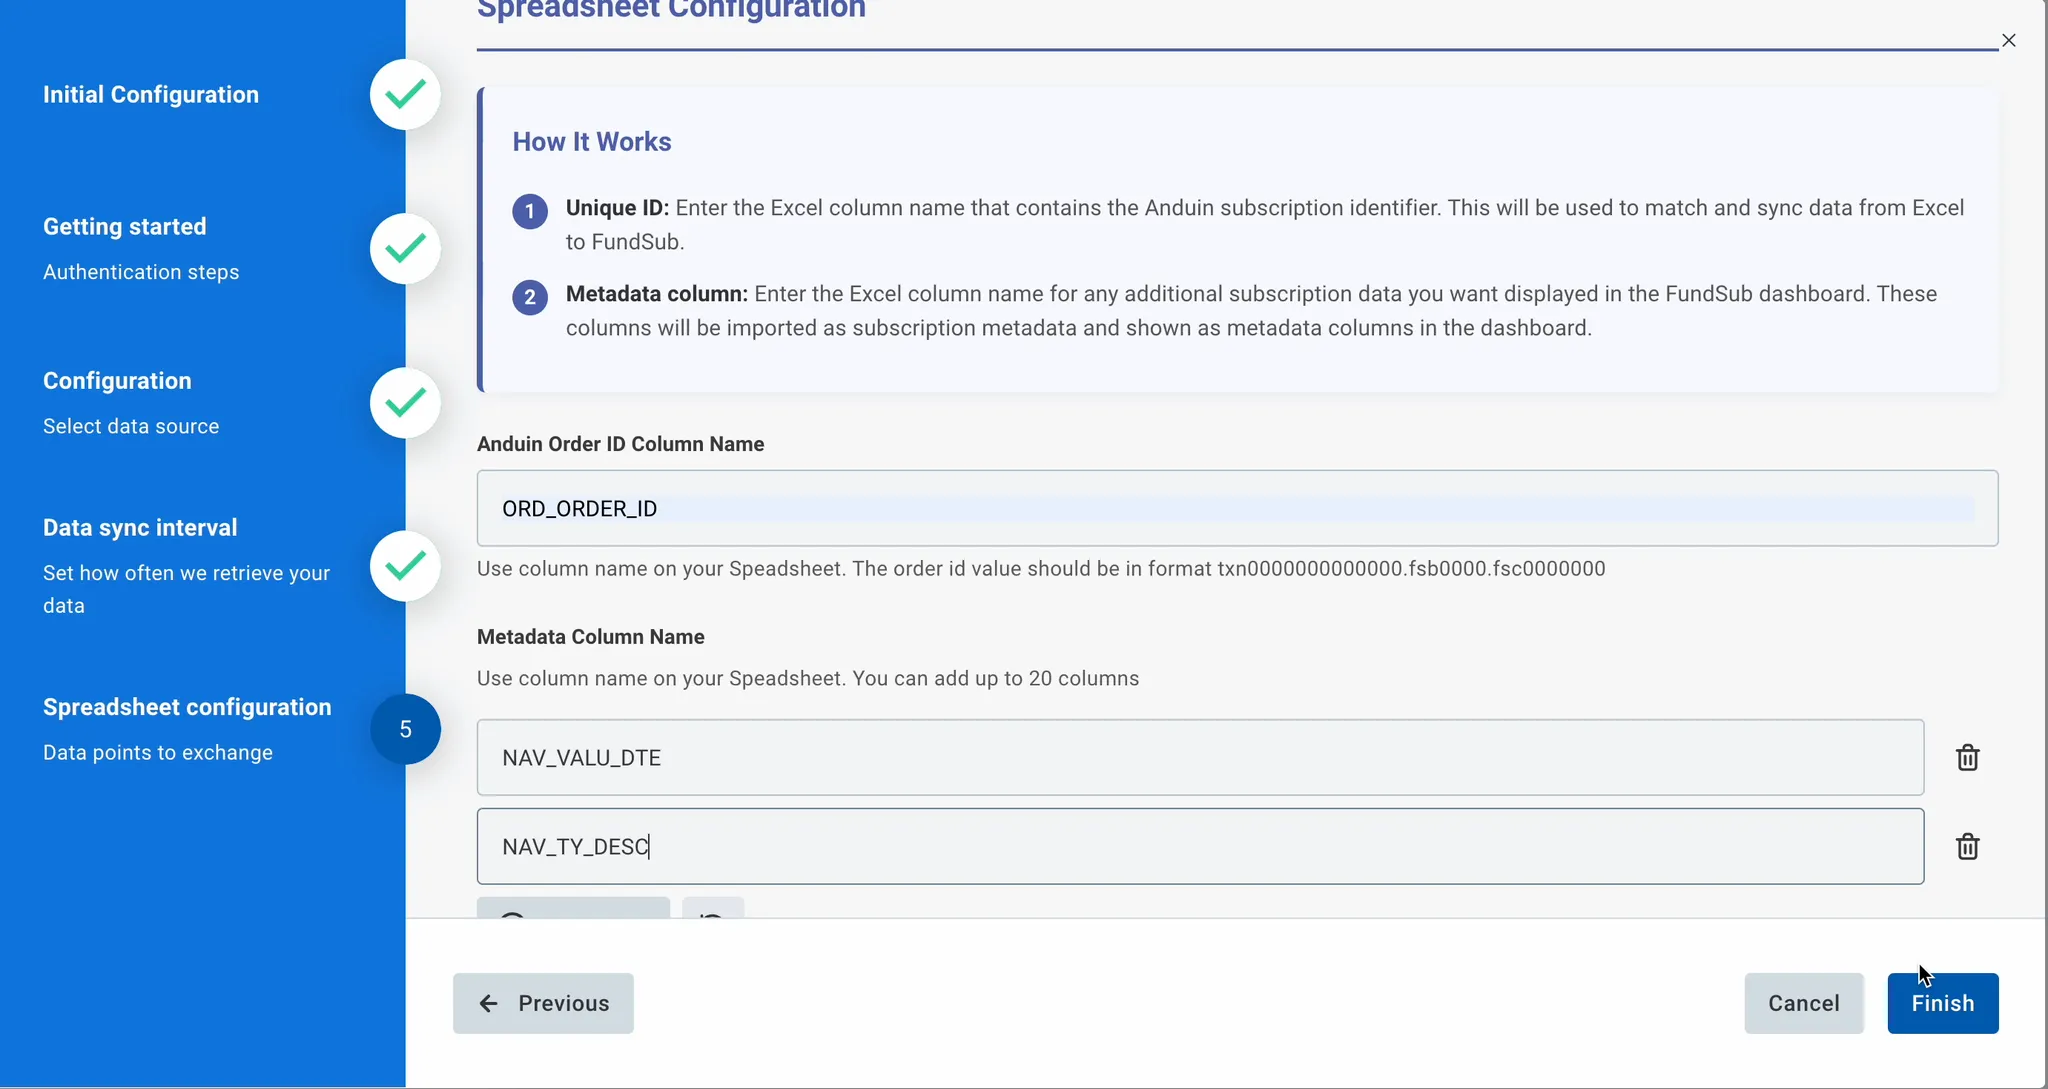
Configure the basic data mapping for Excel spreadsheet
-
Unique ID: Enter the Excel column name that contains the Anduin subscription identifier. This will be used to match and sync data from Excel to FundSub.
-
Metadata column: Enter the Excel column name for any additional subscription data you want displayed in the FundSub dashboard. These columns will be imported as subscription metadata and shown as metadata columns in the dashboard.
-
-
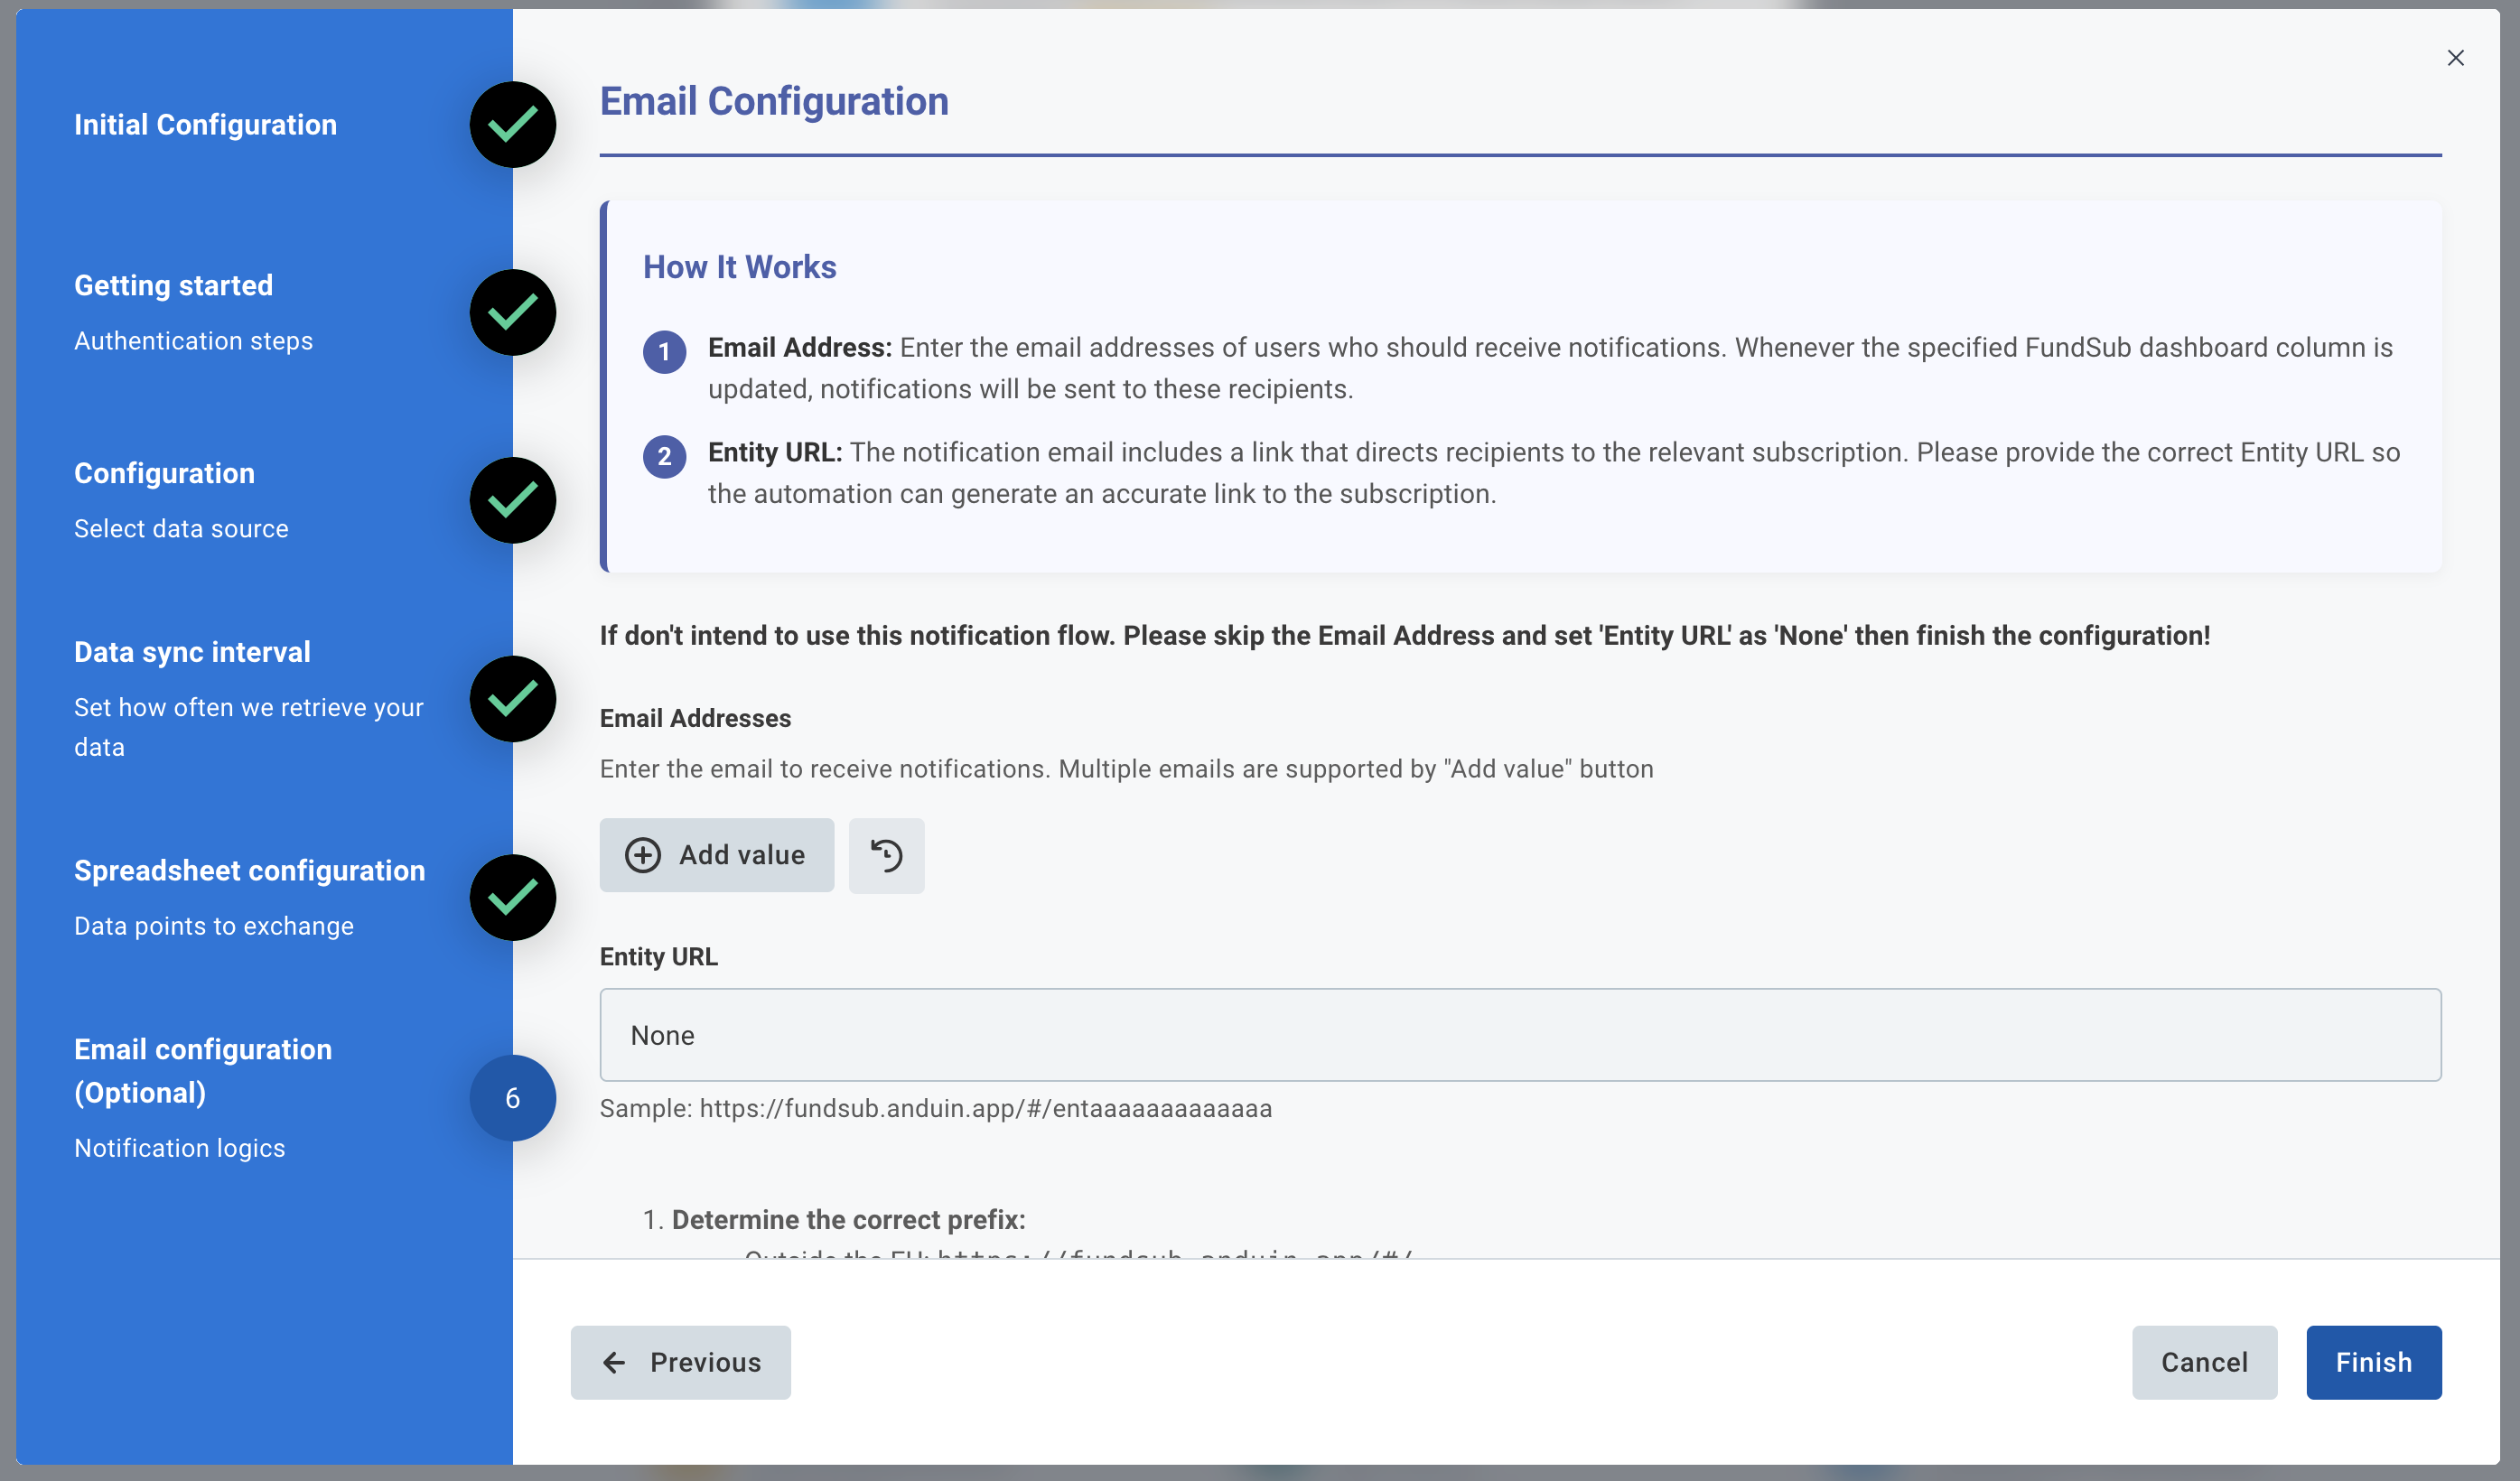
Configure the email notification flow (optional)
-
6.5 Validate the solution
Once configuration is complete:
-
Wait until the next reporting interval
-
Verify that:
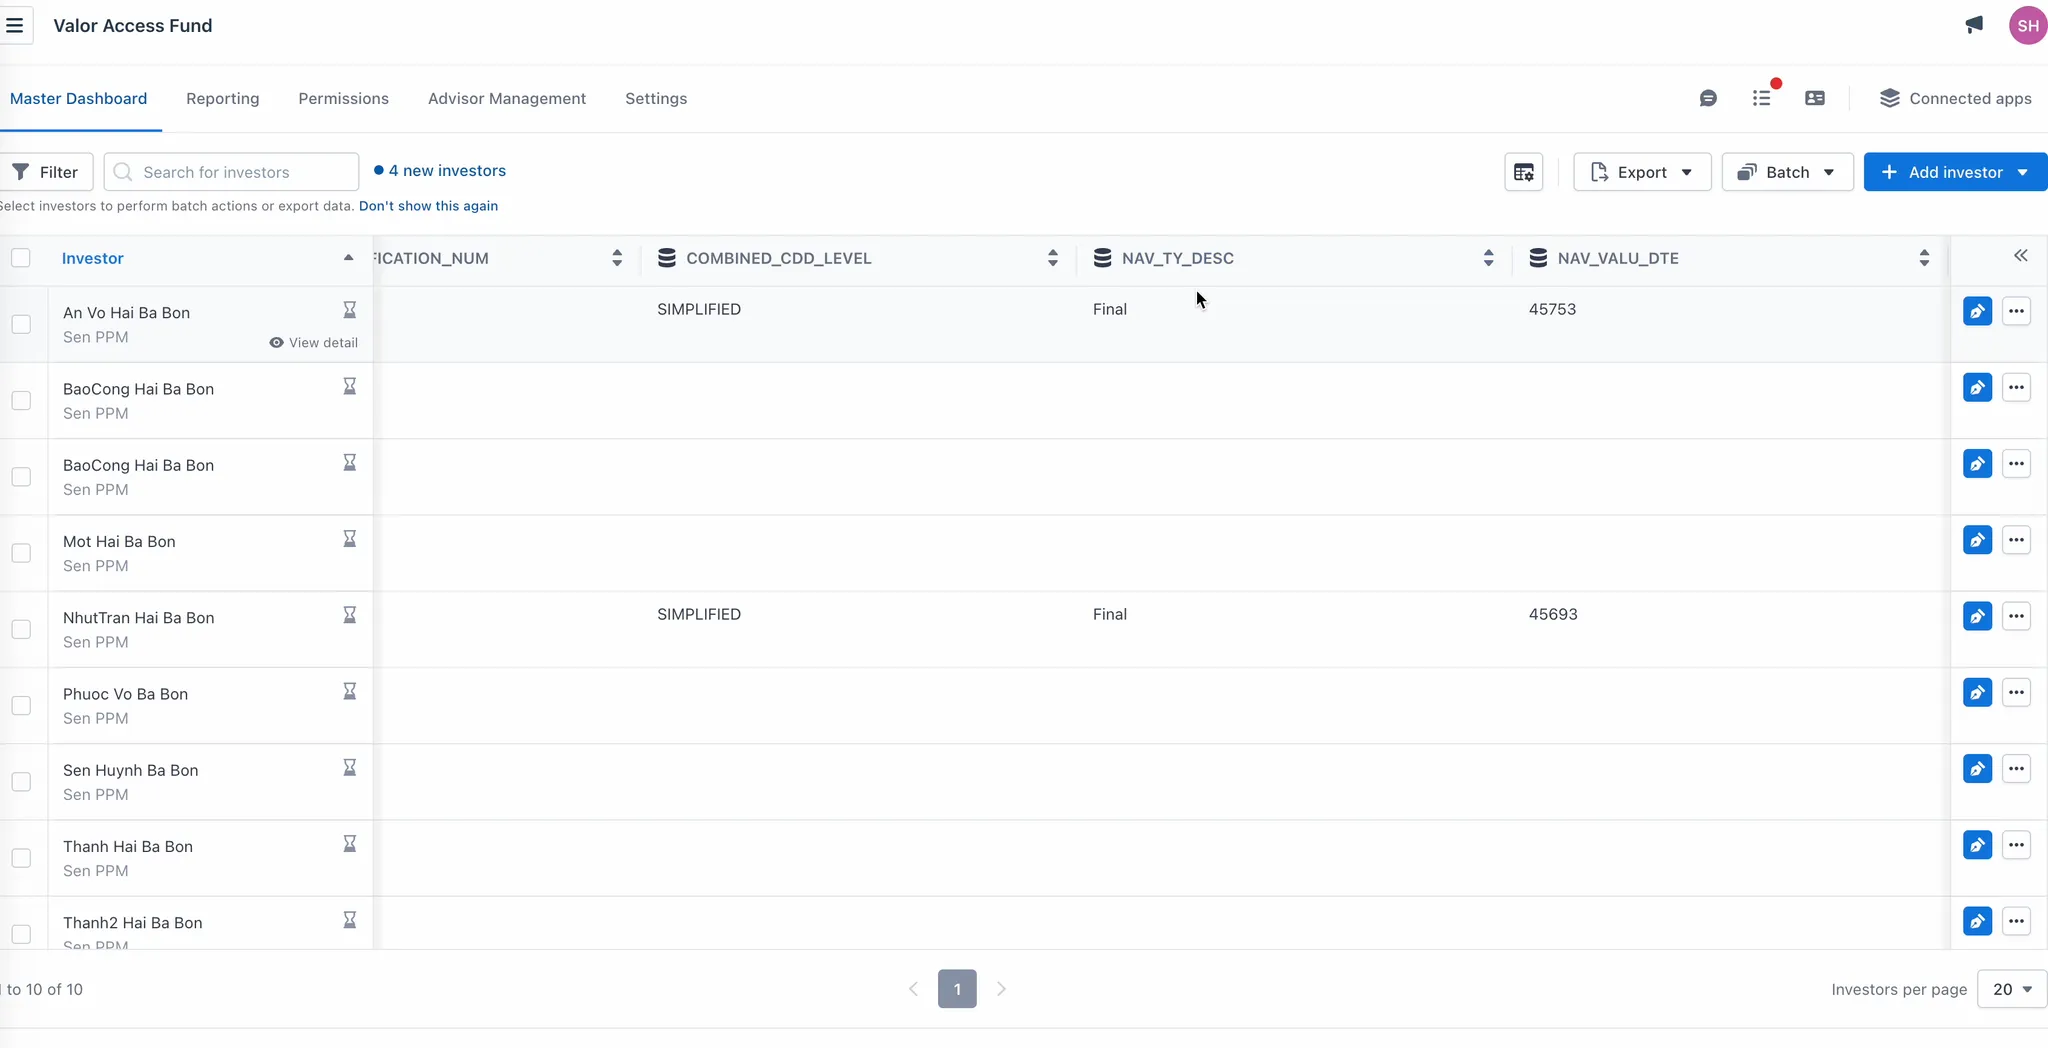
- Configured columns appear in the FundSub dashboard.
- Data is correctly matched to subscriptions and funds.
If the automation works end-to-end, the setup is successfully validated.
Updated 7 months ago