Retrieve subscription documents
1. Purpose
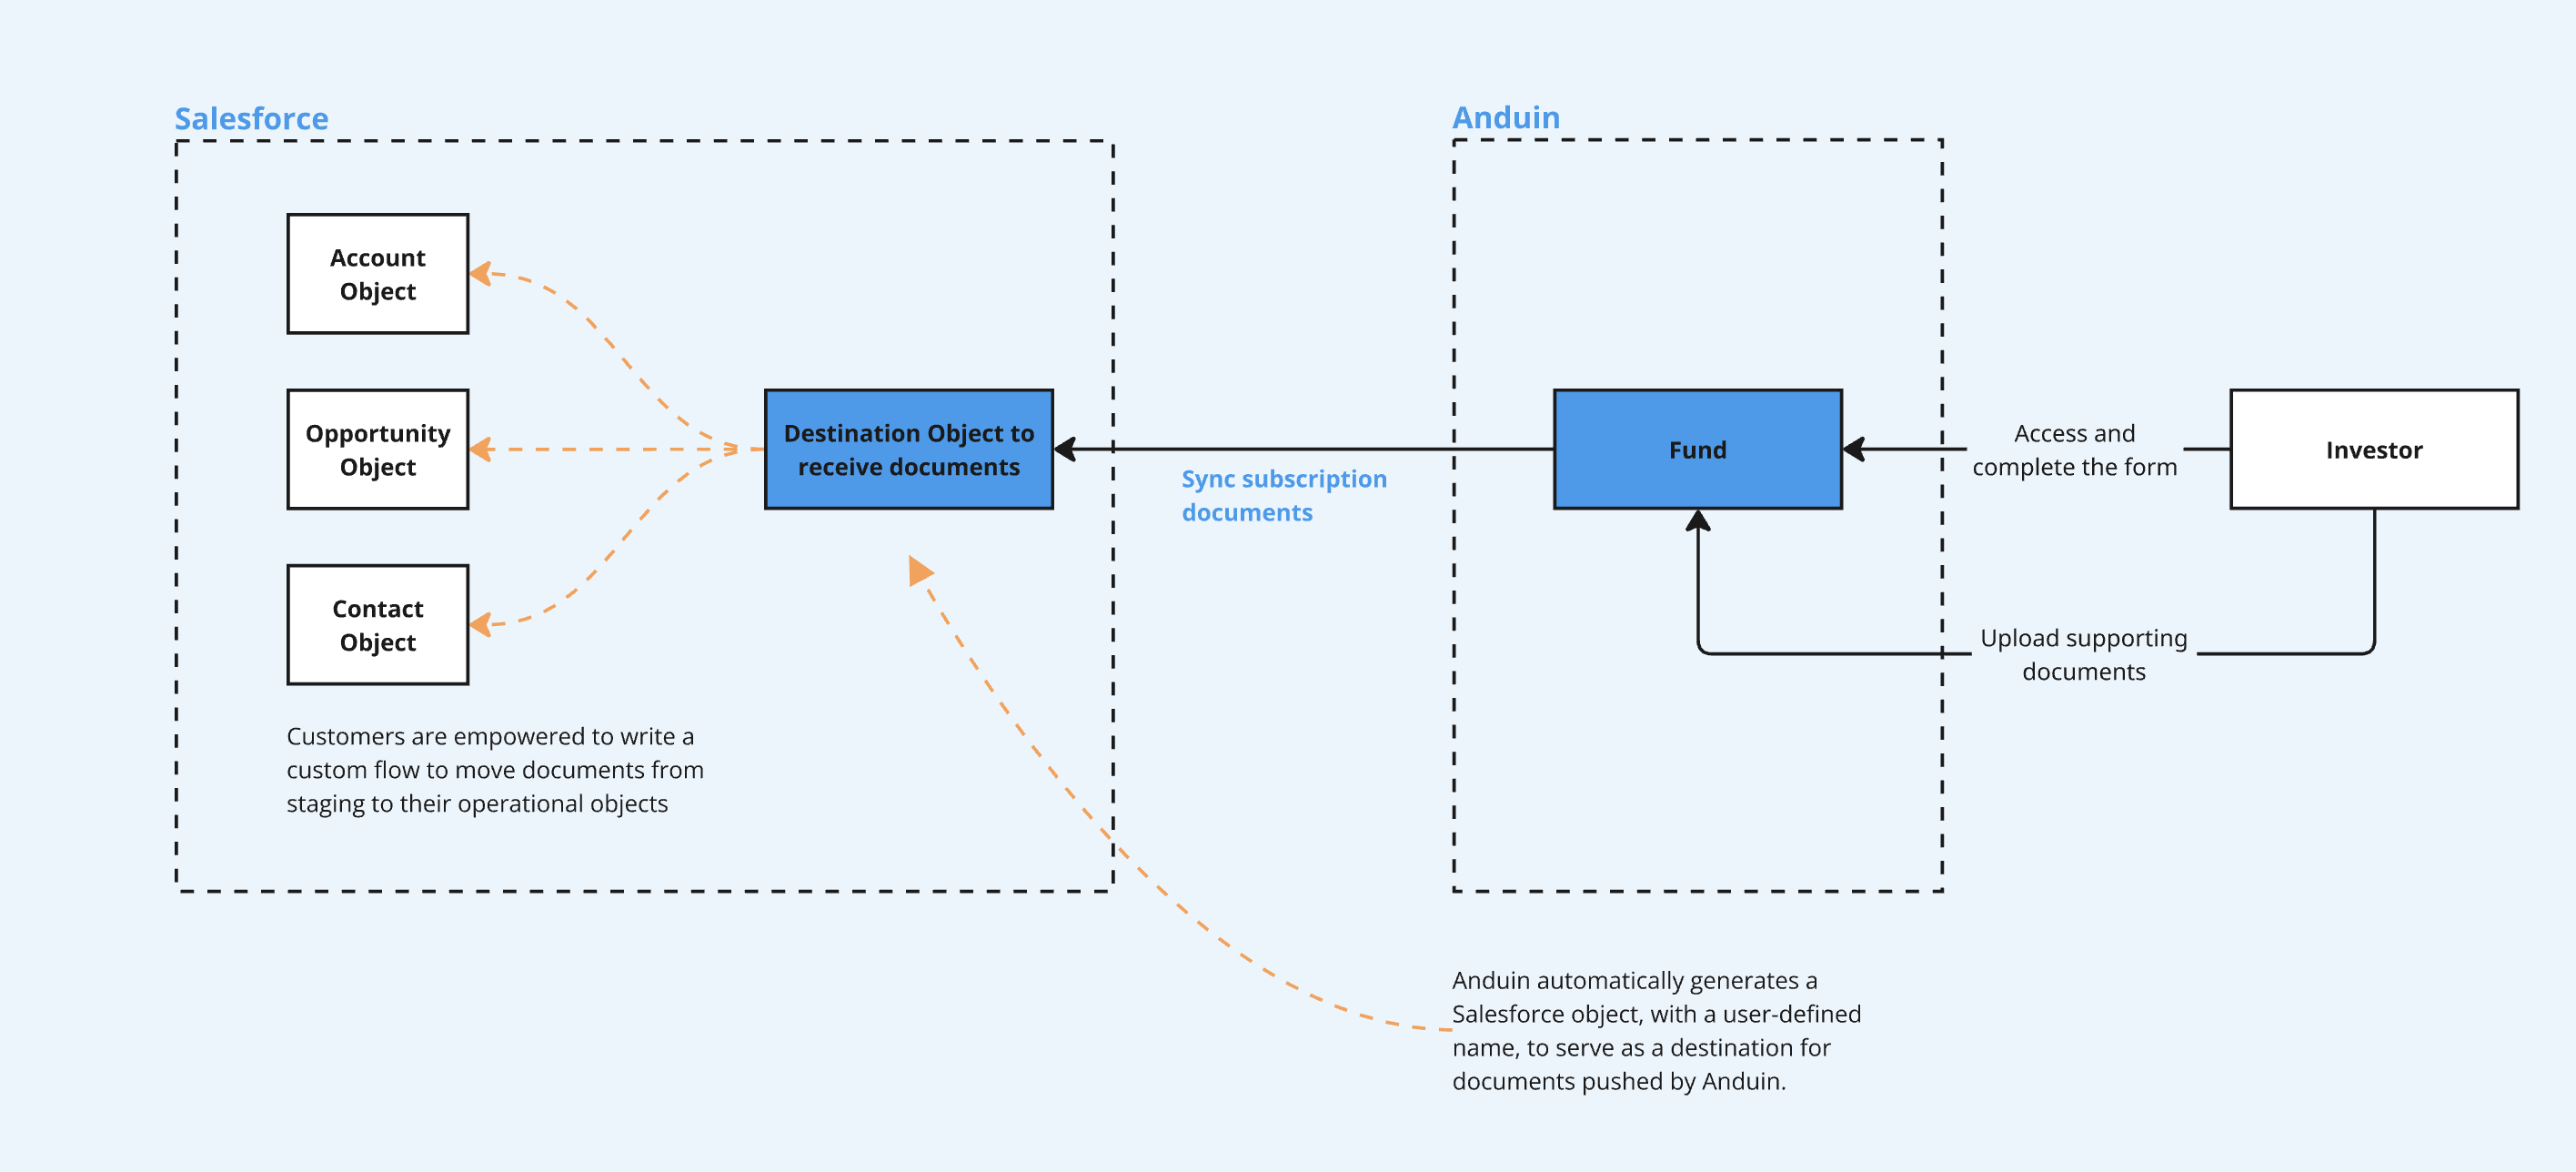
Automatically sync finalized subscription and supporting documents from FundSub to the customer’s Salesforce CRM, eliminating manual uploads and ensuring Salesforce holds all critical investor documentation.
2. Key Benefits & Features
- Makes Salesforce the central, trusted repository for all investor documents
- Eliminates repetitive admin work and reduces the risk of misplaced or outdated files
- Supports syncing both subscription forms (PDFs) and investor-uploaded documents
3. Target Personas
- Suitable for any FundSub customer using Salesforce as their CRM
- Especially beneficial for firms that rely on Salesforce to manage document workflows across teams
4. Prerequisites
4.1 Third party app requirements
- Connected app
- Understand the concept: Defines how external applications (like Anduin) connect to Salesforce, using OAuth. Includes client ID/secret, scopes, callback URLs, etc.
- Credentials: Customers must create a Connected App and provide the necessary credentials during setup.
- Permissions: Ensure the Connected App has the right scopes to allow the integration to access and send data.
- Session Limits: Salesforce allows only 5 active sessions per Connected App. If the limit is reached, the customer must create a new Connected App.
- Object management: Customers should be aware that the integration will create a new Salesforce object to store Anduin documents.
4.2 Anduin app requirements
- Fund access - the user must either:
- Have admin access to the intended funds, or
- Know a team member with admin access who can grant the necessary permissions during setup
5. Pre-Setup Checklist
| Task | Owner | Note | Anduin guide |
|---|---|---|---|
| Connected App - Understand the concept | Customer | ||
| Connected App - Create and retrieve credentials | Customer | Guided by Anduin to ensure correct inputs | LINK |
| Connected App - Permissioning | Customer | Consulted by Anduin | LINK |
| Connected App - Aware of limitation | Customer | Consulted by Anduin | Salesforce enforces a limit of 5 active sessions per Connected App |
| Salesforce object management | Customer | Consulted by Anduin | Customers should be aware that the integration will create a new Salesforce object to store Anduin documents. |
| Fund access | Customer | Consulted by Anduin |
6. Step-By-Step Setup Guide
6.1 Grant access to the Integration Hub
- Customers should contact their Implementation Manager to ensure they have access to the Hub and the correct integration flow.
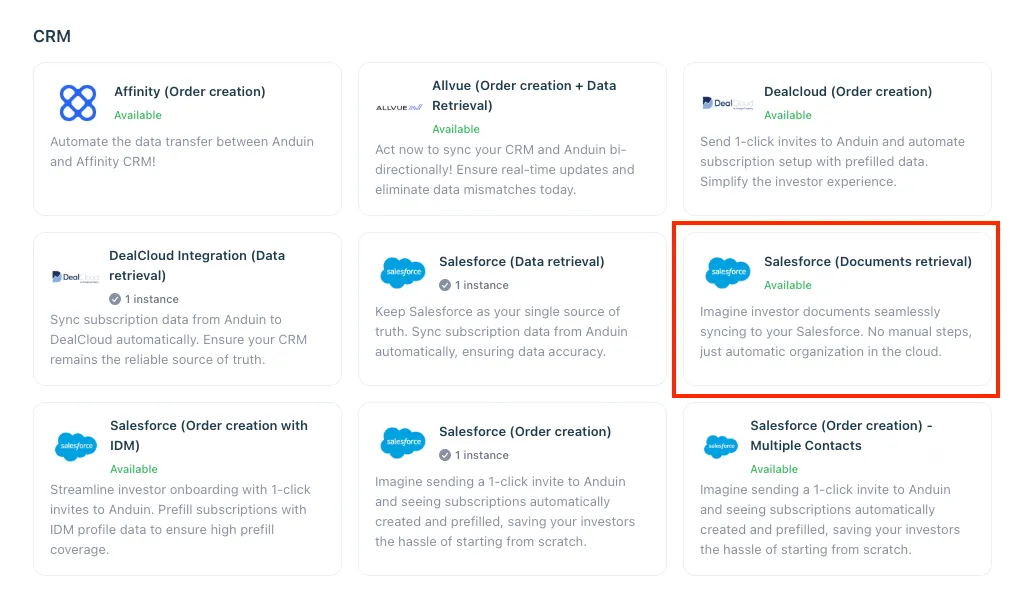
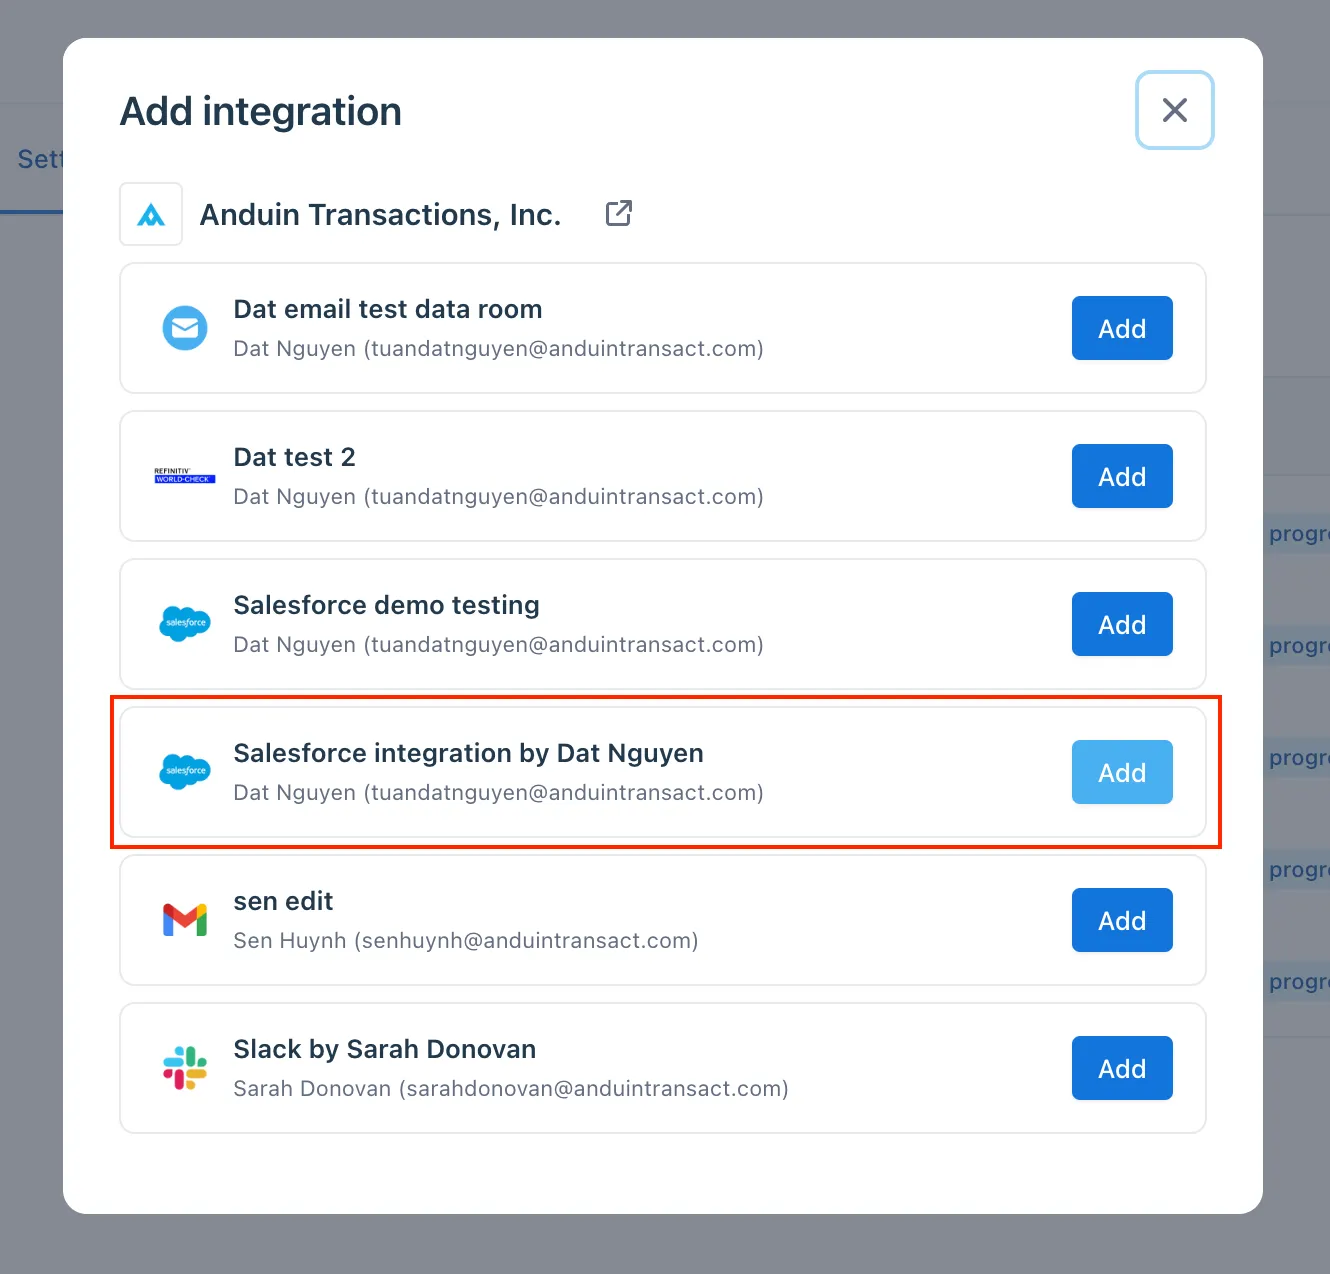
6.2 Locate the solution
- In the Browse tab of the Integration Hub, the customer can locate the Salesforce (Document Retrieval) solution
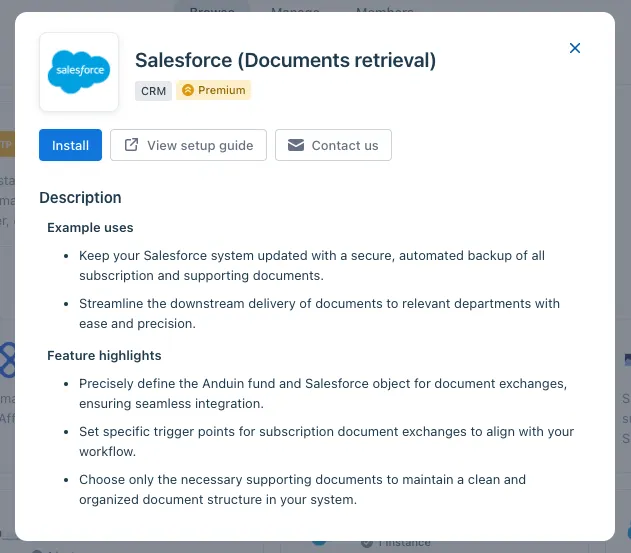
6.3 Install the solution
- Step 1: Click Install to begin setup
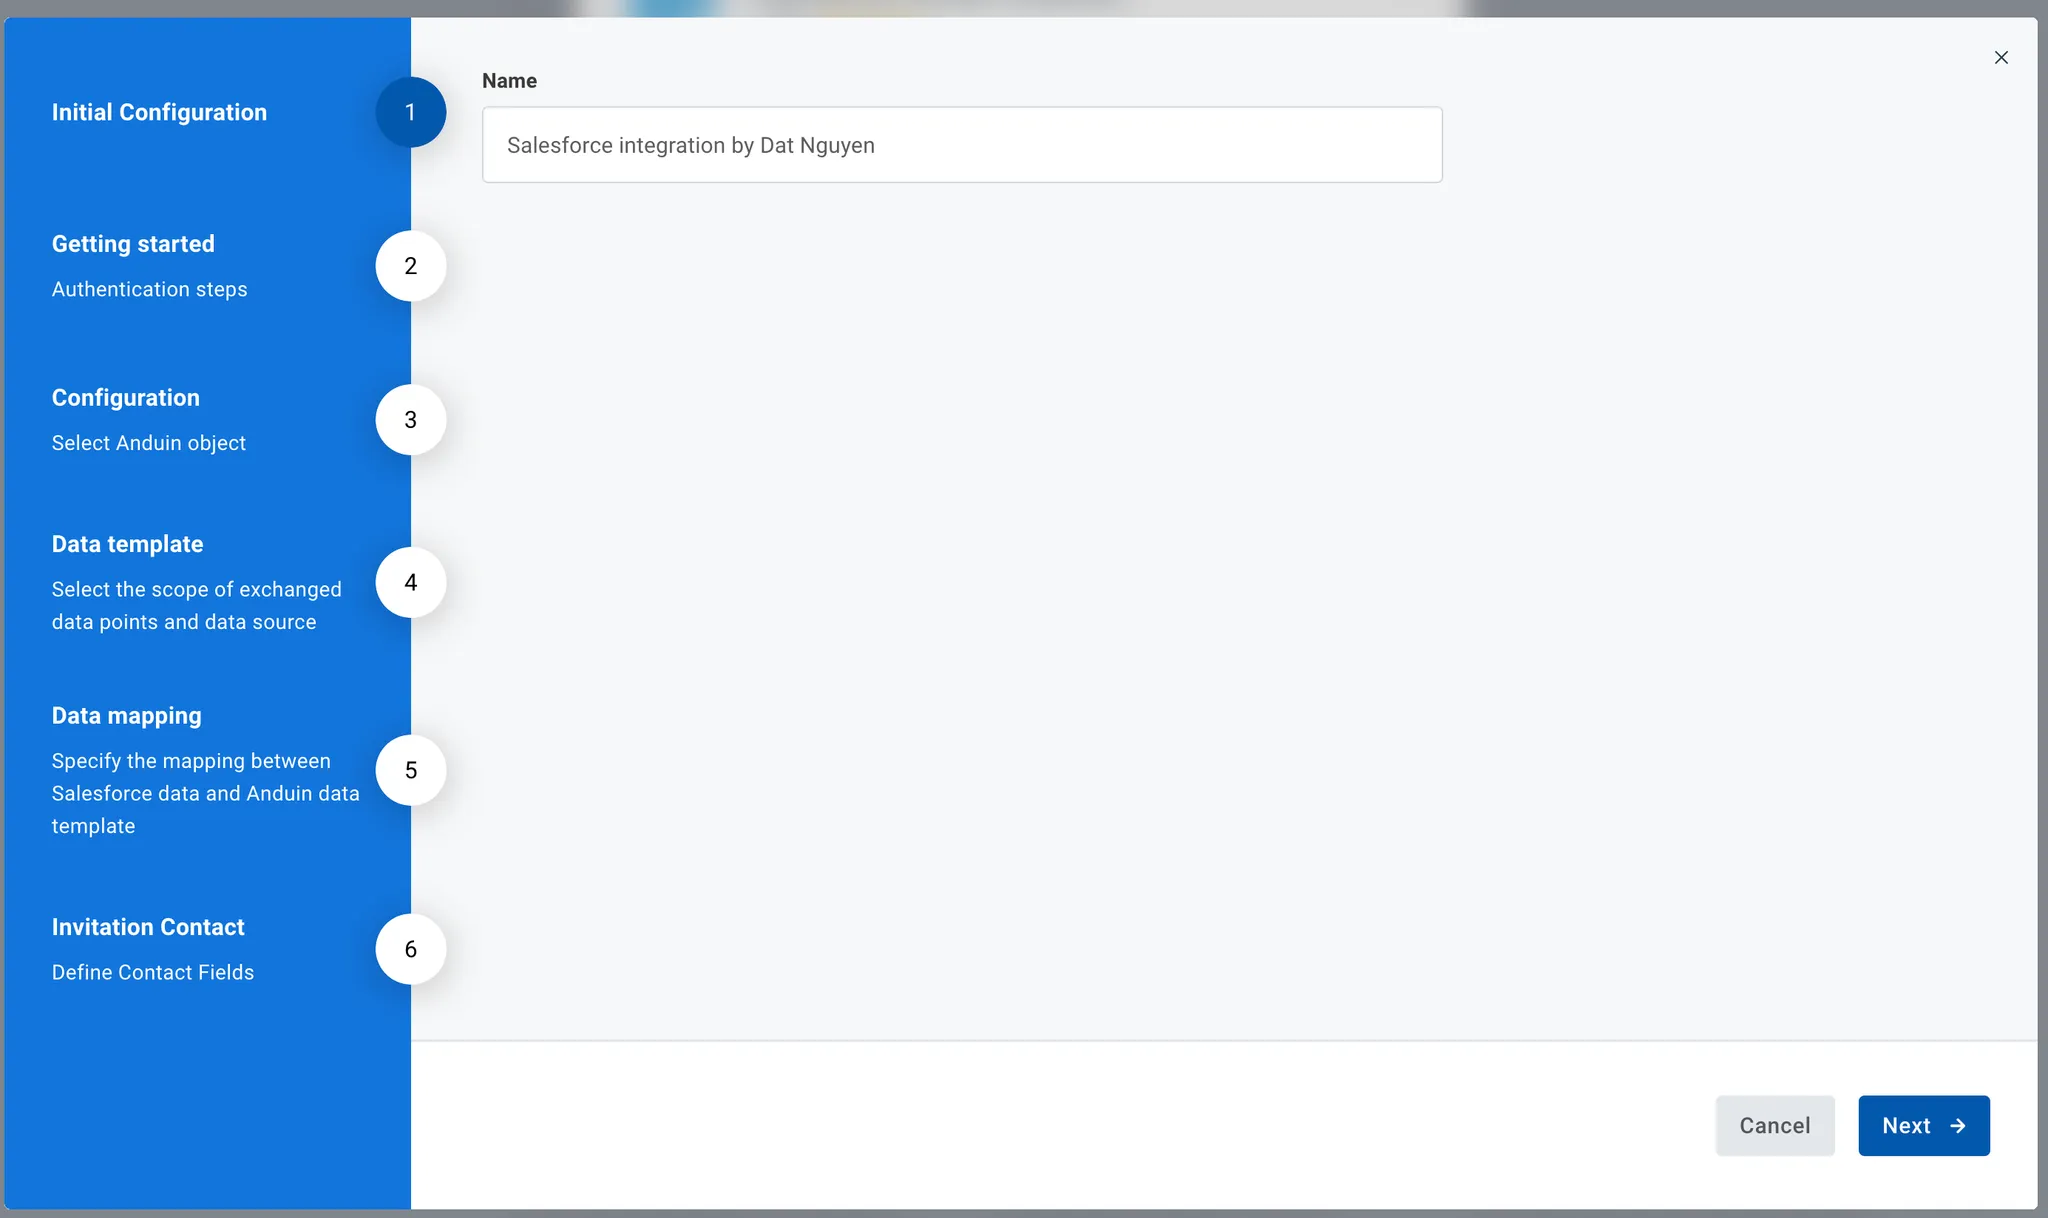
-
Step 2: Name the Integration
- Recommend a clear and descriptive name (e.g., “Salesforce integration - Fund Alpha” or “By John Smith”)
- Click Next: Link to Anduin objects
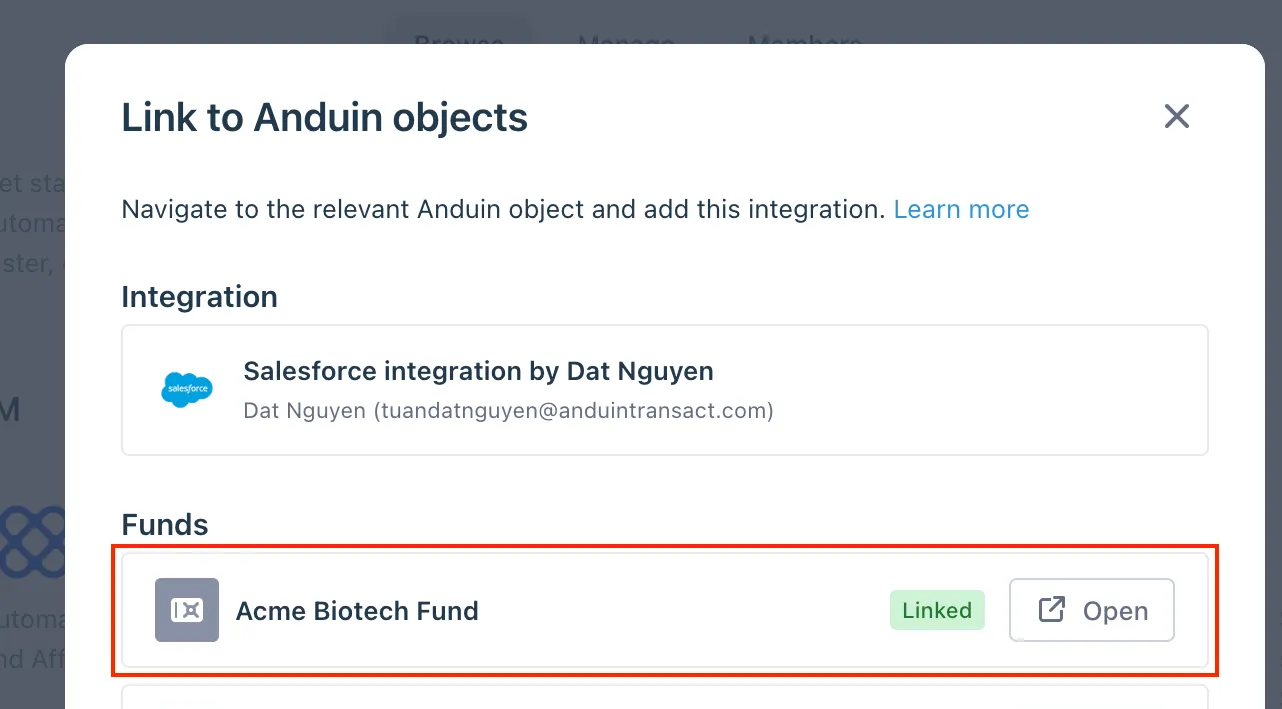
-
Step 3: Grant integration permission to customer’s intended objects (funds)
- Step 3.1: A list of accessible Anduin objects (e.g., Funds) will appear
- Step 3.2: Click Open next to the relevant fund
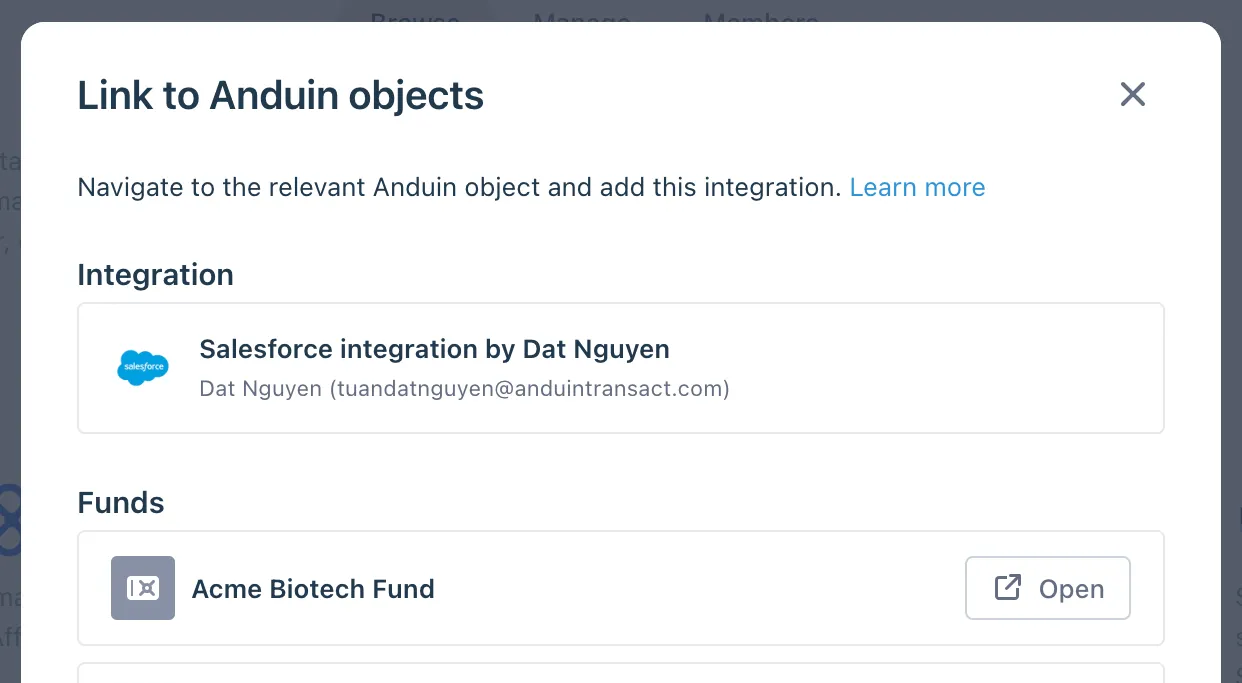
- Step 3.3: In the permission module, find the integration name and click Add
- Step 3.4: Return to the Integration Hub - the fund should now show a “Linked” tag
If the target fund is not listed, there are 2 options
- Customer needs to be added with admin role for that fund, then return to the step 3.2. Customer should be able to see the target fund there
- Customer requests their team member who has admin role in that fund to perform step 3.3 using Settings > Integrations in the FundSub app and they can continue with step 3.4
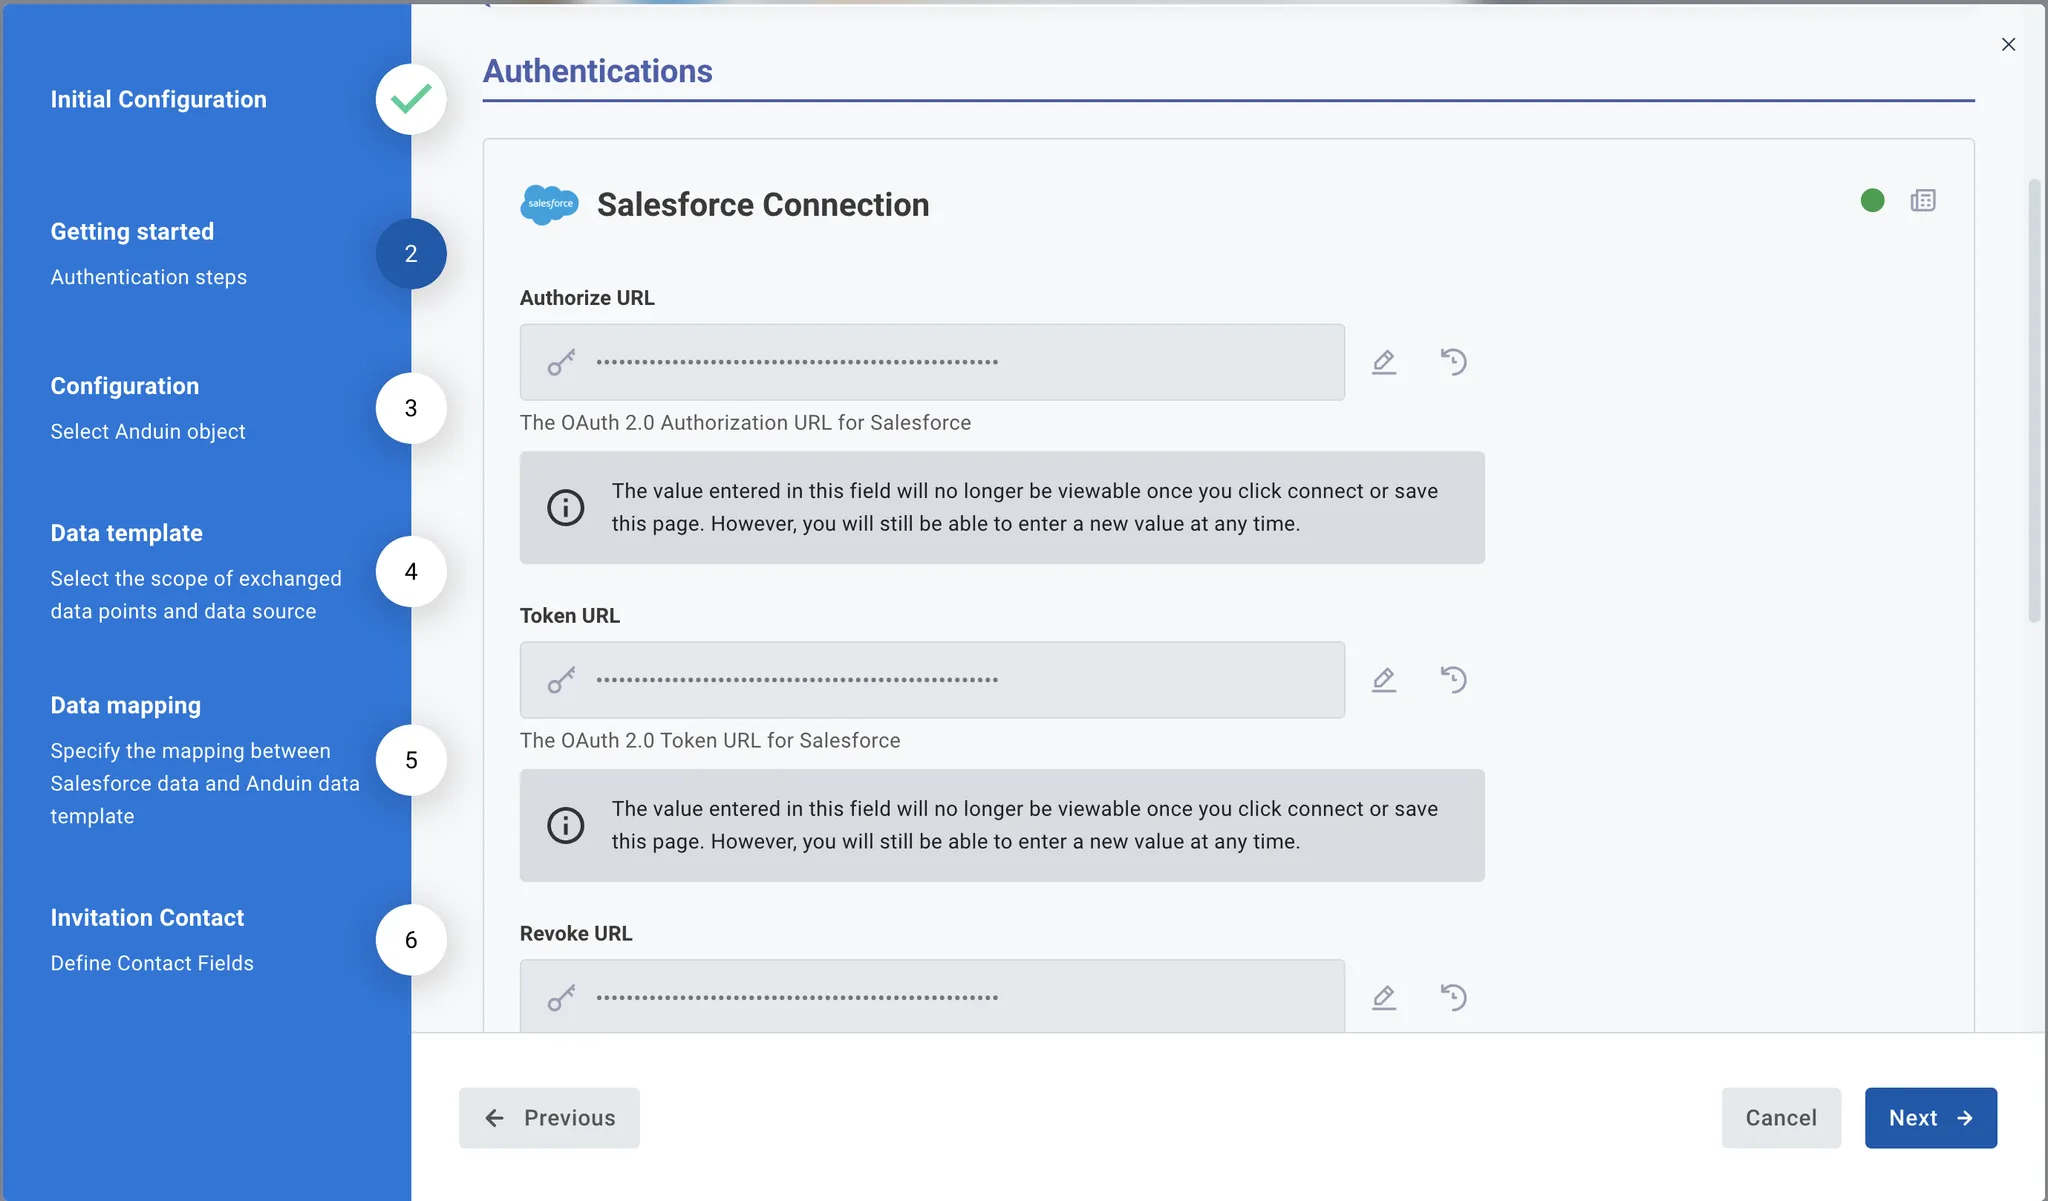
6.4 Configure the solution
- The customer may rename the integration or proceed as-is
- Enter Connected App credentials
- Select the Anduin fund and Salesforce object this integration should work with
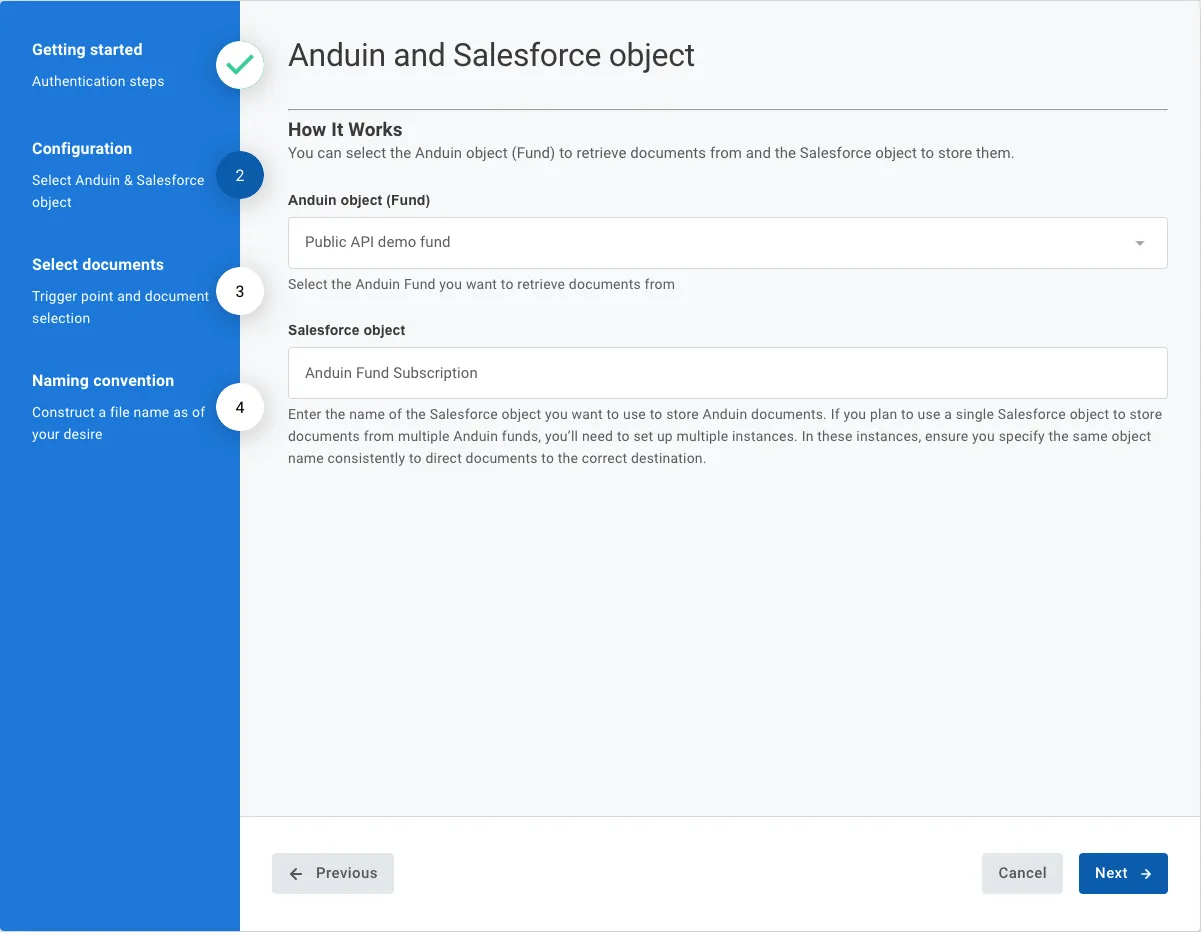
-
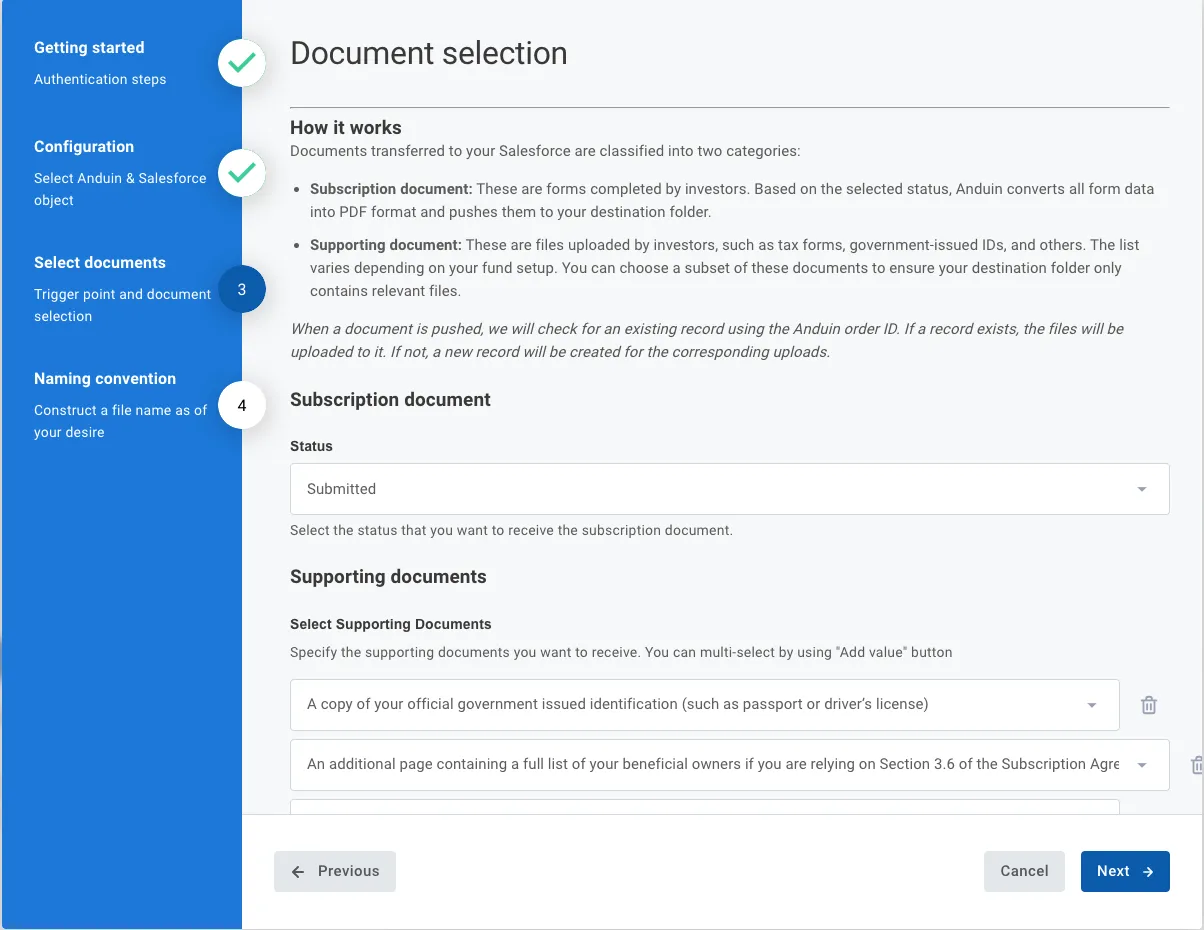
Configure document selection
- Subscription document: These are forms completed by investors. Based on the selected status, Anduin converts all form data into PDF format and pushes them to your destination folder.
- Supporting document: These are files uploaded by investors, such as tax forms, government-issued IDs, and others. The list varies depending on your fund setup. You can choose a subset of these documents to ensure your destination folder only contains relevant files.
When a document is pushed, we will check for an existing record using the Anduin order ID. If a record exists, the files will be uploaded to it. If not, a new record will be created for the corresponding uploads.
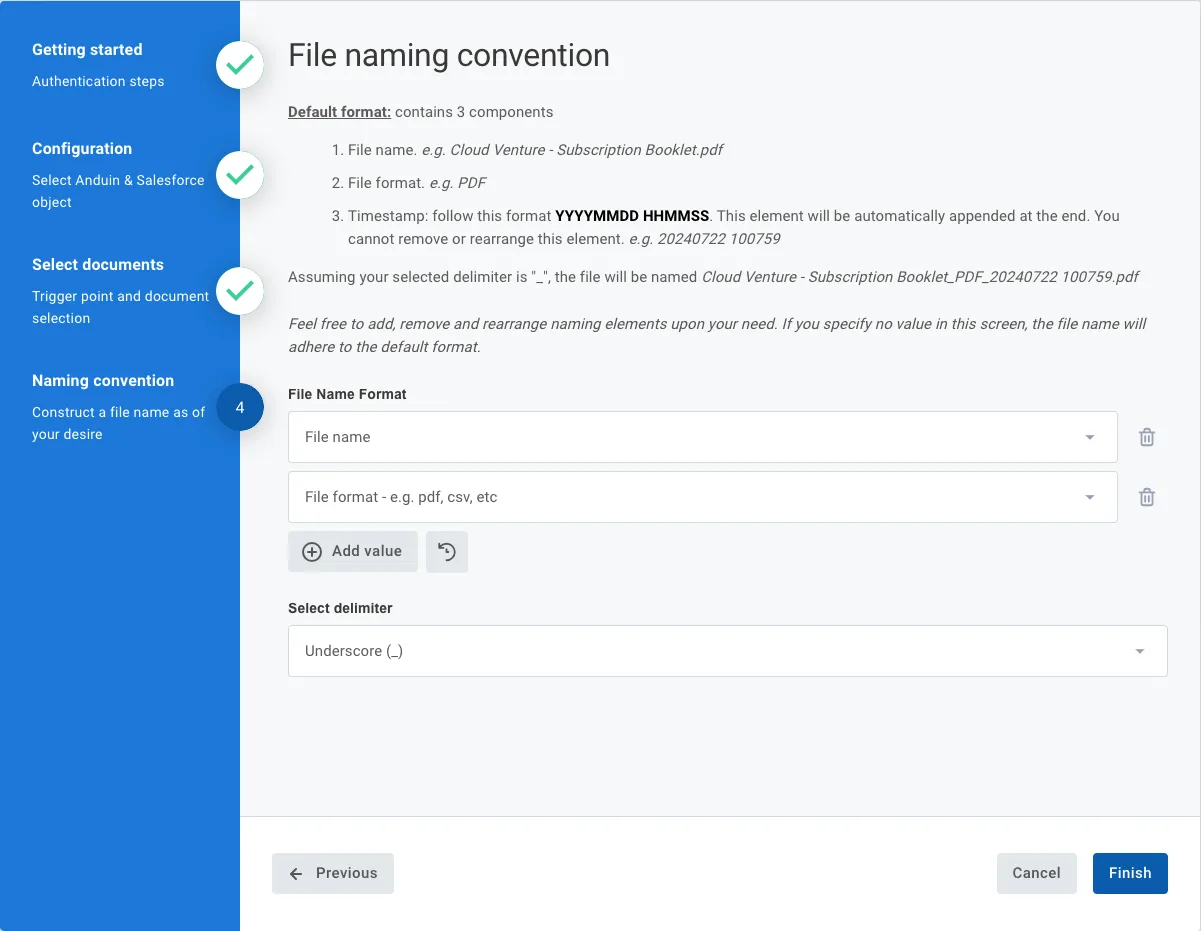
- Customers define the naming convention
6.5 Validate the solution
Once configuration is complete:
- The customer can see the integration creates a new Salesforce object (unless the provided name in the last configuration step already exists)
- The customer can then move any subscription in the target fund to the triggering status or upload a supporting document to any subscriptions
- This will initiate the integration, resulting in
- A new record is created in the target Salesforce object
- All documents (main subdoc and supporting docs are pushed to that record)
If the automation works end-to-end, the setup is successfully validated.
Updated 7 months ago
Did this page help you?