Investor onboarding (Primary Investor + Collaborators)
To support scalability, we plan to introduce multi-fund integration, allowing a single instance to connect to multiple funds. Once available, this change will impact parts of this guide.
1. Purpose
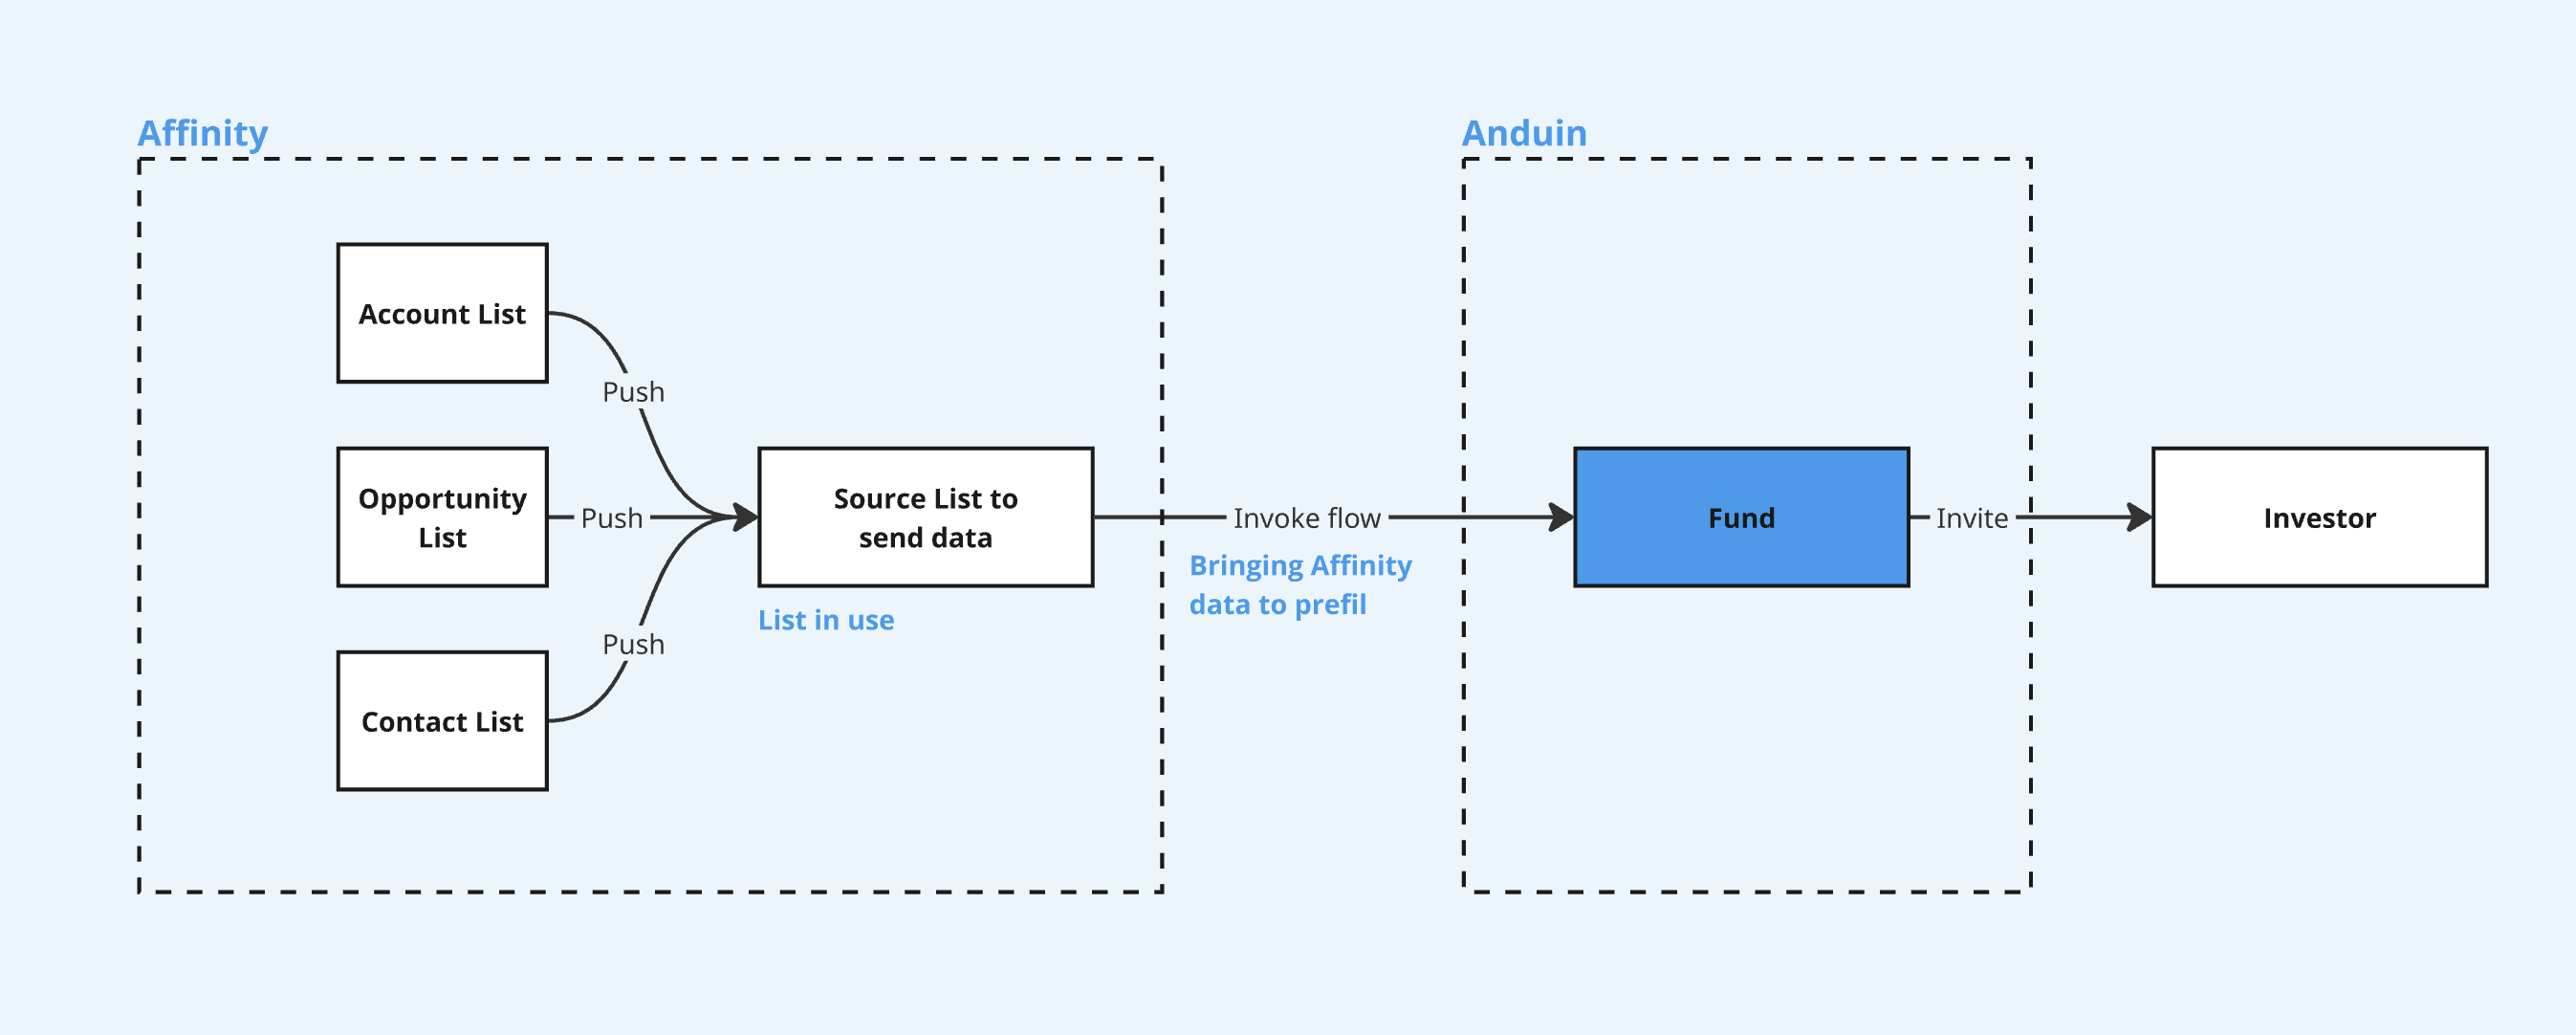
Enable seamless onboarding by inviting investors to FundSub, with subscription forms partially prefilled using data from Affinity - eliminating the need for investors to start from scratch.
2. Key Benefits & Features
- Eliminate manual onboarding to FundSub
- Ensure a seamless investor experience through automatic Affinity → FundSub data transfer
3. Target Persona
- Valuable for any FundSub customer using Affinity as their CRM
- Especially helpful for firms aiming to prefill large portions of investor subscription forms via Affinity
4. Prerequisites
4.1 Third party app requirements
- API key: Customer must retrieve Affinity credentials
- List preparation: Customer must create a consolidated Affinity list containing all relevant data for prefilling in Anduin
4.2 Anduin app requirements
- Fund access - the user must either:
- Have admin access to the intended funds, or
- Know a team member with admin access who can grant the necessary permissions during setup
- Data transfer
- Data & mapping: Identify what Affinity data will be used and how it maps to FundSub fields
- Clarify if it’s 1-to-1 mapping or requires transformation logic
- Import templates: depending on the exchanged data points and how it is mapped, the corresponding import templates will be recommended
- Anduin Standard Alias (ASA)
- Custom Templates
- Data & mapping: Identify what Affinity data will be used and how it maps to FundSub fields
5. Pre-Setup Checklist
| Task | Owner | Note | Anduin guide |
|---|---|---|---|
| Affinity API key | Customer | Consulted by Anduin | LINK |
| Affinity list preparation | Customer | Consulted by Anduin | Customer must create a consolidated Affinity list containing all relevant data for Anduin |
| Fund access | Customer | Consulted by Anduin | |
| Data & mapping | Anduin | ||
| Import template | Anduin |
6. Step-By-Step Setup Guide
6.1 Grant access to the Integration Hub
- Customers need to contact their Implementation manager to ensure they have access to the Integration Hub and this specific integration
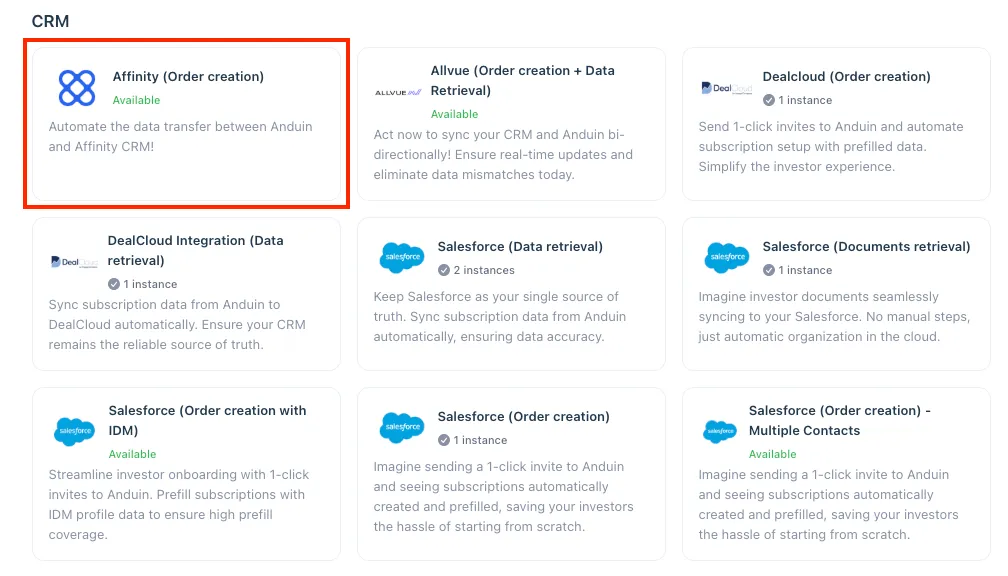
6.2 Locate the solution
- In the Browse tab of the Integration Hub, the customer can locate the Affinity (Order creation) solution
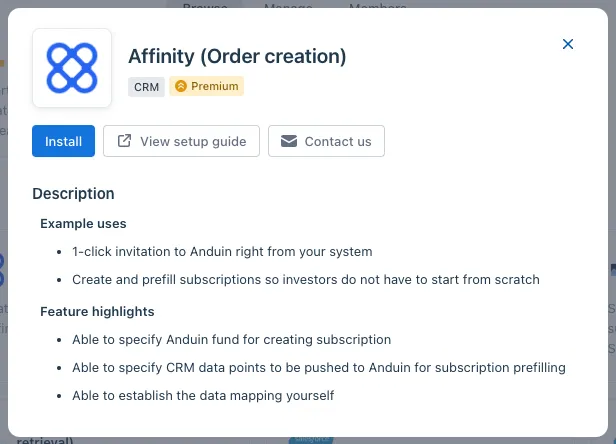
6.3 Install the solution
- Step 1: Click Install to begin setup
-
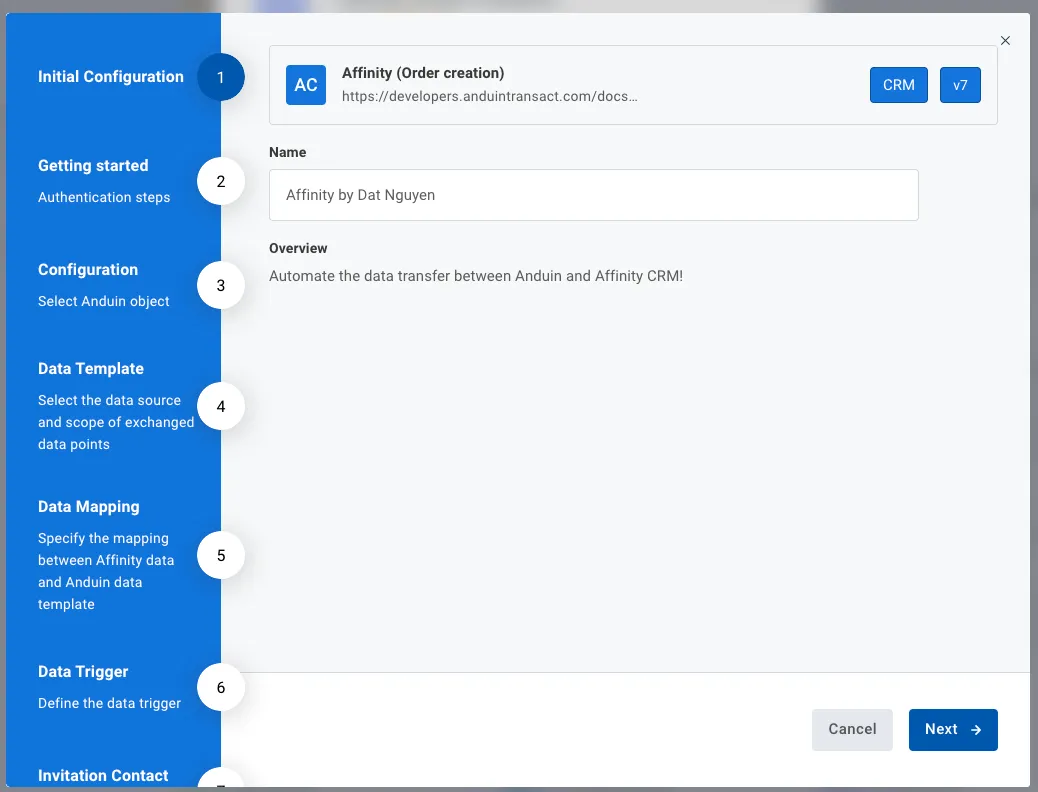
Step 2: Name the Integration
- Recommend a clear and descriptive name (e.g., “Affinity integration - Fund Alpha” or “By John Smith”)
- Click Next: Link to Anduin objects
-
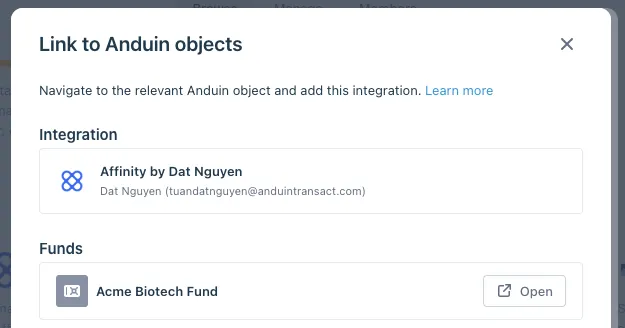
Step 3: Grant integration permission to customer’s intended objects (funds)
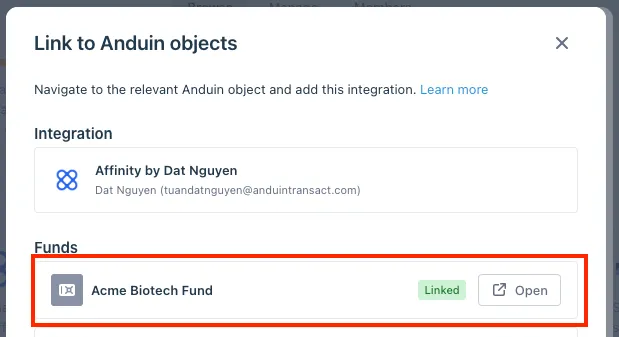
- Step 3.1: A list of accessible Anduin objects (e.g., Funds) will appear
- Step 3.2: Click Open next to the relevant fund
- Step 3.3: In the permission module, find the integration name and click Add

- Step 3.4: Return to the Integration Hub - the fund should now show a “Linked” tag
If the target fund is not listed, there are 2 options
- Customer needs to be added with admin role for that fund, then return to the step 3.2. Customer should be able to see the target fund there
- Customer requests their team member who has admin role in that fund to perform step 3.3 using Settings > Integrations in the FundSub app and they can continue with step 3.4
6.4 Configure the solution
- The customer may rename the integration or proceed as-is
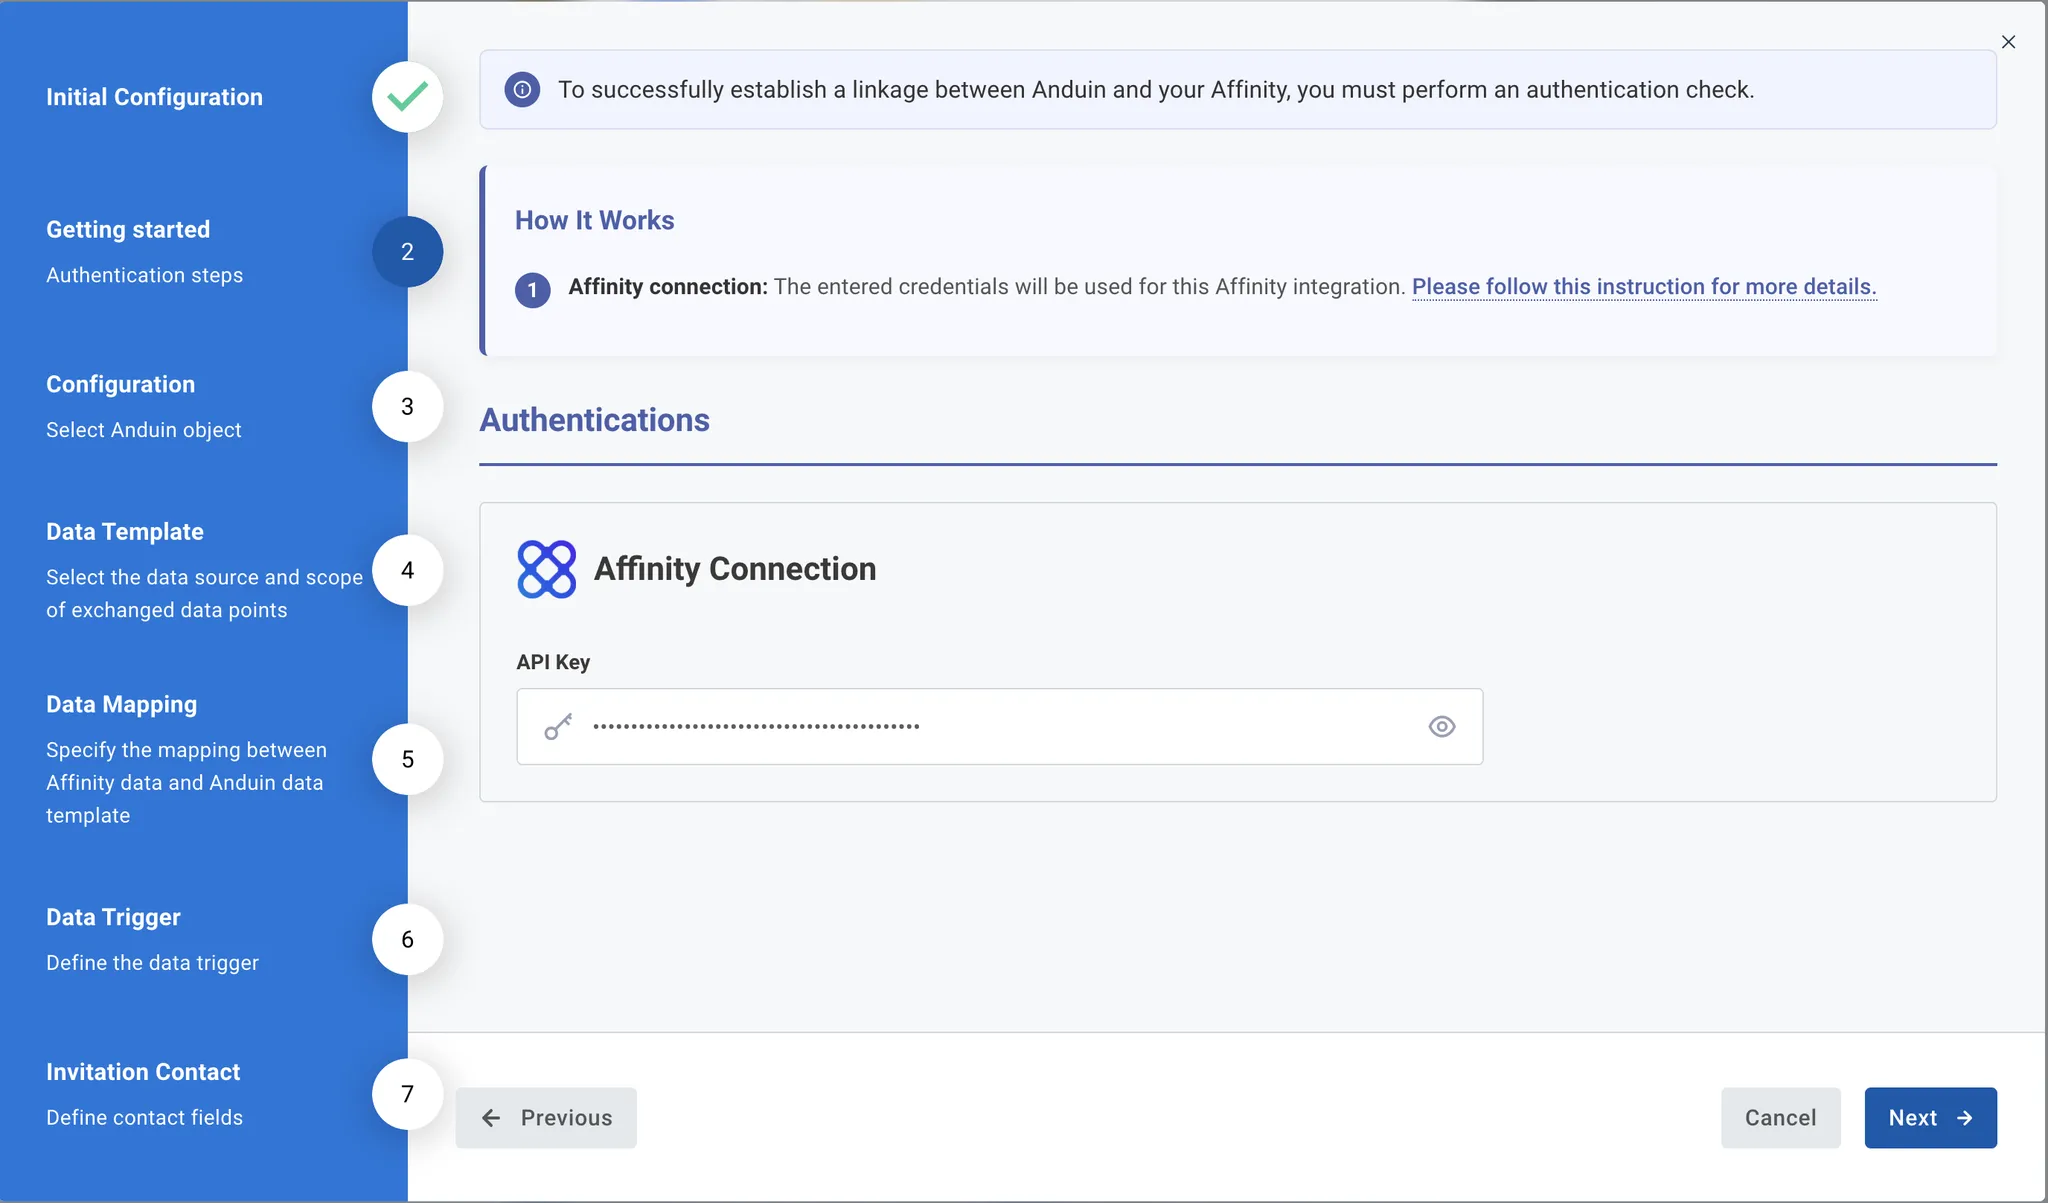
- Enter Affinity credentials
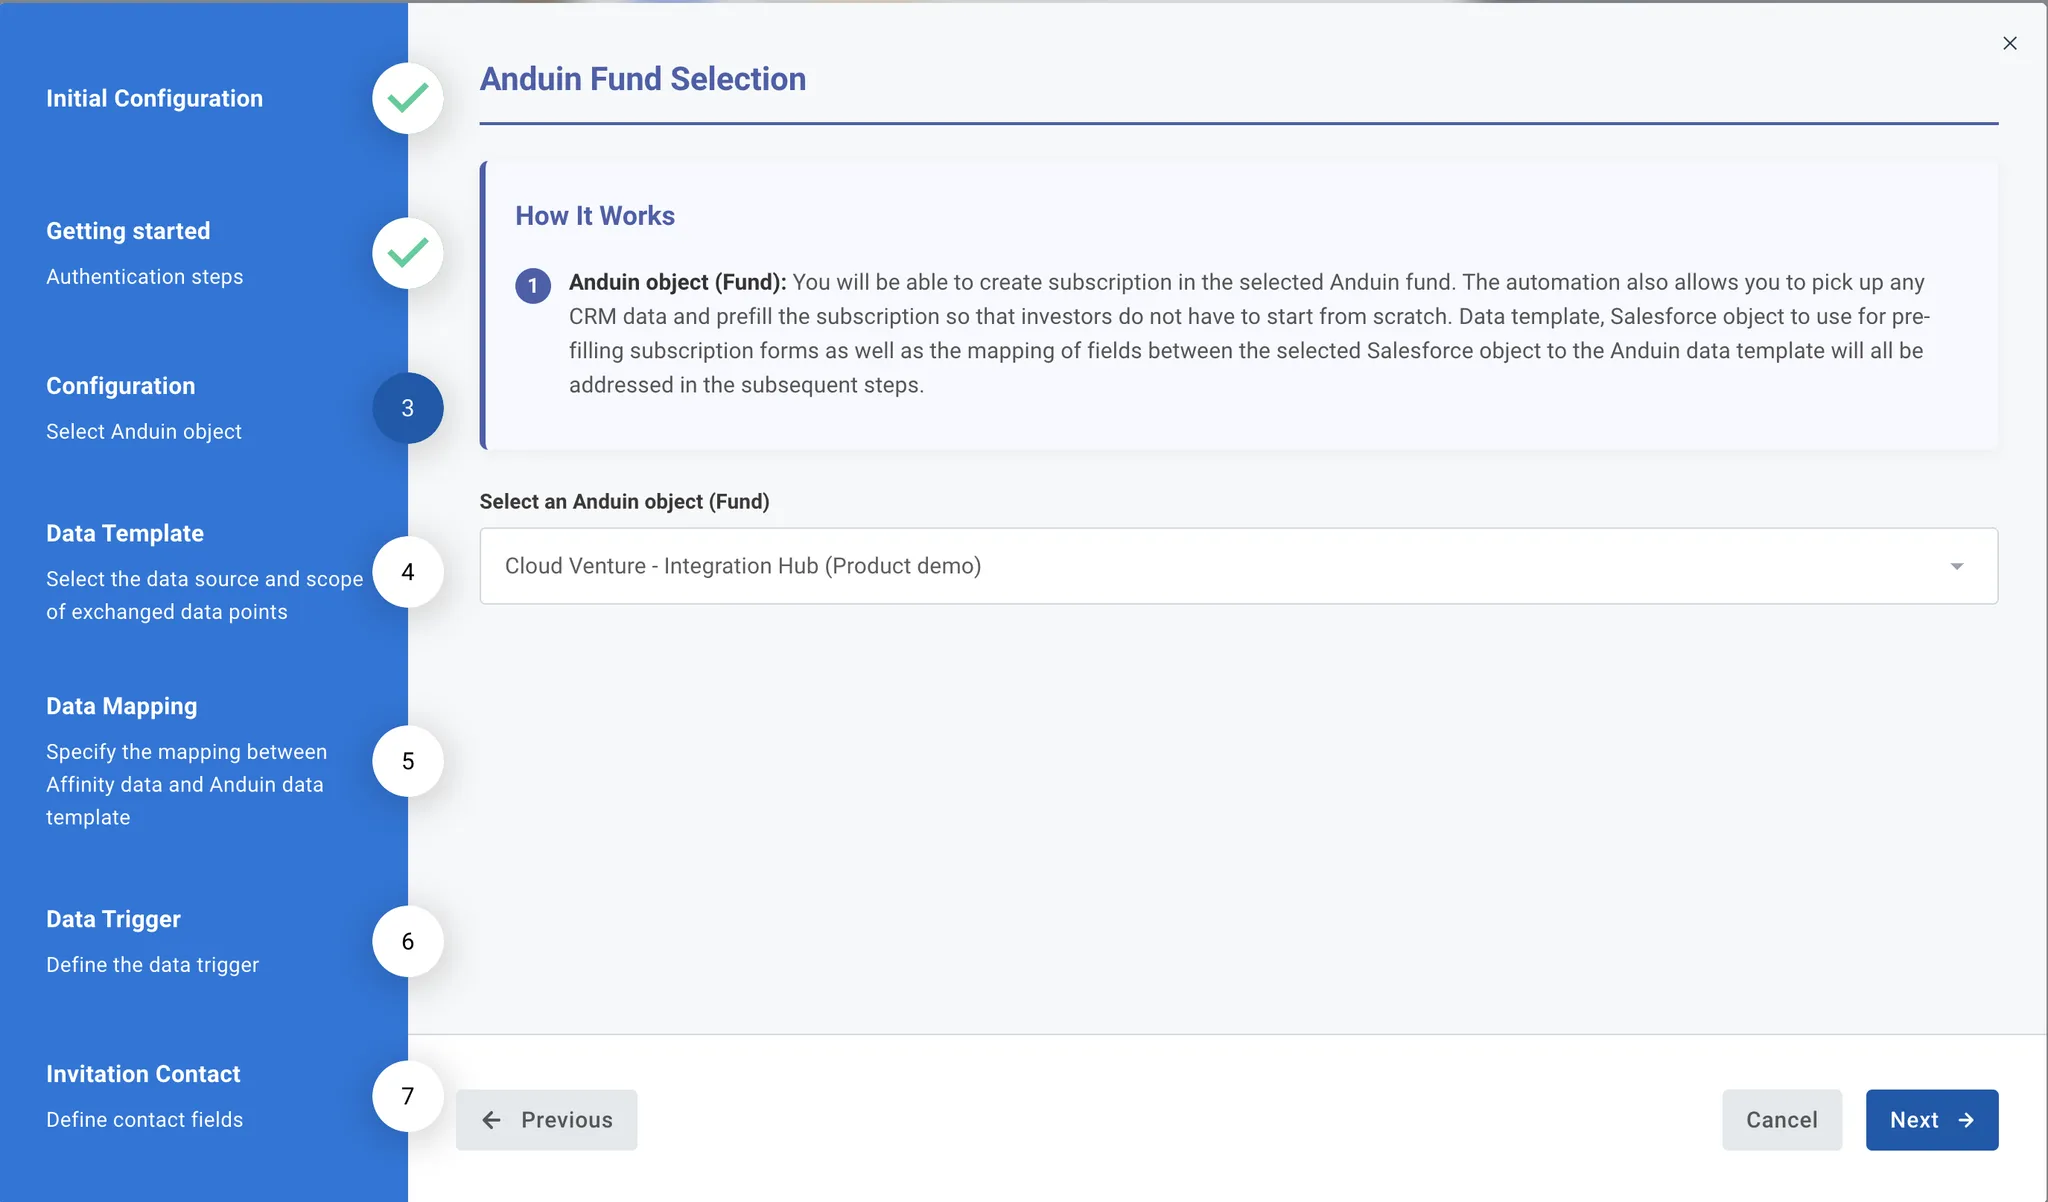
- Select the Anduin fund this integration should work with
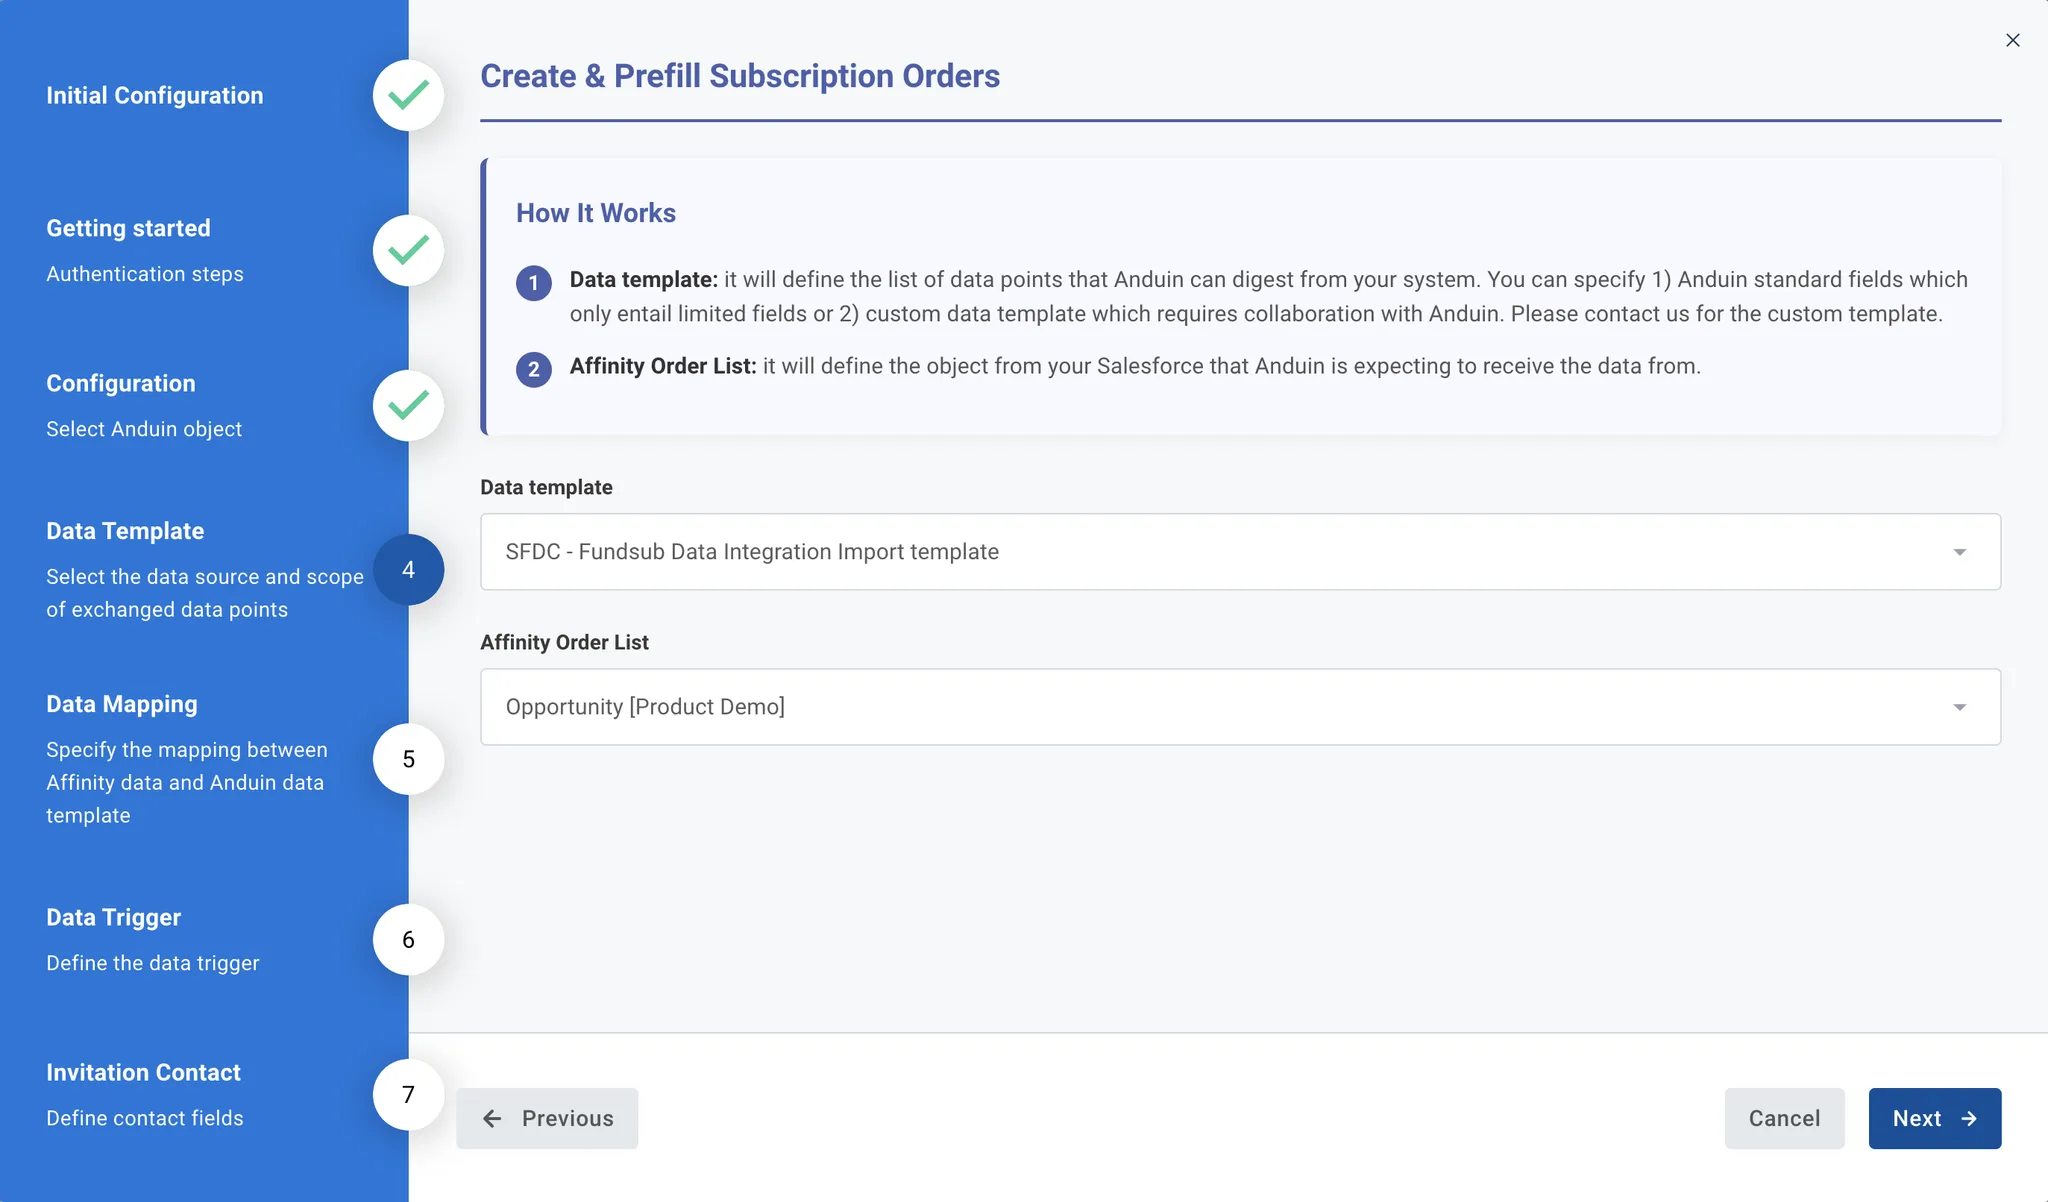
- The customer can specify the data template which will define the prefilled data points. There are 2 types of template
- Anduin standard fields - contain only limited data points
- Custom template - contain as many data points as they desire with complex computation as needed.
- They also need to tell us the Affinity list which is used to push data to Anduin for order creation and data prefill
-
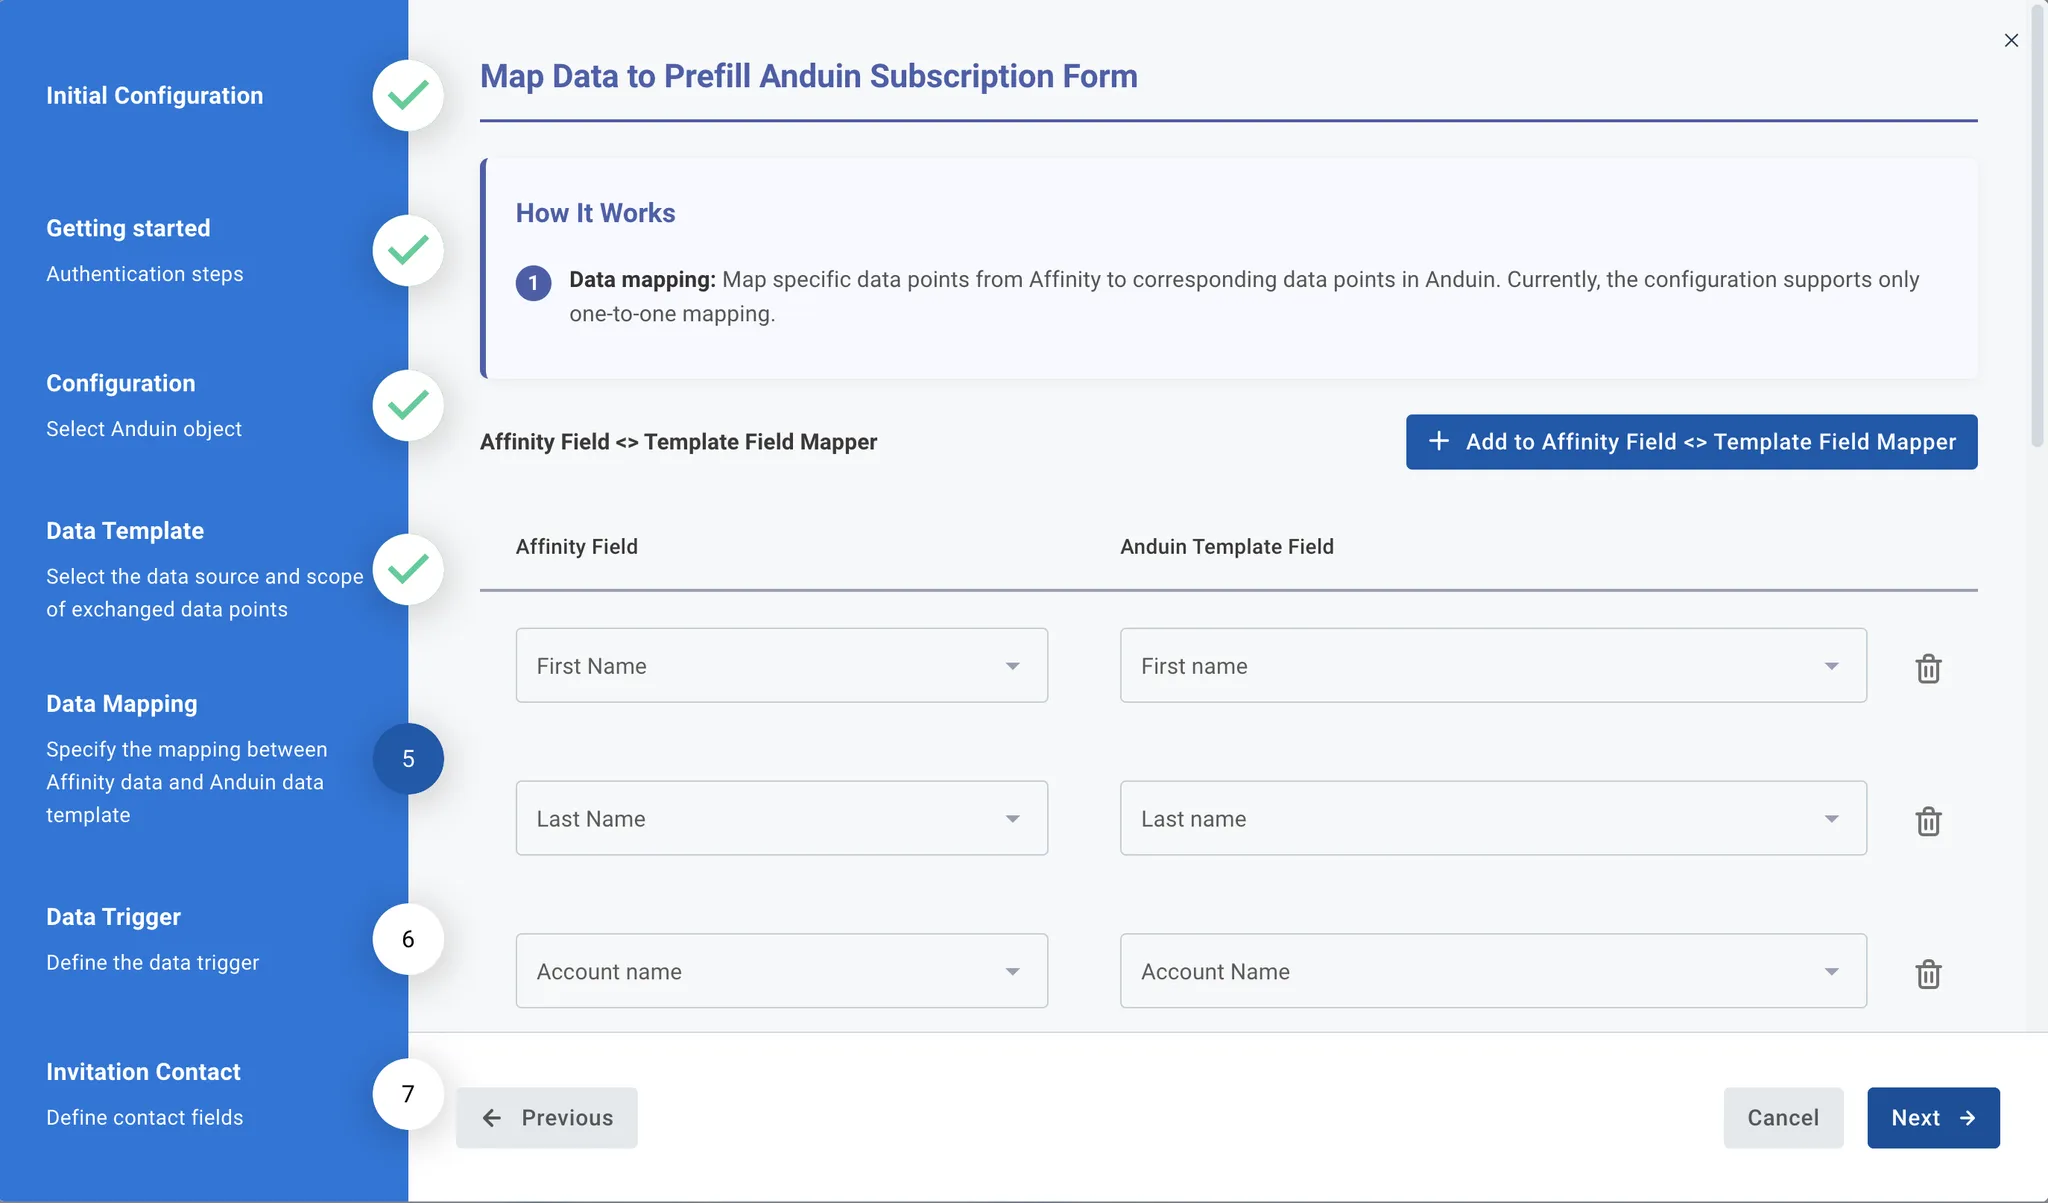
This step configures which Affinity fields map to which FundSub template fields
- Left column (Affinity field) - data points listed in the Affinity list they specified before
- Right column (Anduin template field) - data points listed in the Anduin template they specified before
-
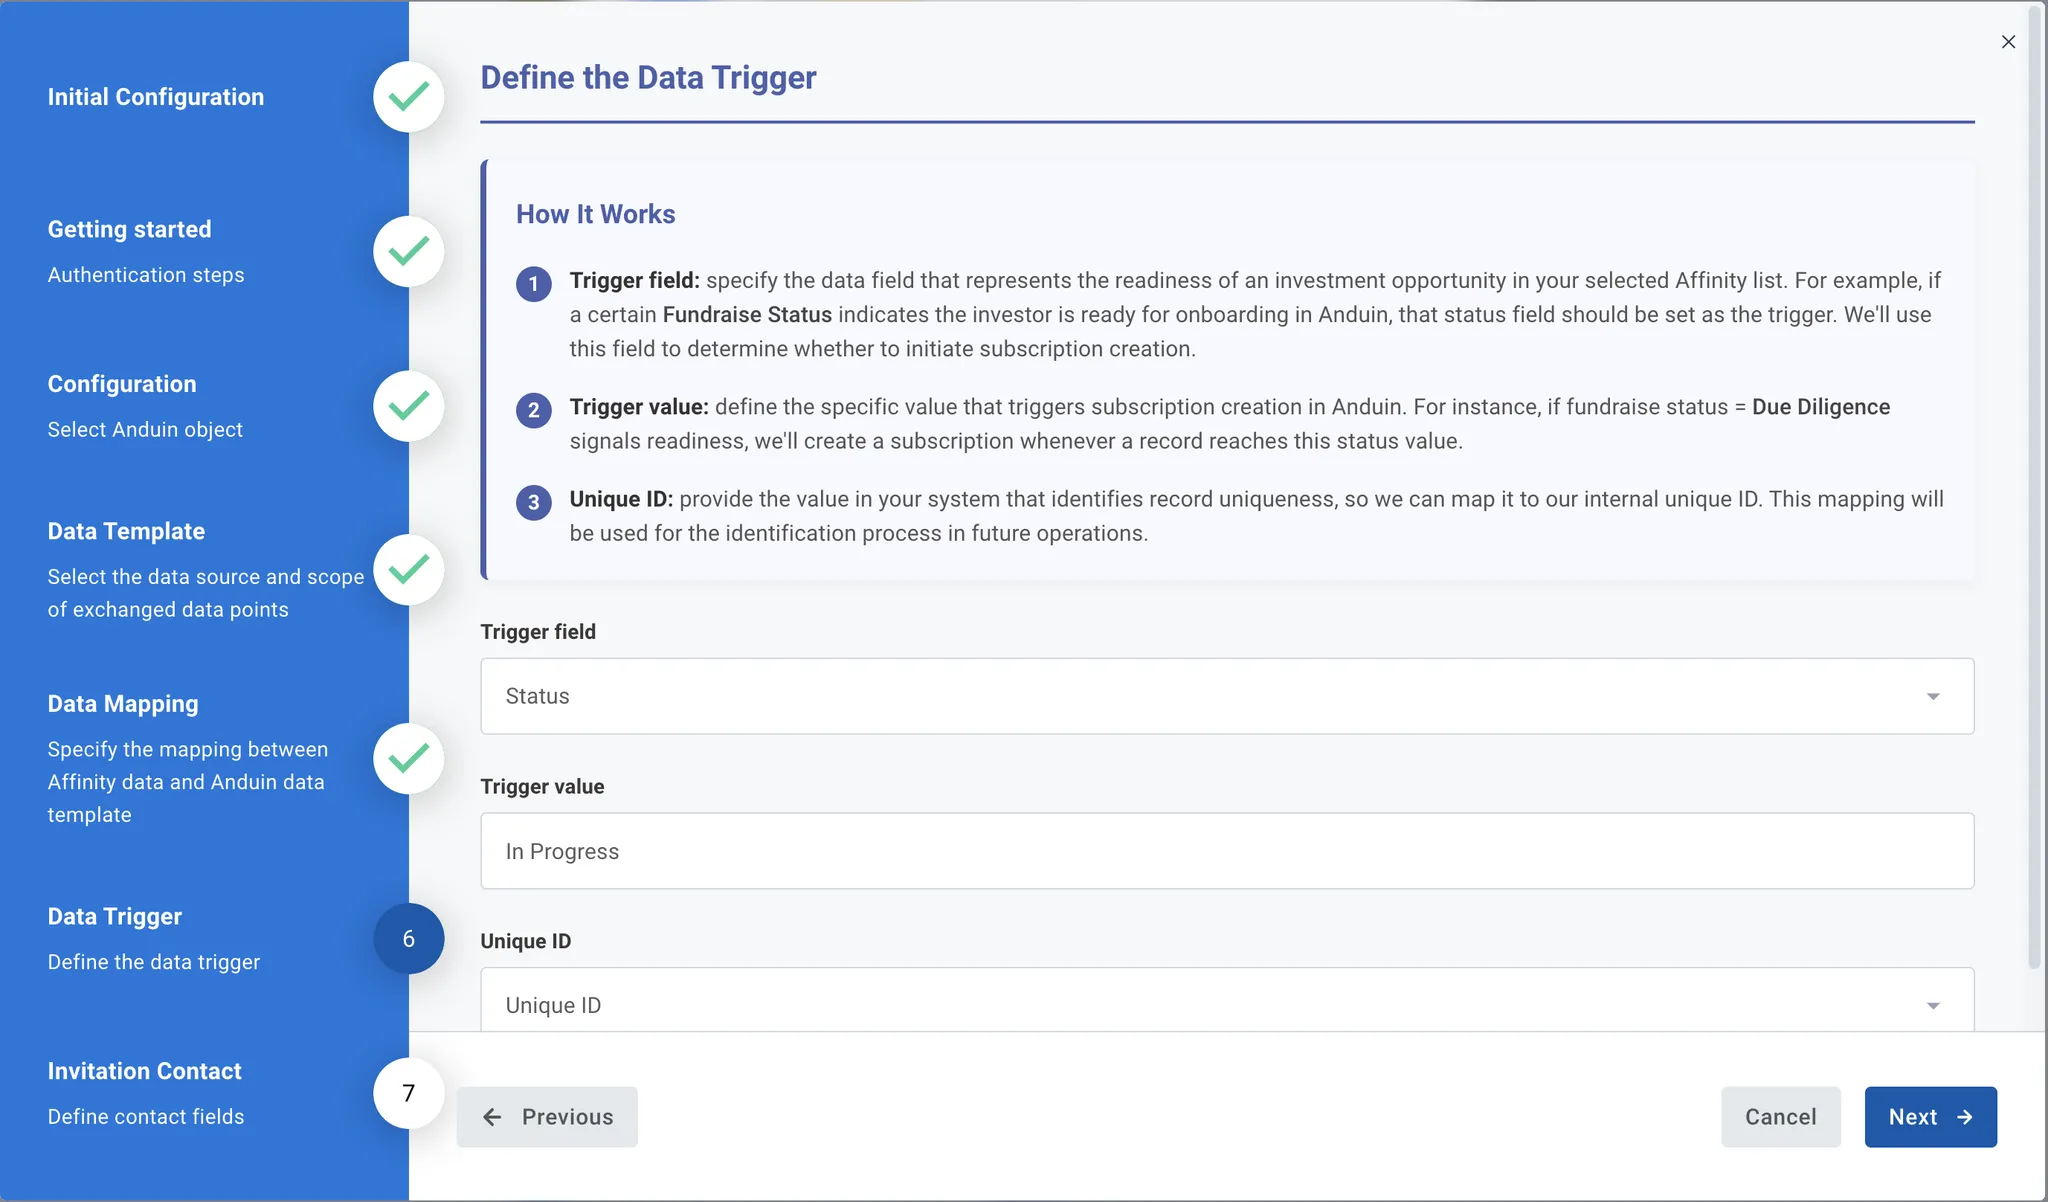
Triggering and Unique Identifier configuration
- Trigger field: specify the data field that represents the readiness of an investment opportunity in their selected Affinity list. For example, if a certain Fundraise Status indicates the investor is ready for onboarding in Anduin, that status field should be set as the trigger. We’ll use this field to determine whether to initiate subscription creation.
- Trigger value: define the specific value that triggers subscription creation in Anduin. For instance, if fundraise status = Due Diligence signals readiness, we’ll create a subscription whenever a record reaches this status value.
- Unique ID: provide the value in their system that identifies record uniqueness, so we can map it to our internal unique ID. This mapping will be used for the identification process in future operations.
-
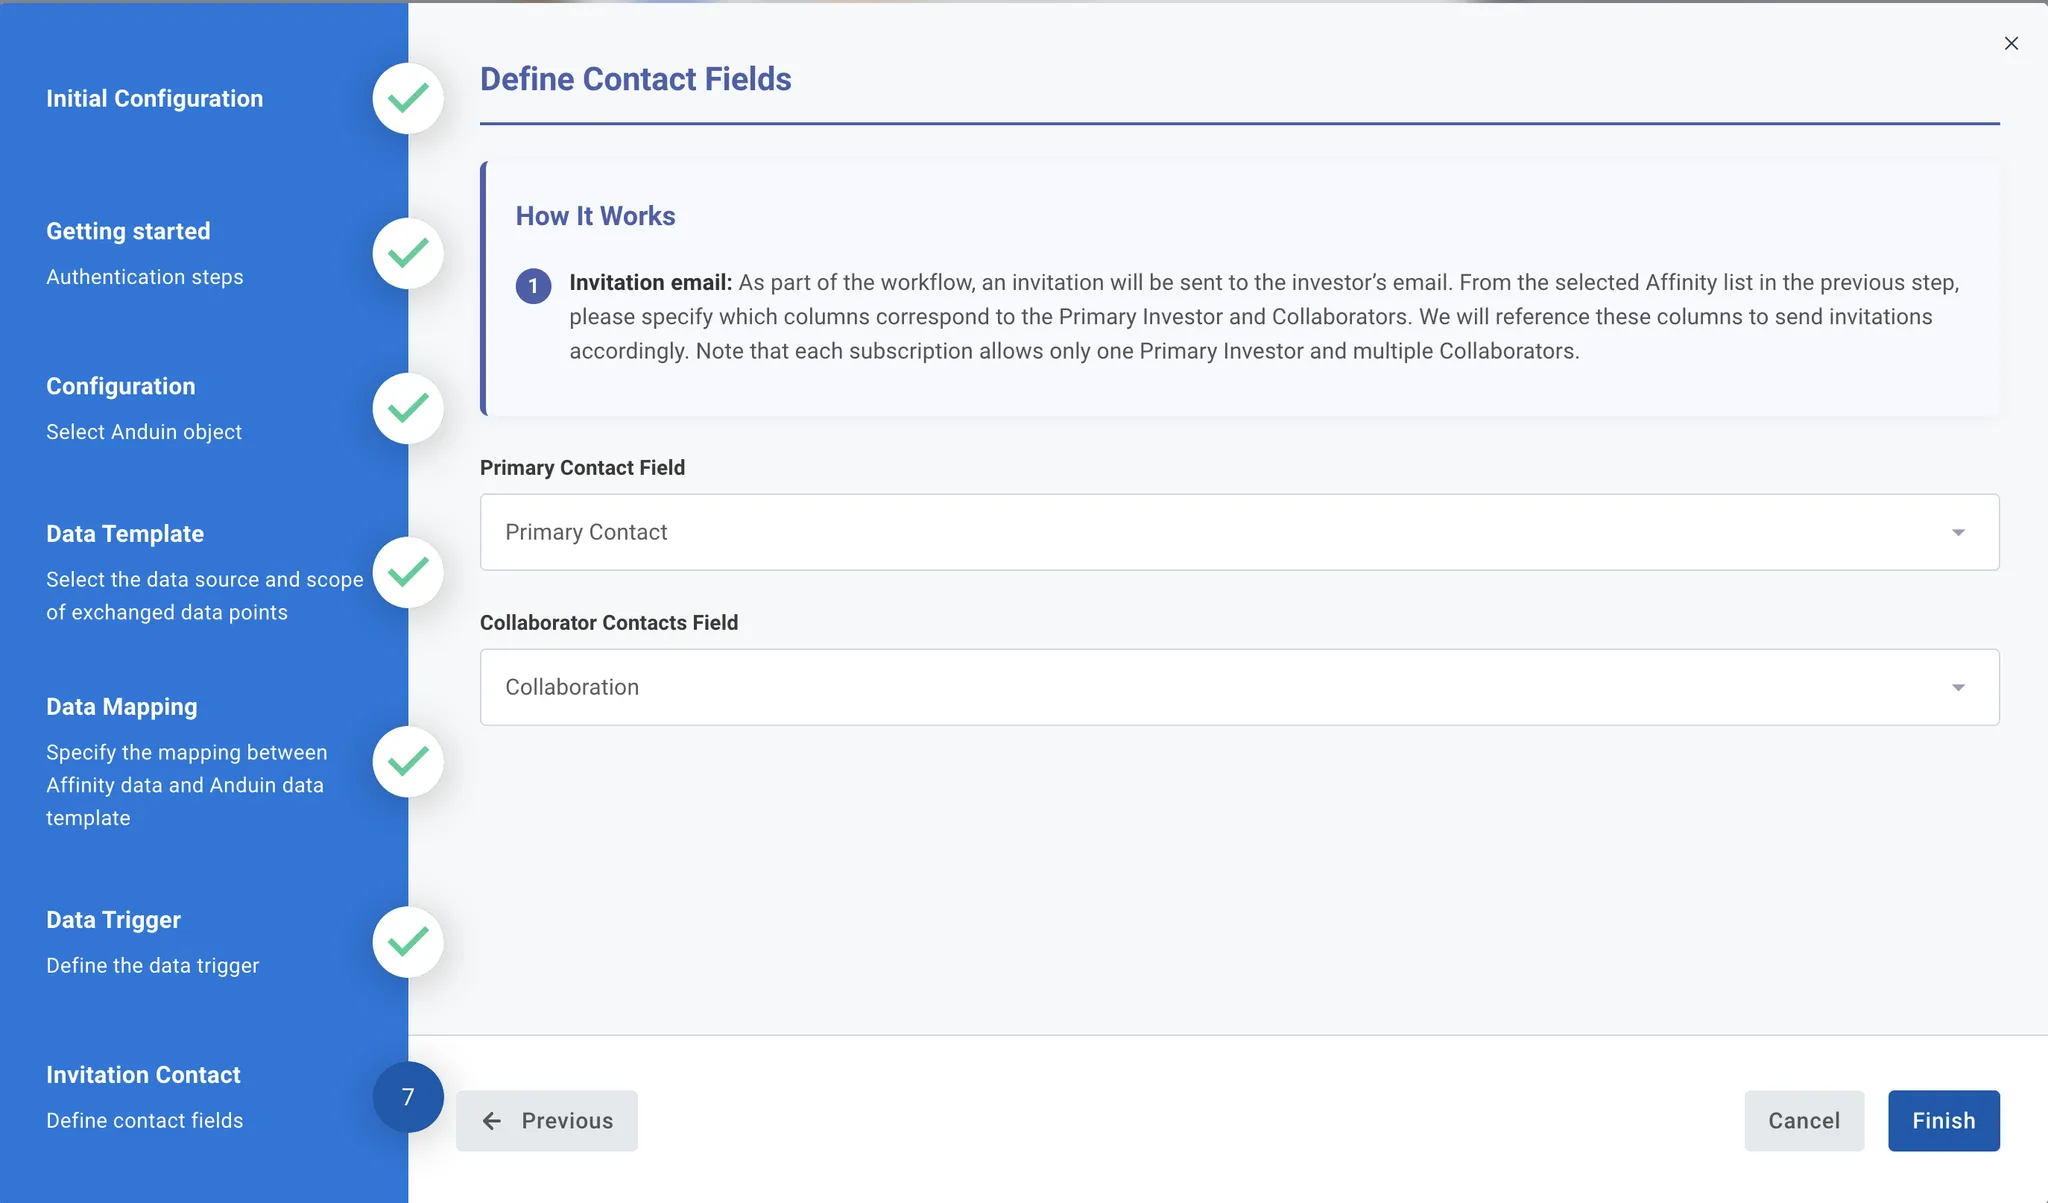
Contact fields
- As part of the workflow, an invitation will be sent to the investor’s email. From the selected Affinity list in the previous step, customers need to specify which columns correspond to the Primary Investor and Collaborators. We will reference these columns to send invitations accordingly. Note that each subscription allows only one Primary Investor and multiple Collaborators.
6.5 Validate the solution
Once configuration is complete:
- Update any record in the Affinity list by changing the trigger field to the specified trigger value
- This will initiate the integration, resulting in:
- A new subscription order being created in the target Anduin fund
- The order being prefilled with mapped Affinity data
- An investor invitation email being sent, using the email field provided
If the automation works end-to-end, the setup is successfully validated.
Updated 4 months ago
Did this page help you?