IDM data synchronization
1. Purpose
Enable customers to automatically replicate Anduin’s source-of-truth data tables into their own Snowflake data warehouse, which can serve as either a backup data source or a centralized hub for dispatching data to various downstream systems.
2. Key Benefits & Features
- Seamless, automated data sync between Anduin and Snowflake
- Preserve Snowflake as the customer’s central data hub—no fragmented data movement
- Comprehensive schema coverage with full relational context, including:
- IDM client (investor)
- Associated IDM investment entity
- Associated IDM profile
- Associated IDM document
3. Target Personas
- Any IDM customers who use Snowflake as their data warehouse
- Especially beneficial for firms with complex and high volume data
4. Prerequisites
4.1 Third party app requirements
- Authentication: Only OAuth and Key Pair authentication methods are currently supported. Customers should be aware of which method they plan to use.
- Credentials: Customers need to provide valid Snowflake credentials. Required parameters vary by authentication type.
- Permission and role: To successfully run the integration, certain permissions need to be granted in Snowflake
- Anduin Table Usage: This integration will create and populate data tables in the customer’s Snowflake environment. Modifying these tables directly is not recommended, as it may break compatibility with automated syncing.
4.2 Anduin app requirements
- IDM access - the user must either:
- Have admin access to their IDM, or
- Know a team member with admin access who can grant the necessary permissions during setup
- IDM firm ID: Customers should already receive their IDM firm ID
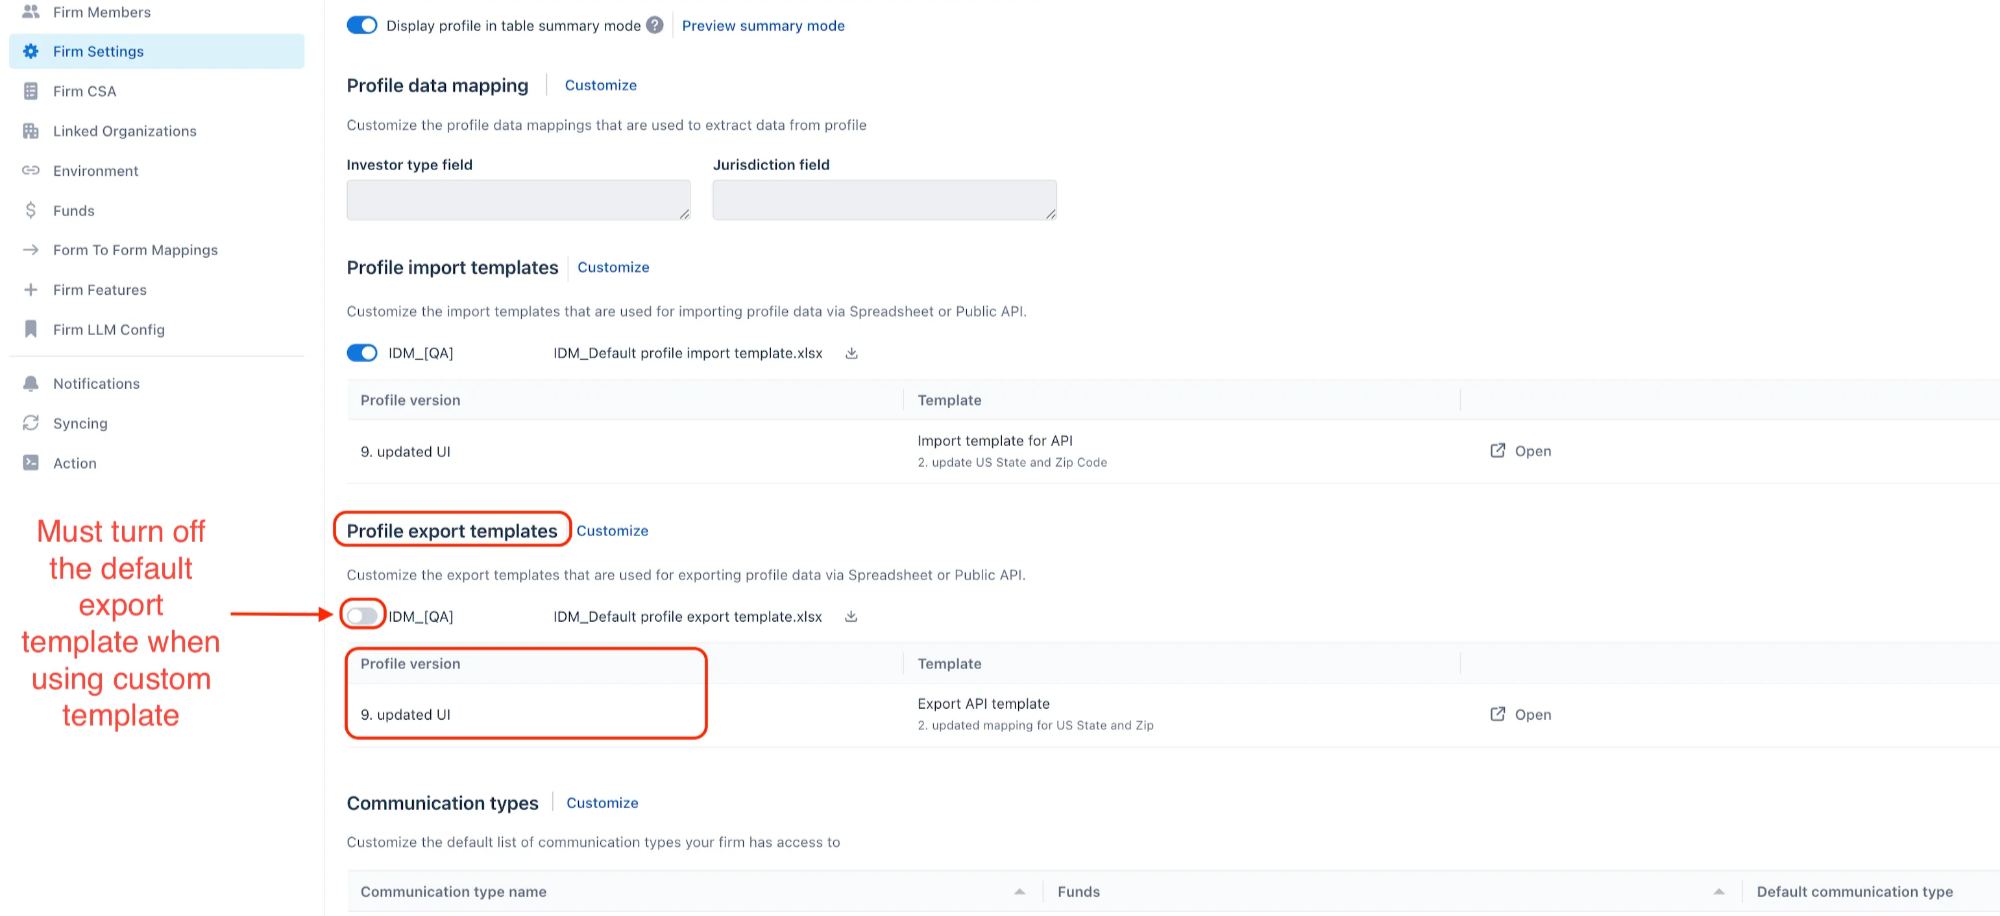
- IDM profile export template: The default export template needs to be inactivated
- Linkage - IDM and Funds (Optional): All participating funds must be linked to the customer's IDM instance
5. Pre-Setup Checklist
| Task | Owner | Note | Anduin guide |
|---|---|---|---|
| Snowflake Oauth credentials | Customer | Consulted by Anduin | https://developers.anduintransact.com/docs/prepare-snowflake-credentials#oauth-method |
| Snowflake Key Pair credentials | Customer | Consulted by Anduin | https://developers.anduintransact.com/docs/prepare-snowflake-credentials#key-pair-authentication-method |
| Snowflake permission and role | Customer | Consulted by Anduin | https://developers.anduintransact.com/docs/permission-and-role |
| Snowflake best practice | Customer | Consulted by Anduin | This integration will create and populate data tables in the customer’s Snowflake environment. Modifying these tables directly is not recommended, as it may break compatibility with automated syncing. |
| IDM permission | Customer | Consulted by Anduin | |
| IDM Firm ID | Customer | Consulted by Anduin | Embedded in the url. Sample: fdfe1r7ez1783d65 for https://platform-demo.anduin.dev/#/fdfe1r7ez1783d65/funds |
| IDM Profile export template | Anduin | ||
| Linkage - IDM & Funds | Anduin |
6. Step-By-Step Setup Guide
6.1 Grant access to the Integration Hub
- Customers need to contact their Implementation manager to ensure they have access to the Integration Hub and this integration
6.2 Locate the solution
-
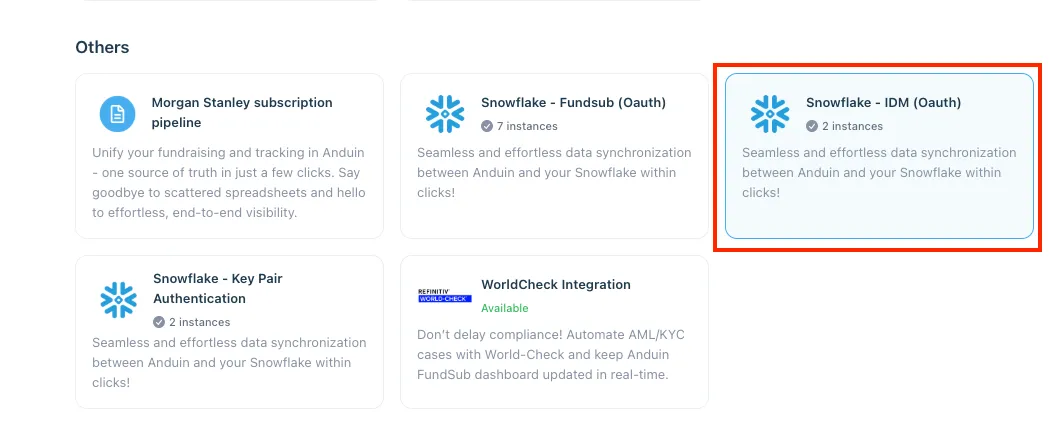
In the Browse tab of the Integration Hub, the customer can locate the Snowflake - IDM (Oauth) or Snowflake - IDM (Key Pair Auth) solution, depending on customer’s authentication method of choice
6.3 Install the solution
-
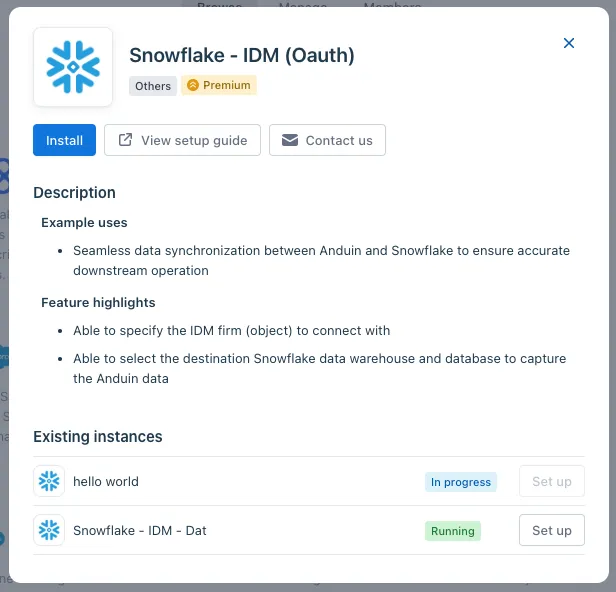
Step 1: Click Install to begin setup
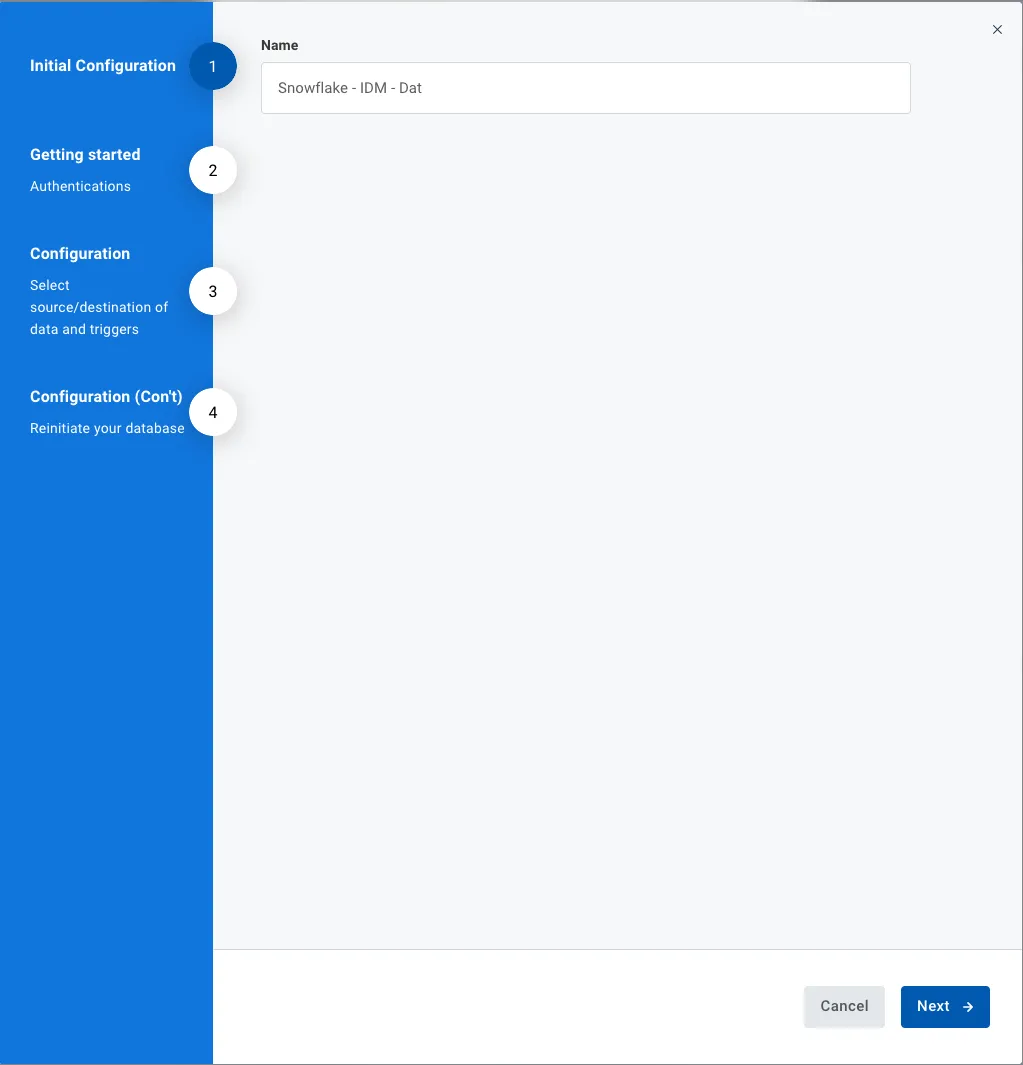
-
Step 2: Name the Integration
- Recommend a clear and descriptive name (e.g., “Snowflake integration - Fund Alpha” or “By John Smith”)
- Click Next: Link to Anduin objects
-
Step 3: Grant integration permission to customer’s intended objects (IDM and Funds)
-
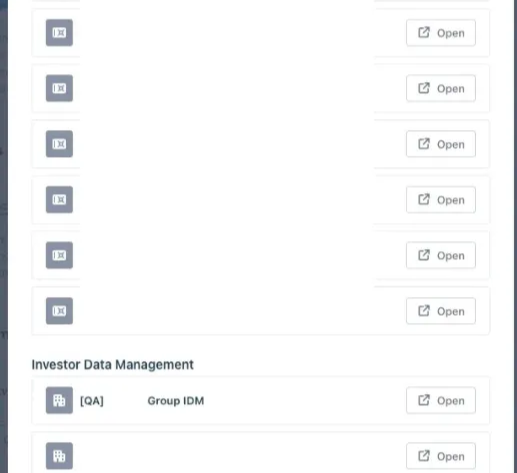
Step 3.1: A list of accessible Anduin objects (e.g., IDM, Funds) will appear
-
Step 3.2: Click Open next to your IDM
-
Step 3.3: In the permission module, find the integration name and click Add
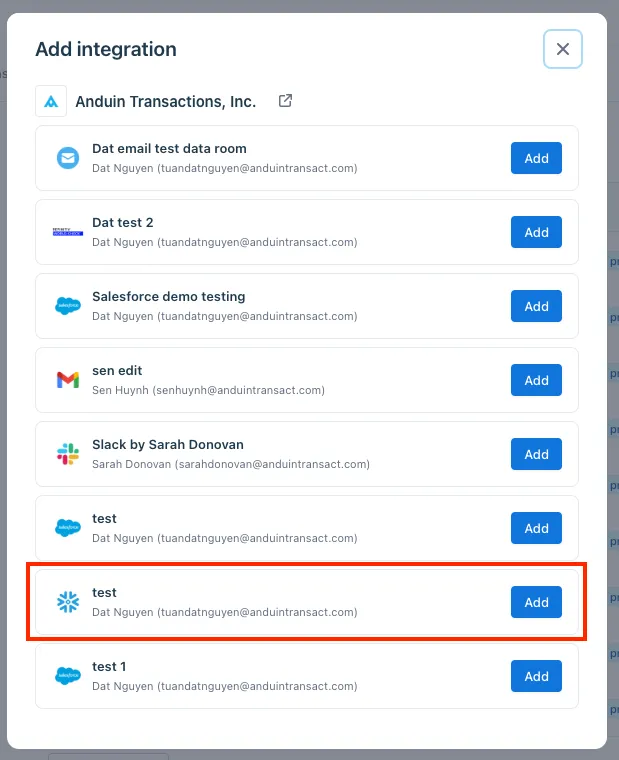
-
Step 3.4: Return to the Integration Hub - the IDM and funds should now show a “Linked” tag
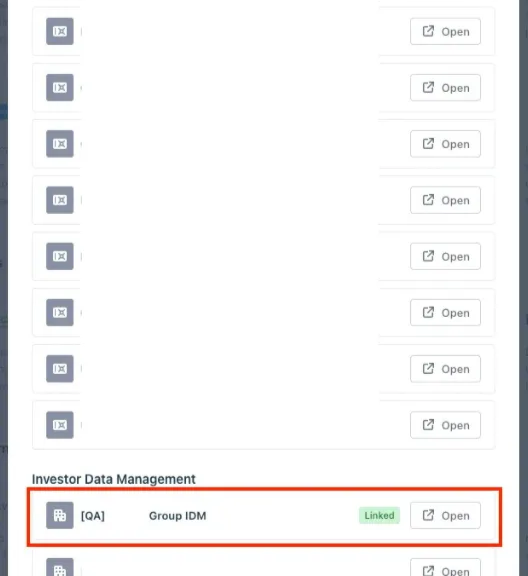
-
If the target IDM is not listed, there are 2 options
- Customer needs to be added with admin role for that IDM, then return to the step 3.2. Customer should be able to see the target fund there
- Customer requests their team member who has admin role in the IDMto perform step 3.3 using Settings > Integrations in the IDM and FundSub app and they can continue with step 3.4
6.4 Configure the solution
-
The customer may rename the integration or proceed as-is
-
Enter Snowflake credentials and speciy warehouse and database in their Snowflake

-
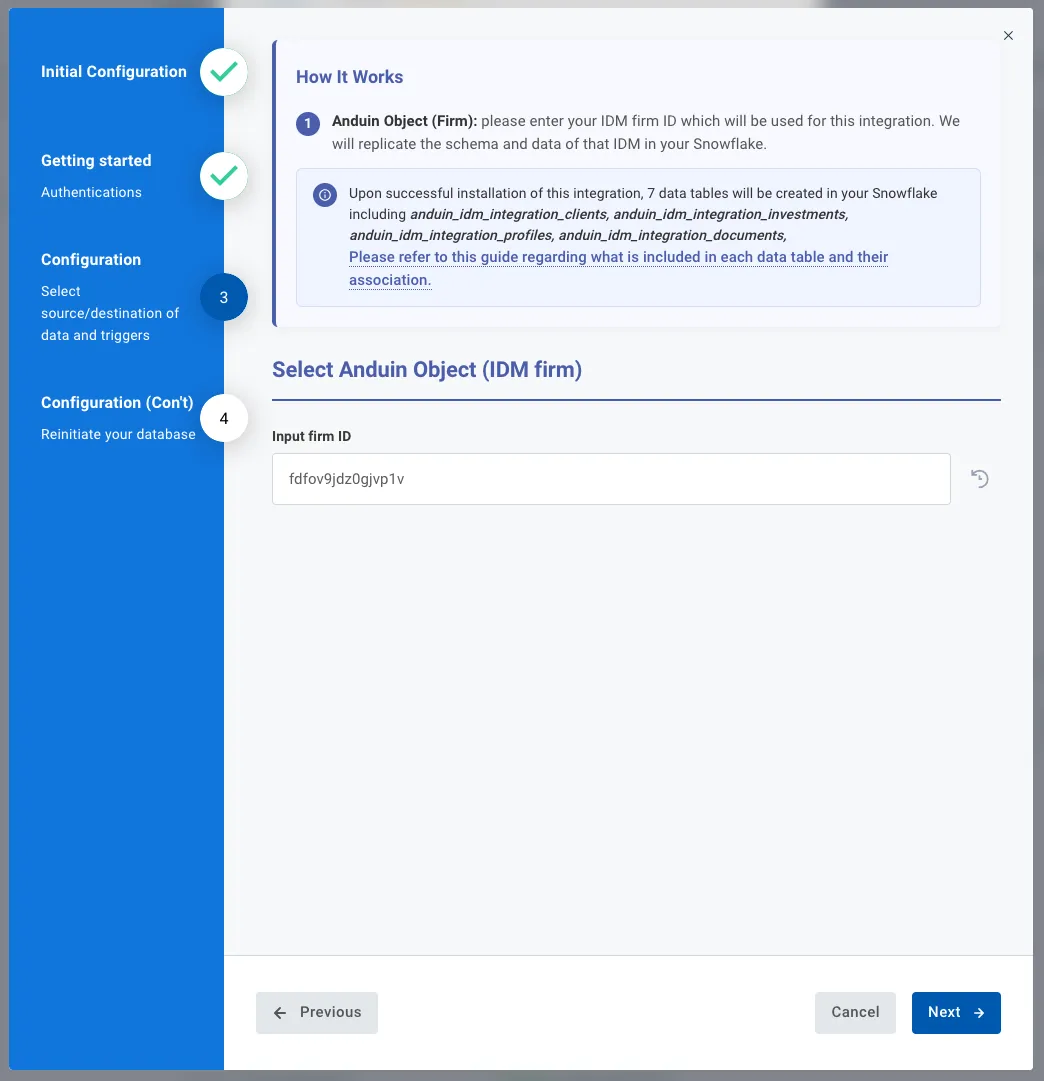
IDM configuration
-
Enable the IDM toggle to sync Anduin IDM data.
-
Specify Anduin IDM firm as the source by entering the Anduin IDM firm ID
-
-
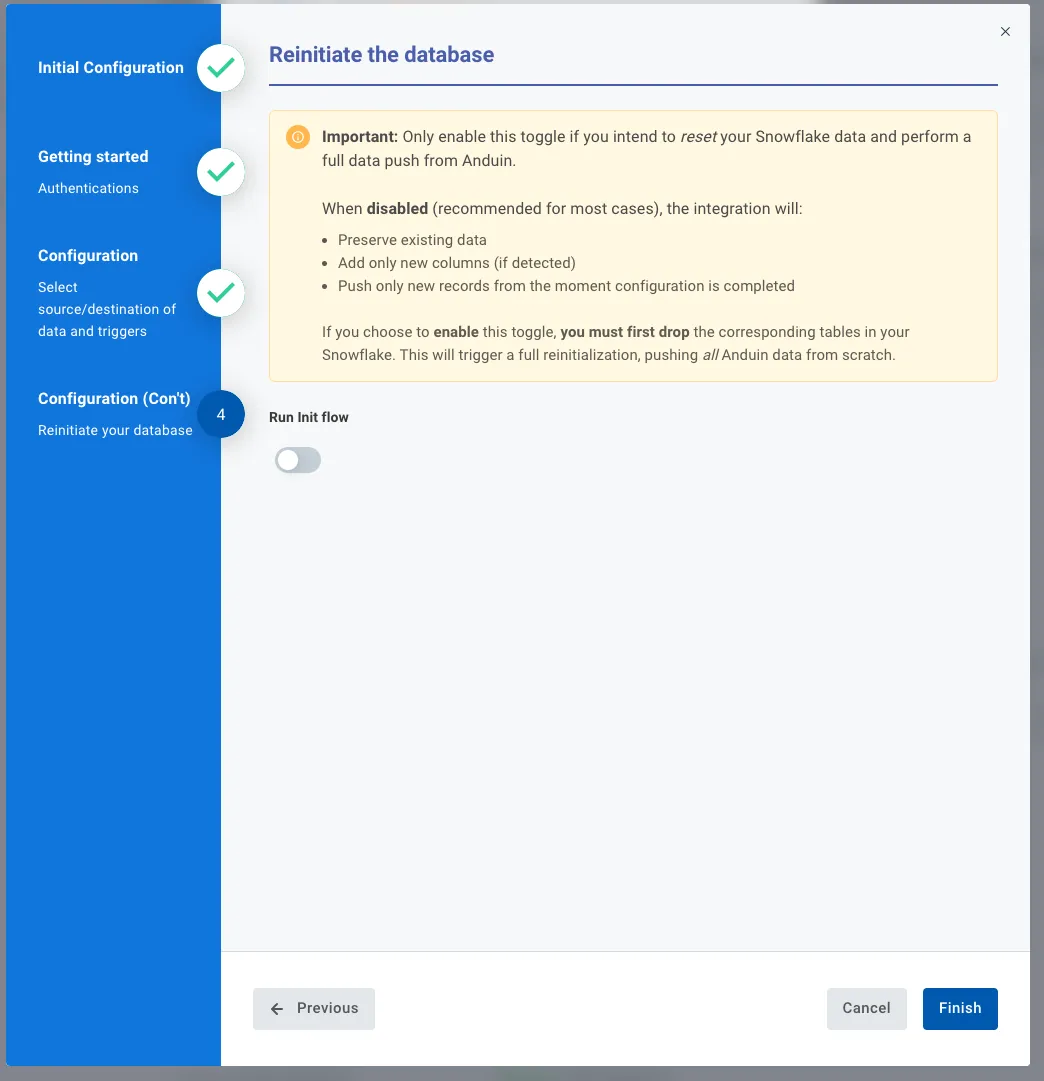
Reinitiate the database
-
Only enable this toggle if you intend to reset your Snowflake data and perform a full data push from Anduin.
-
6.5 Validate the solution
Once configuration is complete:
-
The customer should observe the below schema (in red) is created in their Snowflake. If you combine the integrations with both FundSub and IDM, the entire schema will be created. Detailed data dictionary can be found HERE
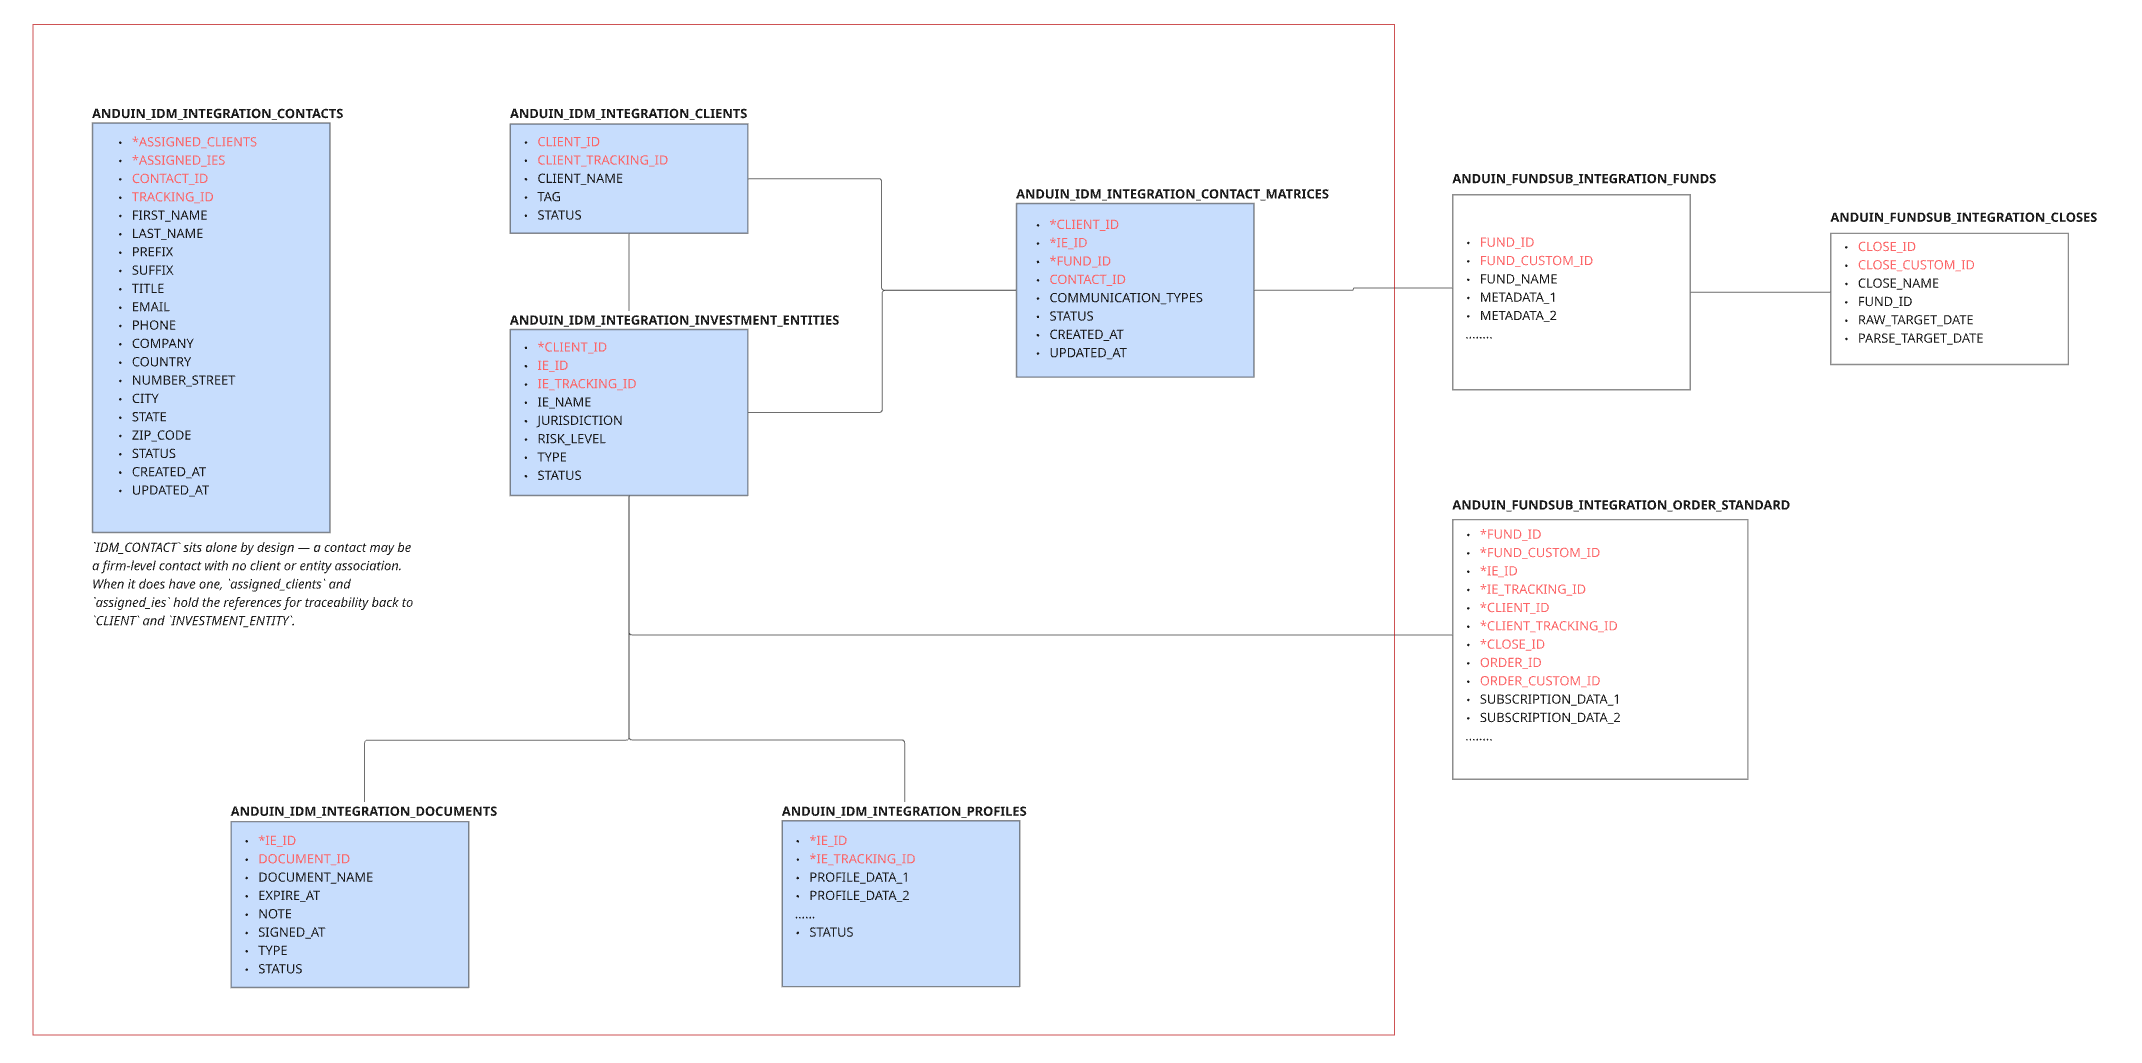
- Existing data will also be pushed and created in relevant tables in their Snowflake
- Once the trigger occurs in Anduin, they will see new record is created or existing record is updated in the corresponding data table in Snowflake
If the automation works end-to-end, the setup is successfully validated.
Updated 5 days ago