Configuration vs permission
Core ideas
The Integration Hub unifies Anduin’s existing offerings - FundSub, Investor Data Management (IDM), Data Room, etc. - and customer's tech stacks into a seamless environment. It manages integration configurations, while each underlying app enforces its own rules and permissions. For instance, as a Fund Manager for Acme Fund 1 and Acme Fund 2, you can automate data flows only for the funds you’re permitted to access. In other words, the Integration Hub handles the integration setup, and the individual Anduin apps maintain the integration permissions.
To simplify terminology, we refer to each app instance as an Anduin object, essentially a container of investor data:
- A fund in FundSub: contains all subscription information entered by investors.
- A firm in IDM: serves as a centralized repository that manages investment entities, contacts, documents, and investor profile data.
- A data room in Data Room: captures insights and activities related to investor document interactions.
Roles
Integration Hub
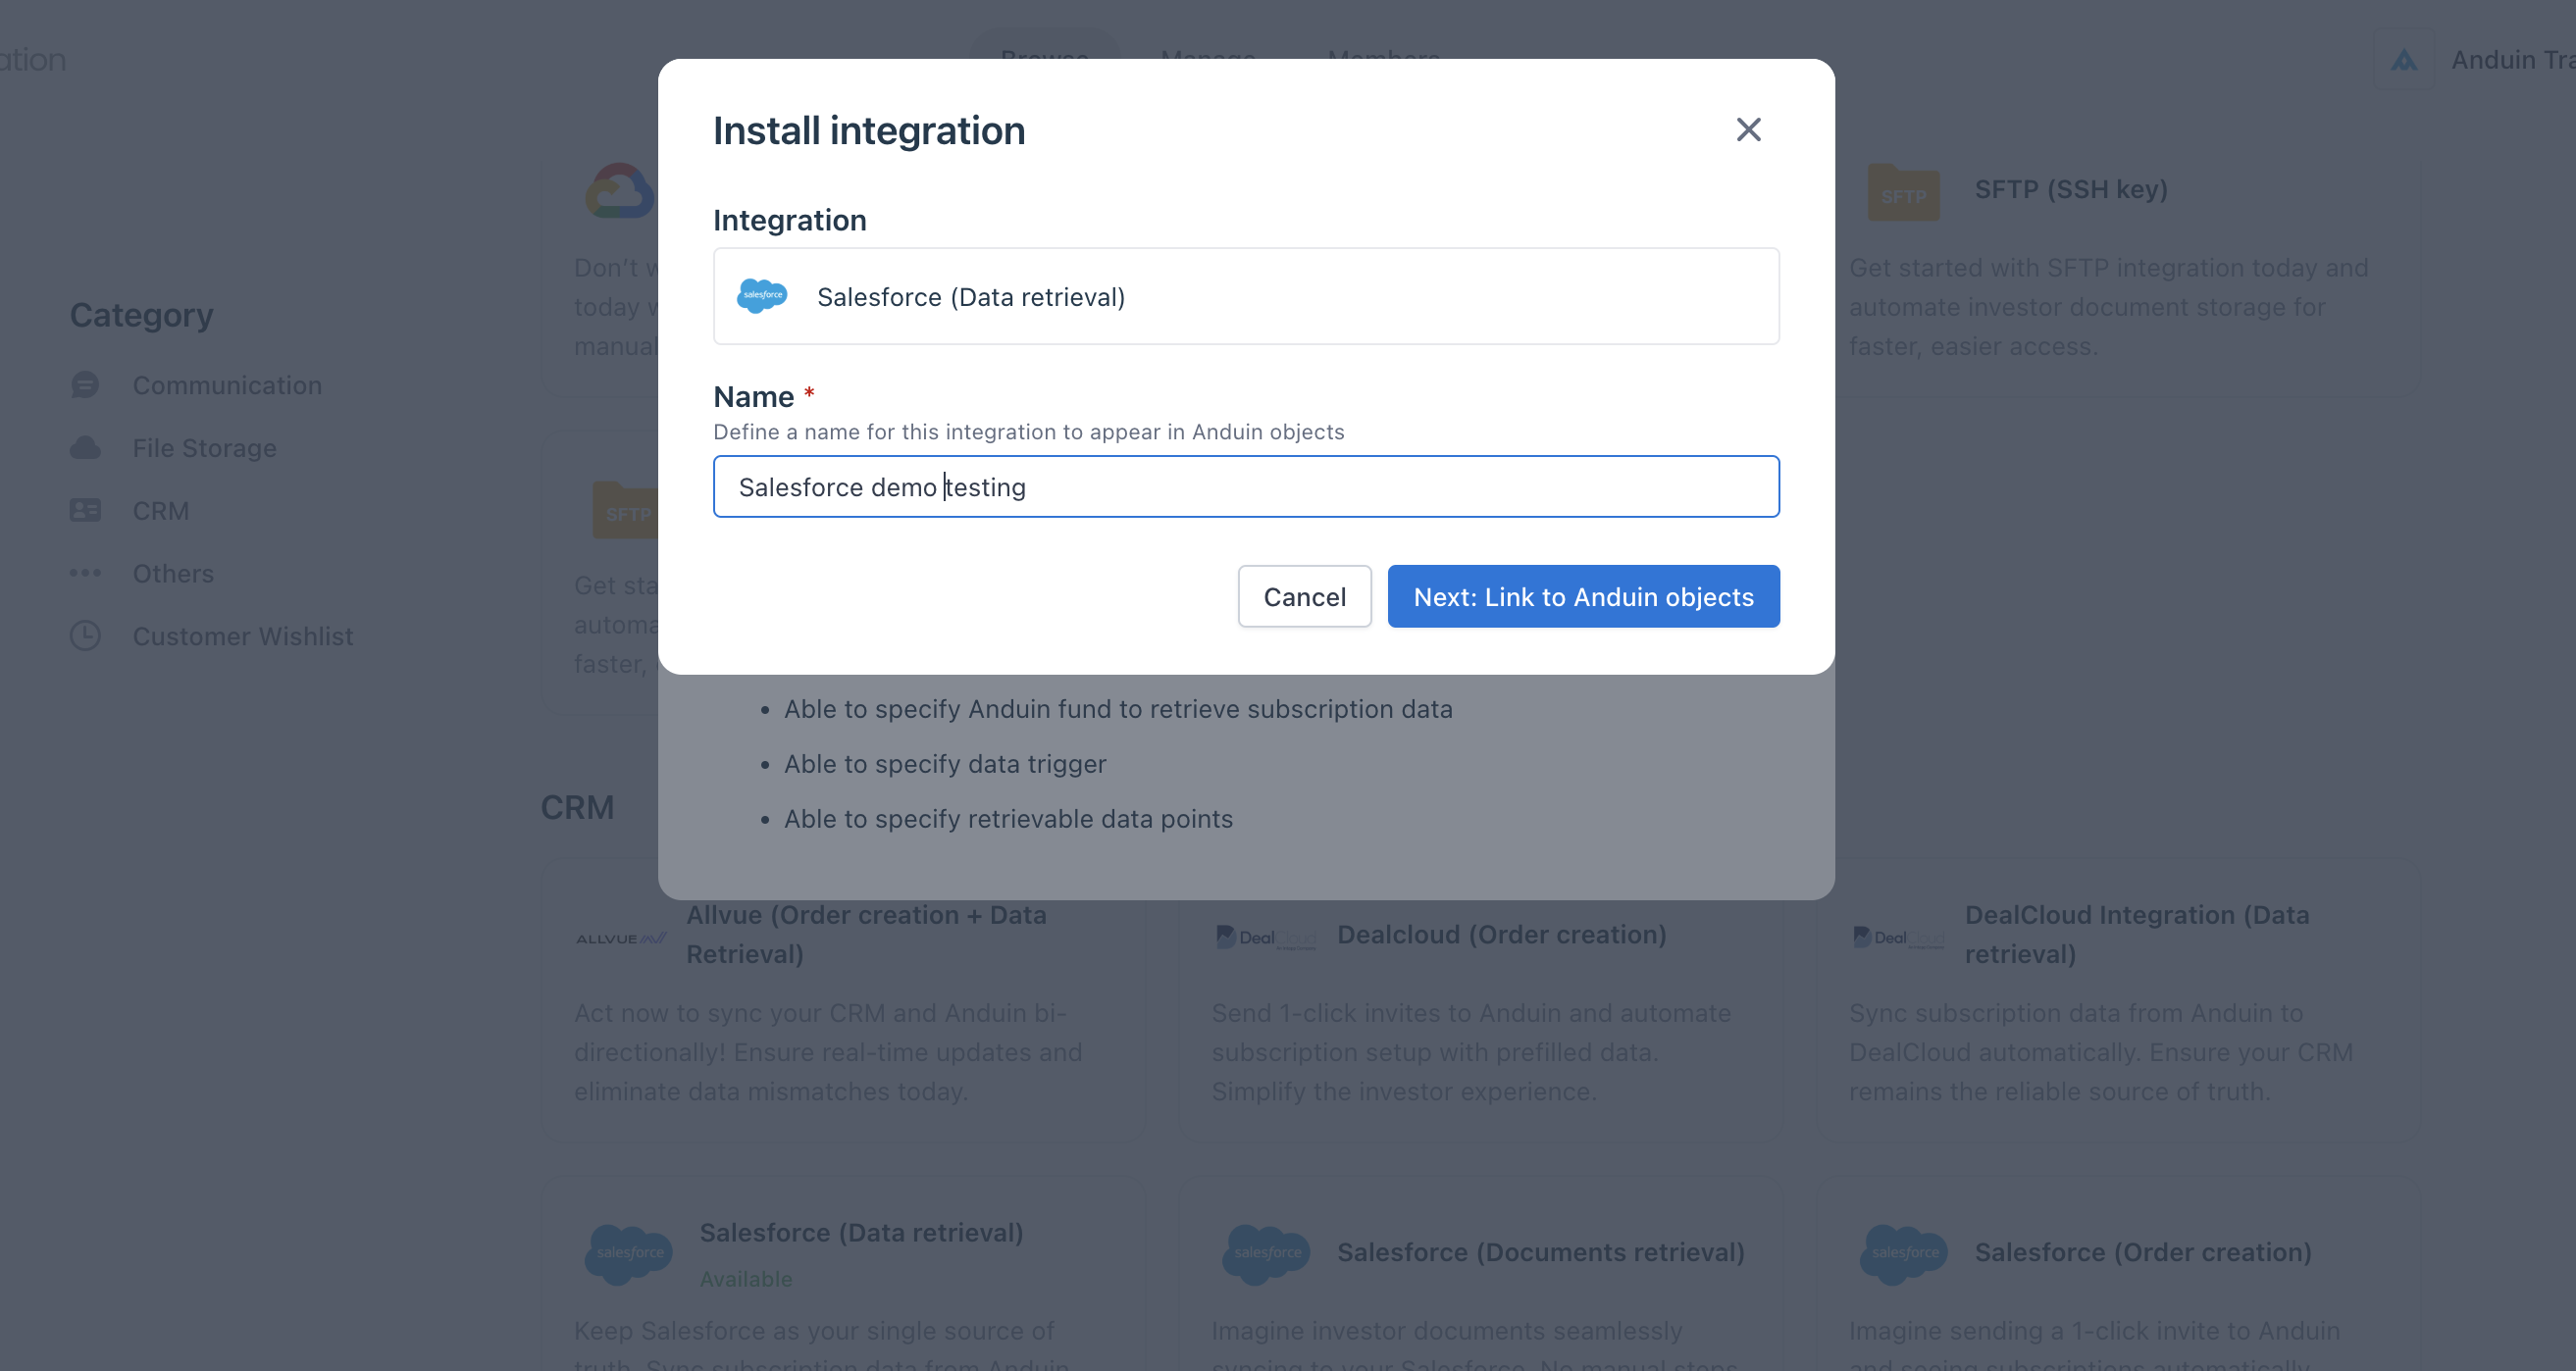
To initiate the installation of any integrations, you can hit Install and start with naming the flow. Please remember the integration name which will be added to the corresponding Anduin objects you want to integrate with.
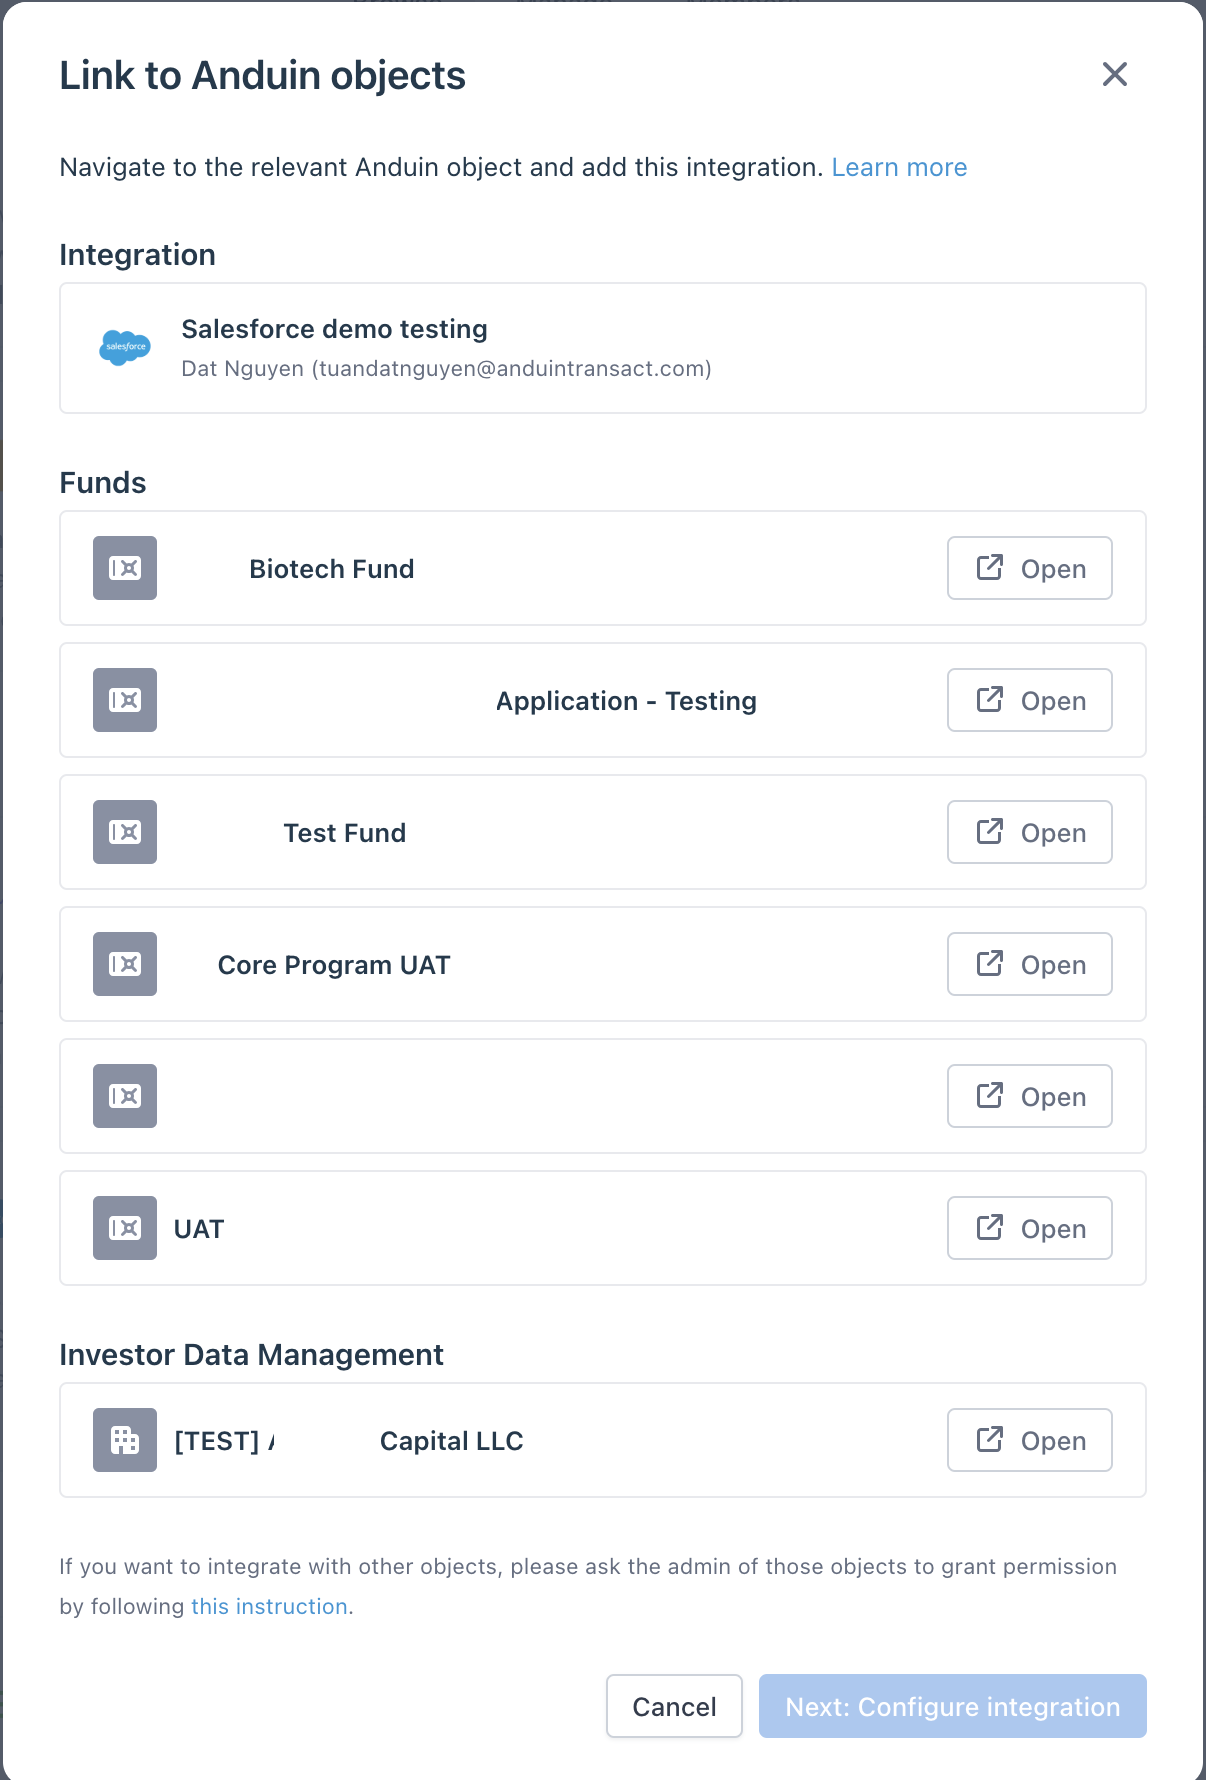
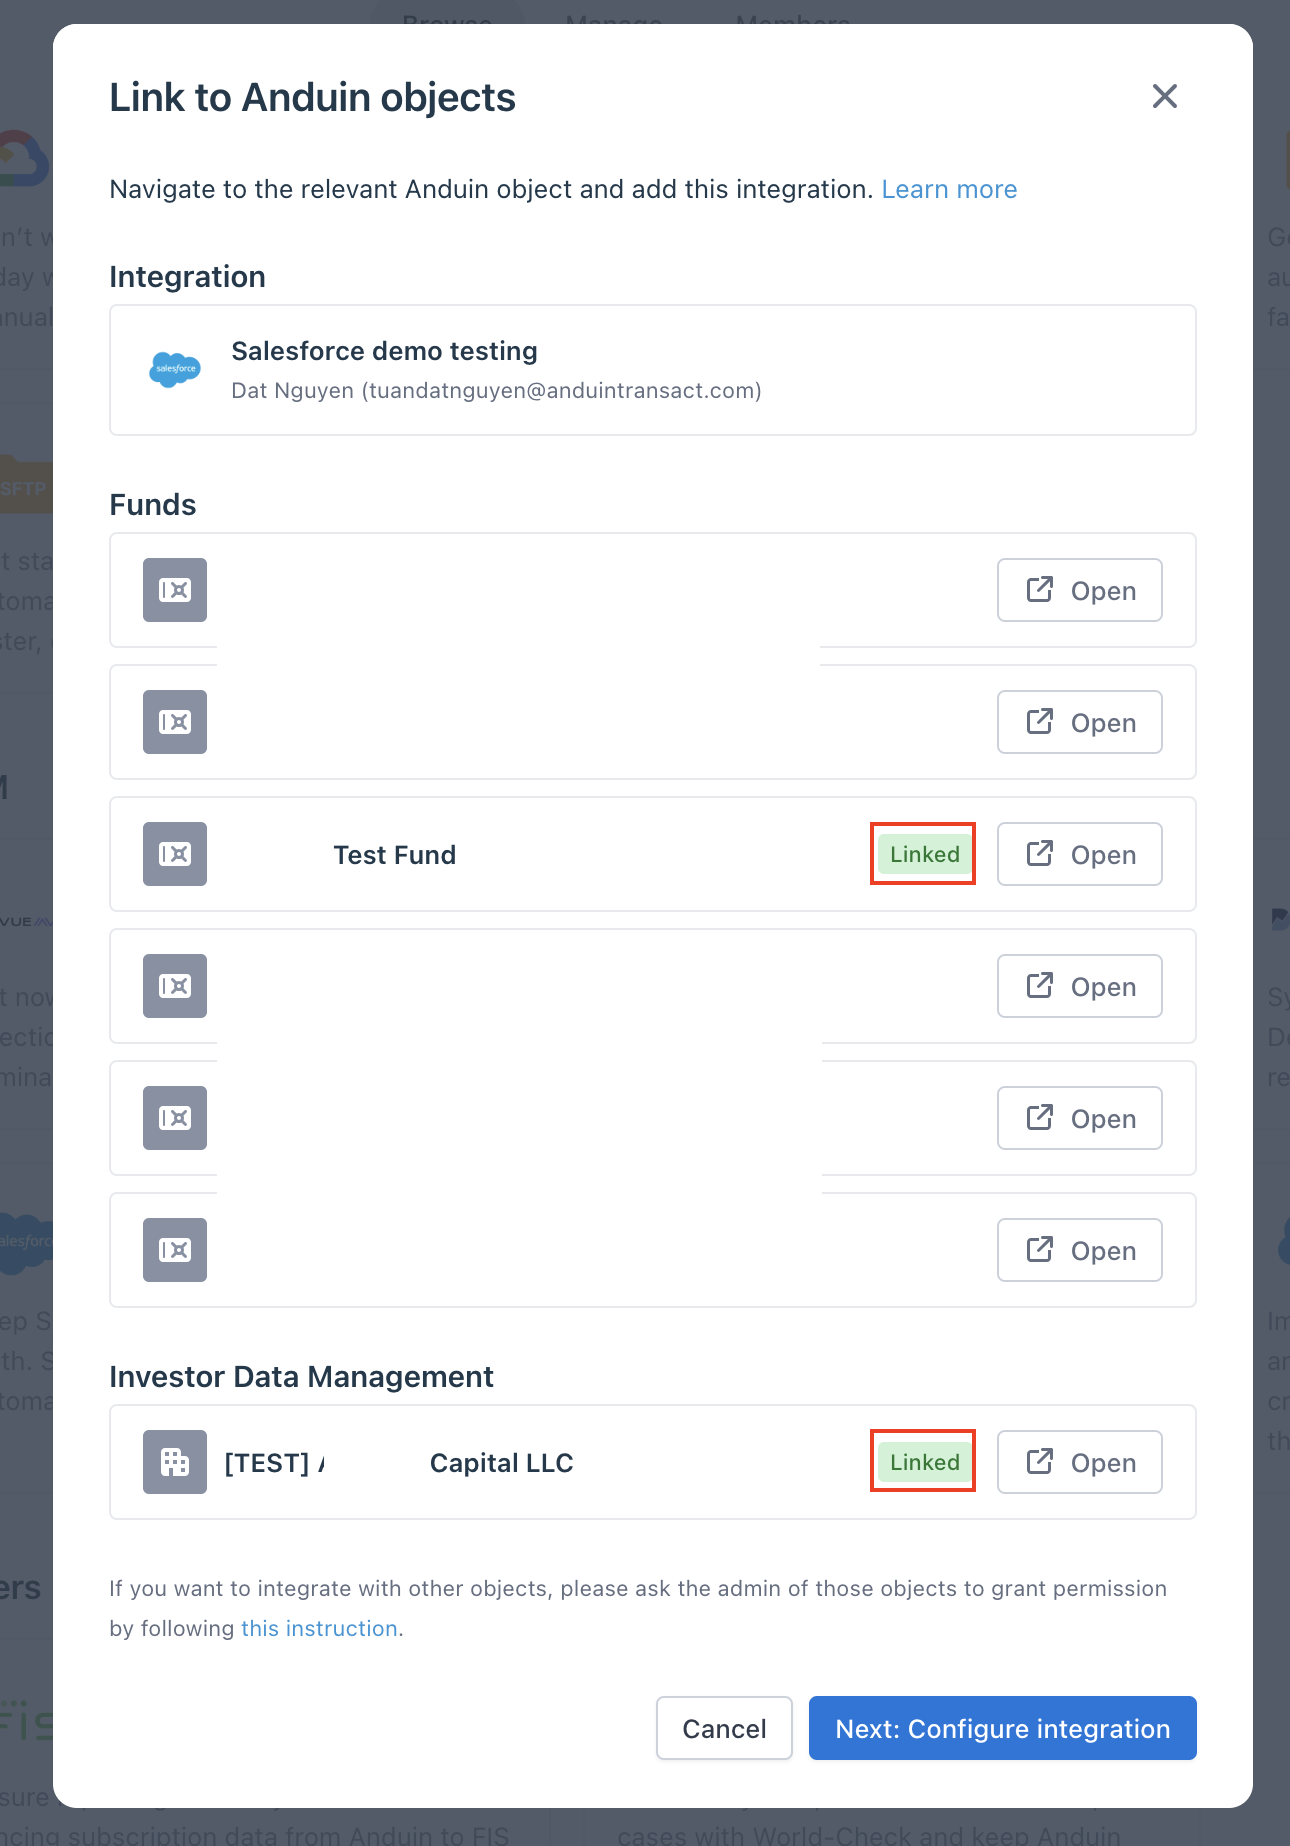
Hitting Next and you can observe the list of Anduin objects you have permission. Click Open and you will be directed to either FundSub or IDM where you grant access for your integration. Please follow through the next section for more details.
The Integration Hub is designed to facilitate automation and data movement across Anduin objects. It’s a workspace where you can select workflows, choose which objects to connect, and configure integration details.
- If you have admin permissions for these objects, you can complete the setup independently.
- Otherwise, you’ll need an admin to grant the required permissions.
Anduin objects
Integration flows can only be set up if you have permission for all related Anduin objects.
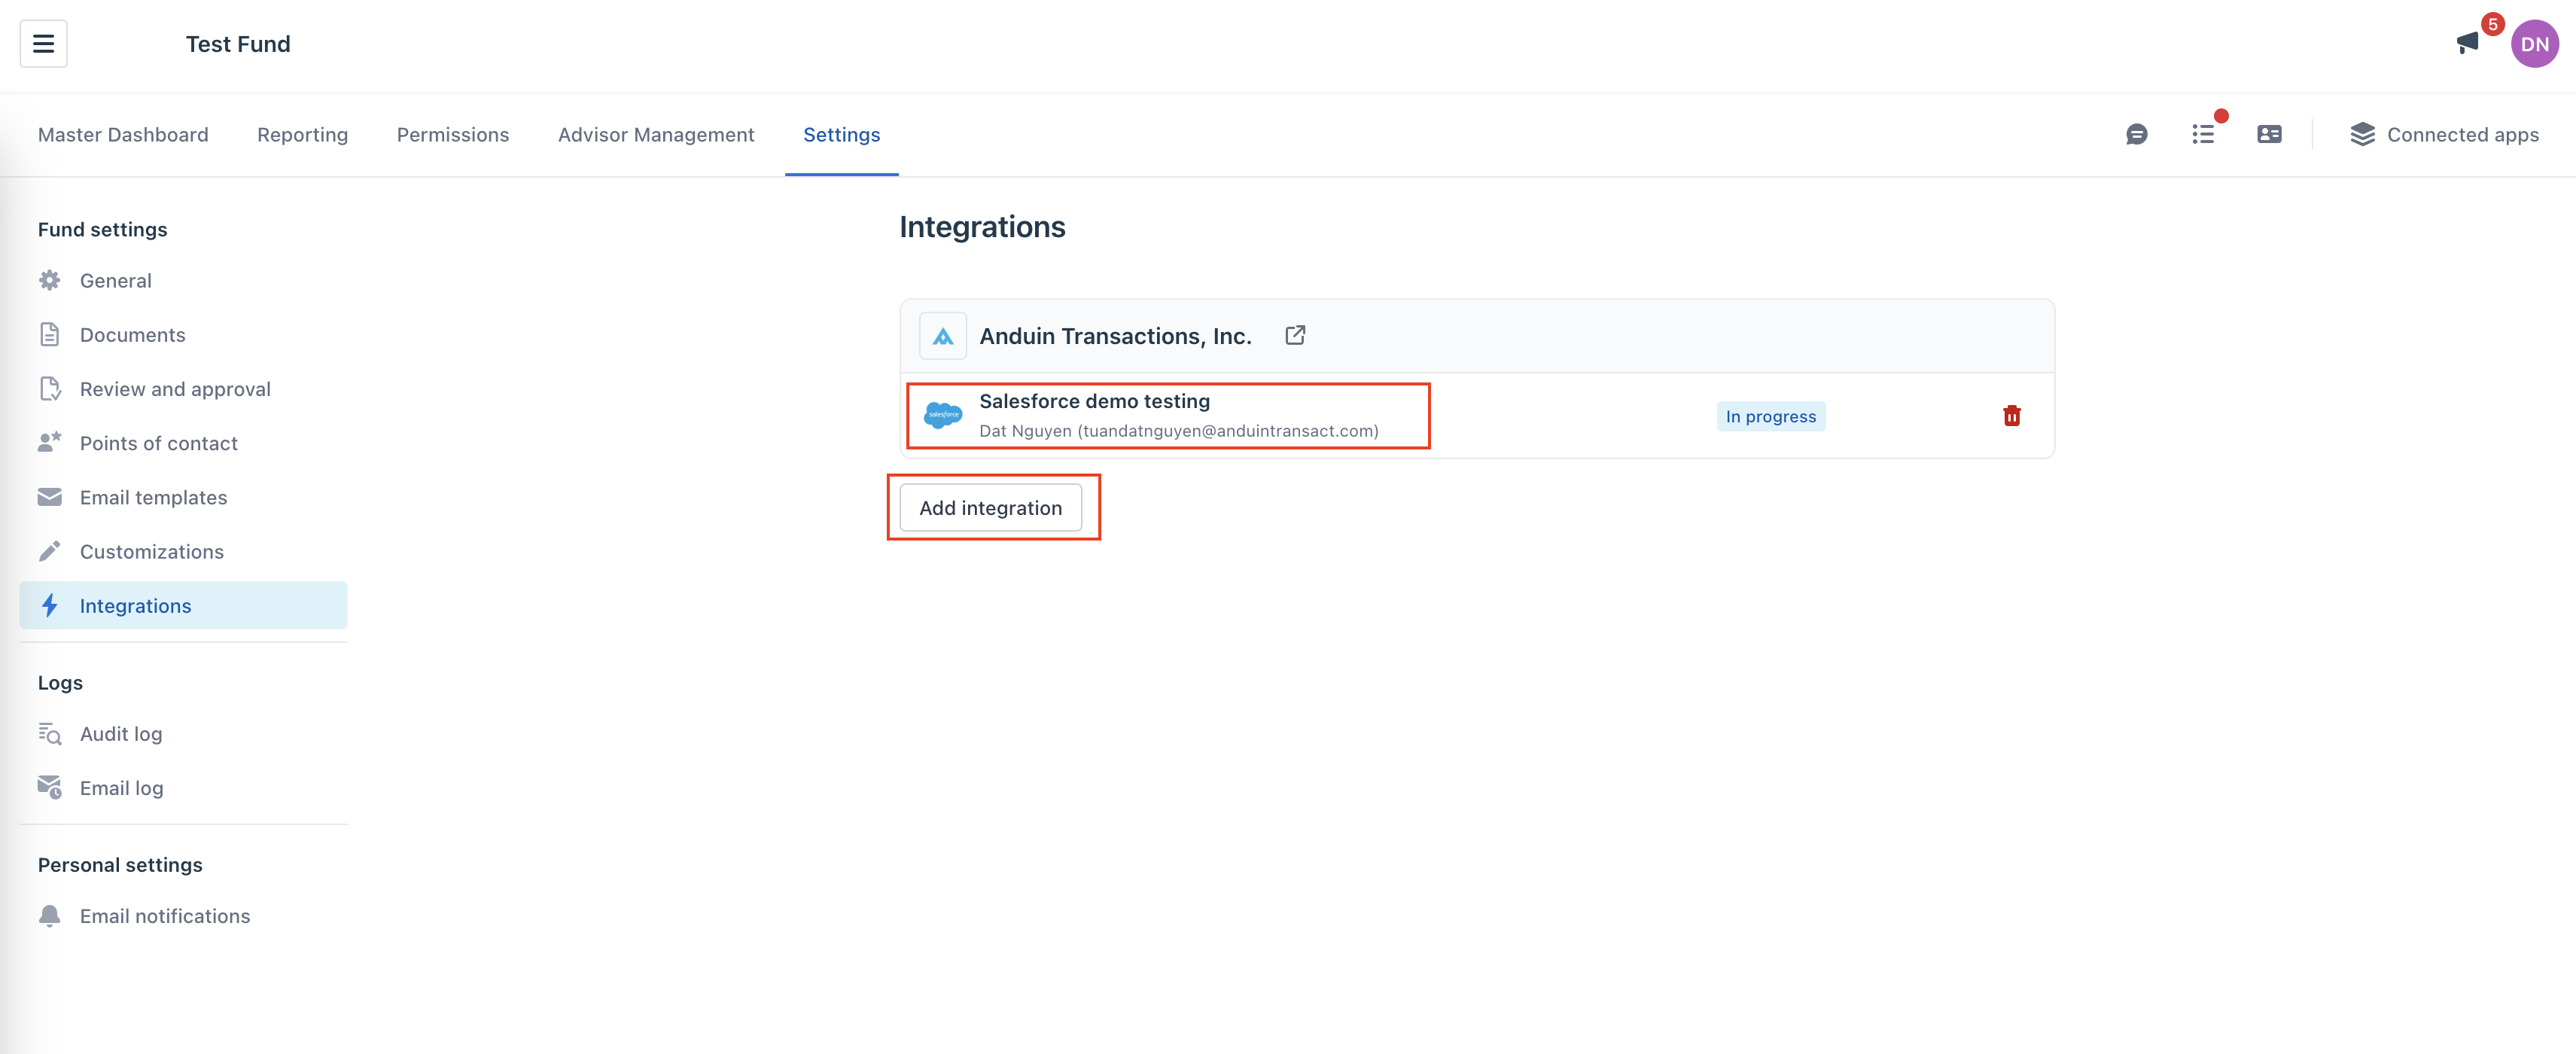
- FundSub: Manage permissions via Settings > Integrations in the dashboard. You can access this page either through the Integration Hub (hitting Open from previous step) or directly. Once there, add the integration you created earlier - this grants it permission to connect to the specific fund.
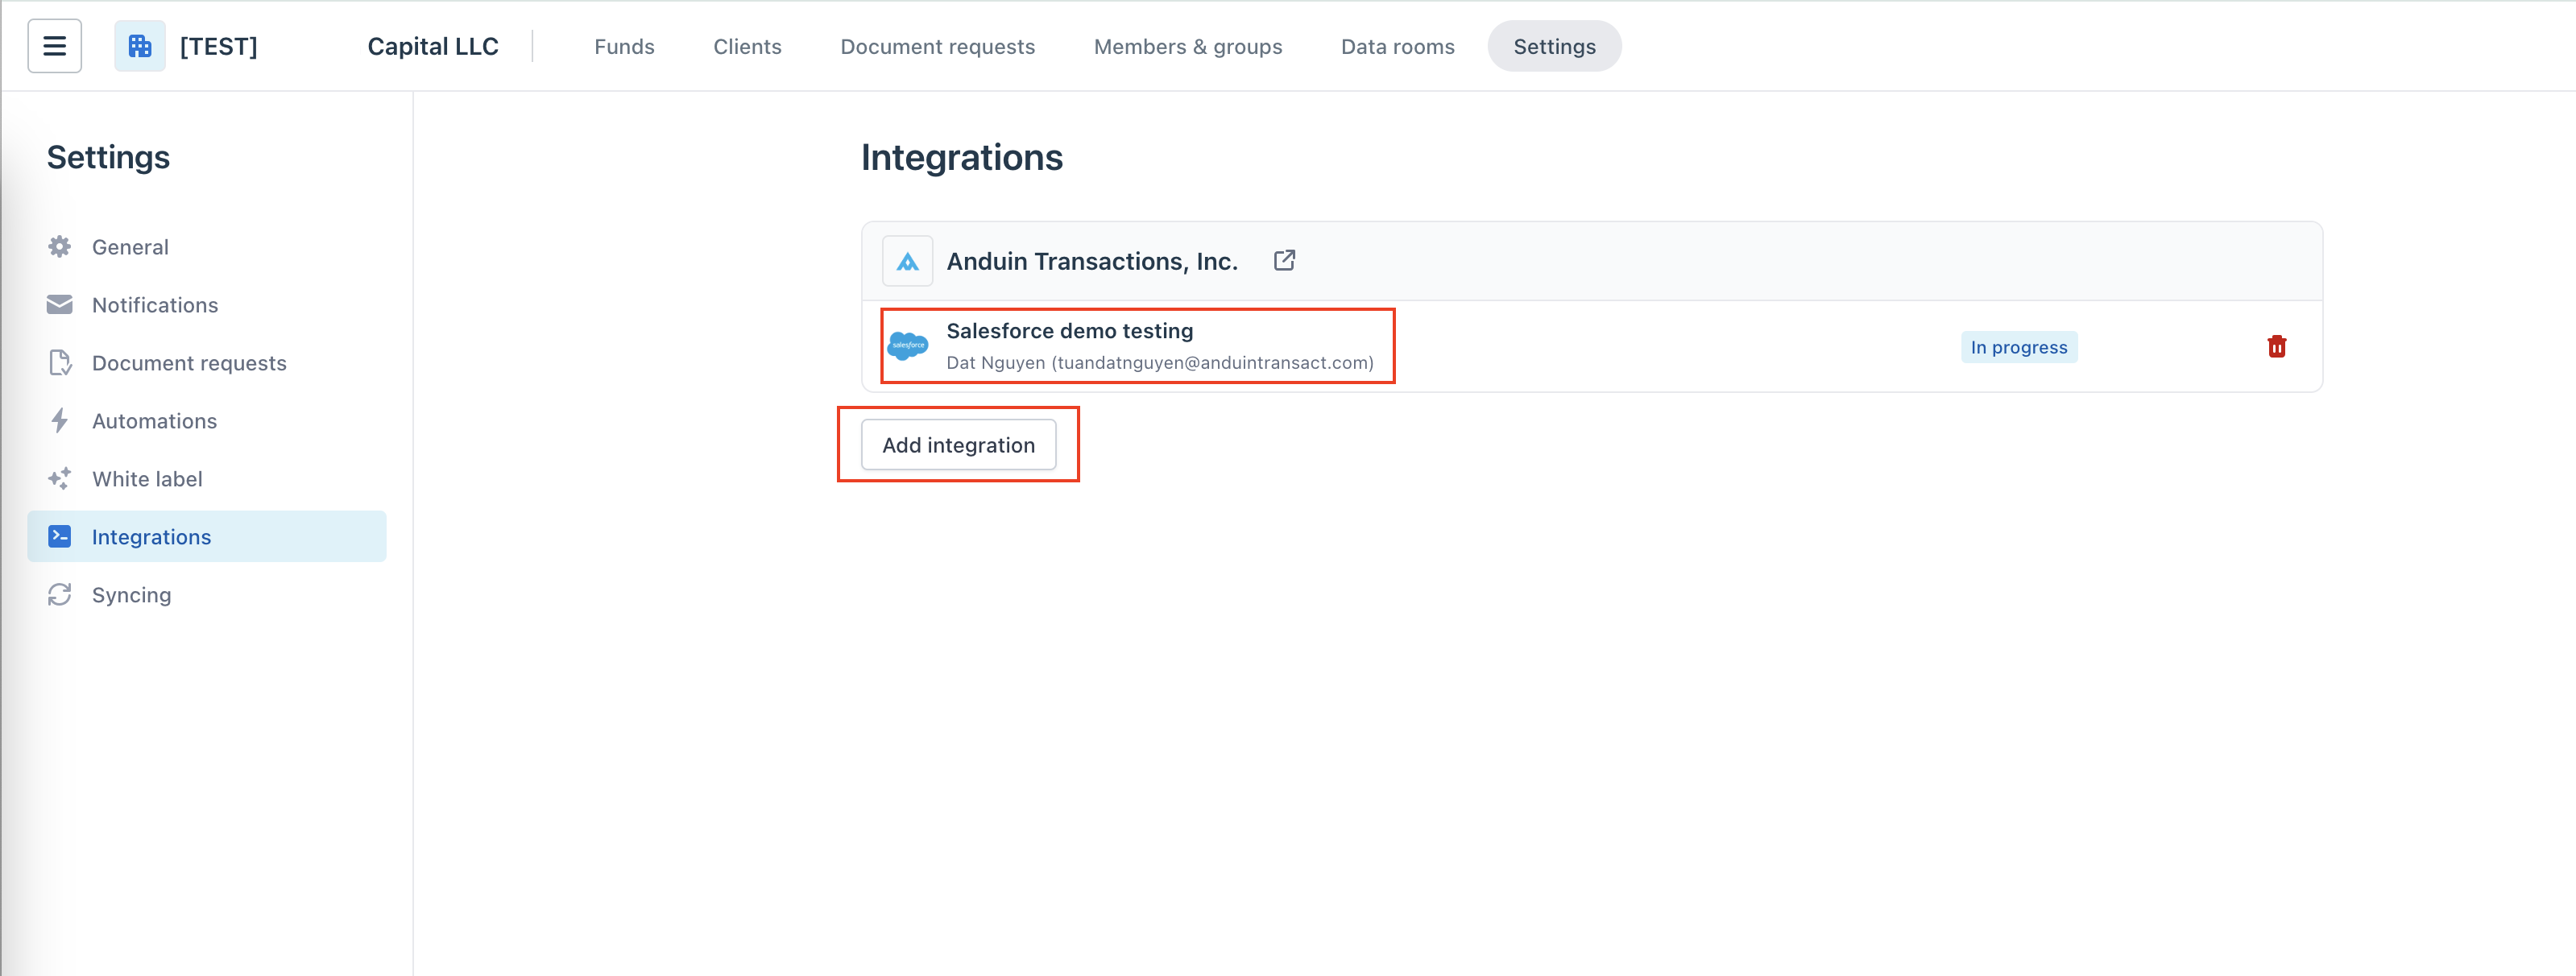
- IDM: Manage permissions via Settings > Integrations in the dashboard. You can access this page either through the Integration Hub (hitting Open from previous step) or directly. Once there, add the integration you created earlier - this grants it permission to connect to the specific IDM.
- Data Room: TBD.
Once permission successfully granted, you can go back to the Integration Hub and observed the corresponding objects linked from which you can go into the configuration screens.
Let's put it together and start installing an actual Gmail integration in "Setup Your First Instance" section.
Updated 10 months ago