Automated document repository
1. Purpose
Keep their storage as a document repository to maintain all subscription and supporting documents.
2. Key Benefits & Features
- Automated document transfer
- Self-configured – customers don’t need to share passwords or credentials with Anduin
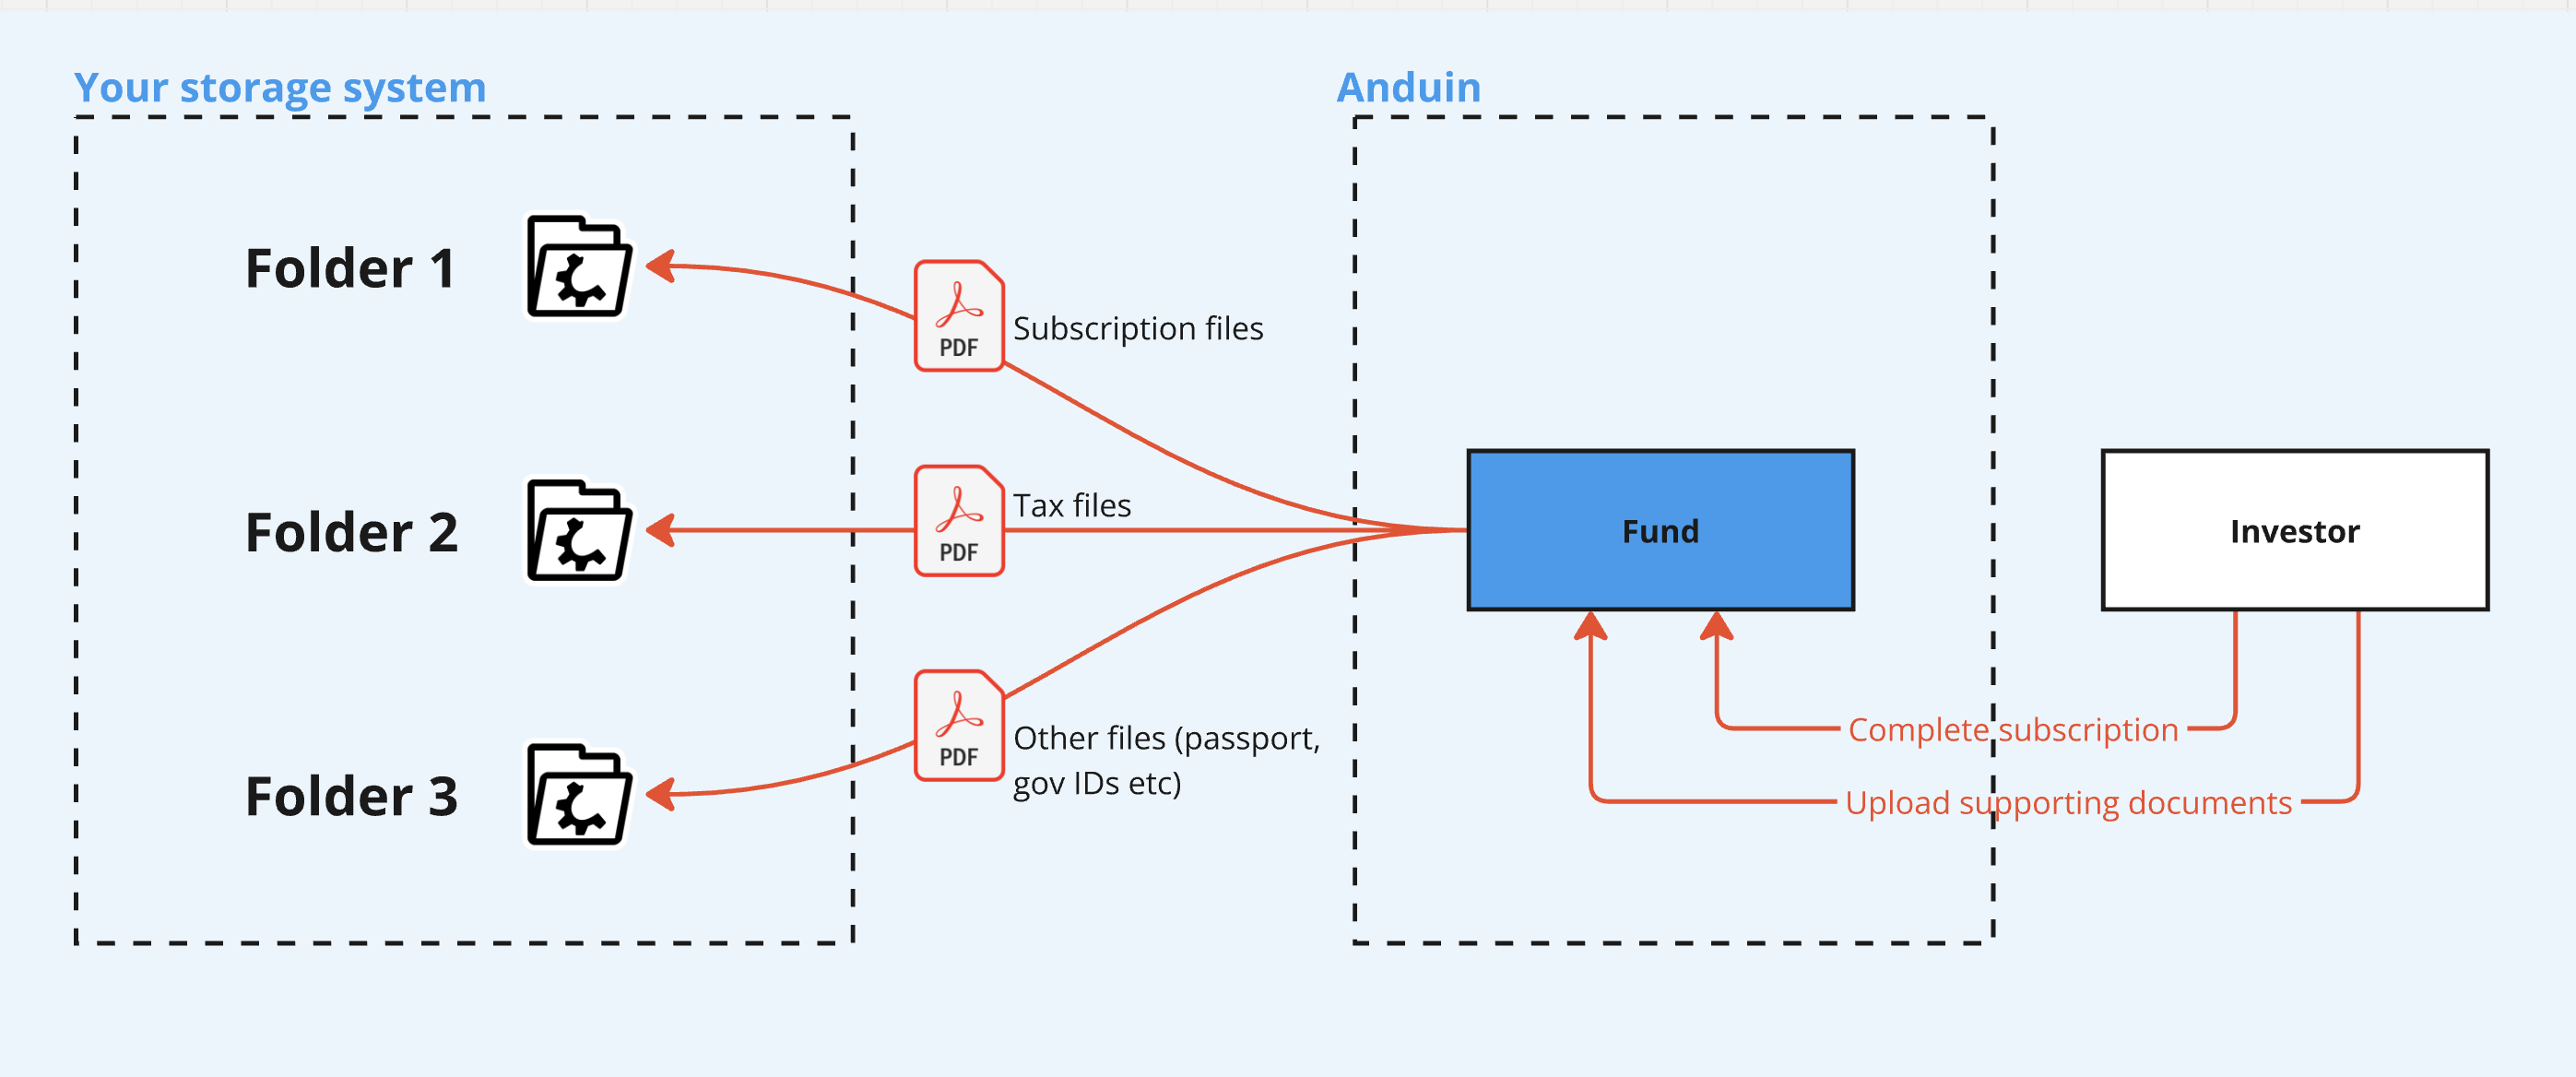
- Folder customization
- One folder for the main subscription document
- One folder for AML/KYC documents (e.g., passport, driver’s license)
- One folder for tax documents
- etc
3. Target Personas
- Valuable for FundSub customers who need to move subscription and supporting documents out of Anduin for subsequent operations
- Especially helpful when customers prefer self-service
- Customers stay in control and avoid sharing credentials
4. Prerequisites
4.1 Third party app requirements
- Customer must retrieve and enter their SFTP credentials
4.2 Anduin app requirements
The user must either:
- Have admin access to the intended funds, or
- Know a team member with admin access who can grant the necessary permissions during setup
5. Pre-Setup Checklist
| Task | Owner | Note | Anduin's guide |
|---|---|---|---|
| Permission to Anduin funds | Customer | Consulted by Anduin | |
| SFTP credentials | Customer | Consulted by Anduin | LINK |
6. Step-By-Step Setup Guide
6.1 Grant access to the Integration Hub
- Customers need to contact their Implementation manager to ensure they have access to the Integration Hub and this specific integration
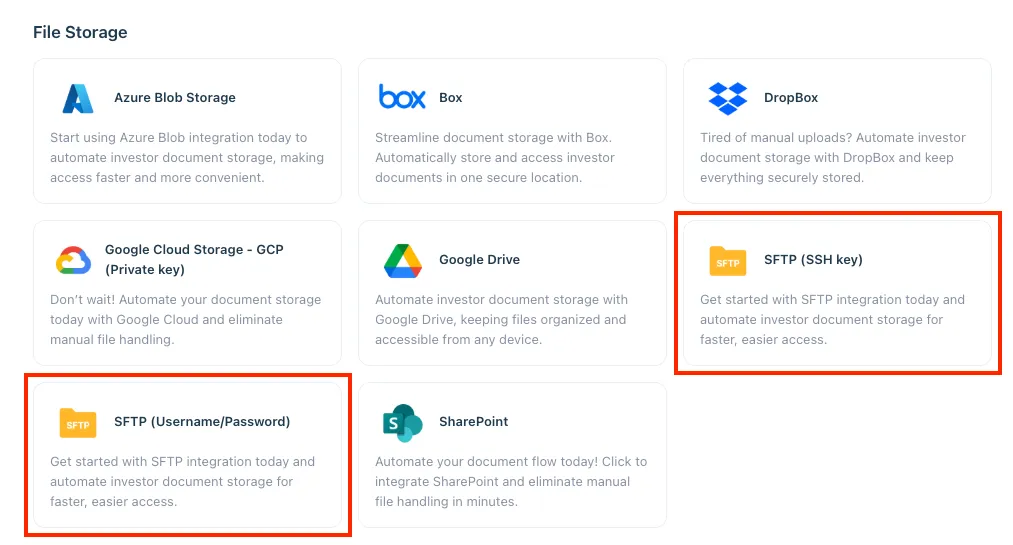
6.2 Locate the solution
- In the Browse tab of the Integration Hub, the customer can locate the SFTP (SSH Key) or SFTP (Username/Password) solution, depending on their authentication method.
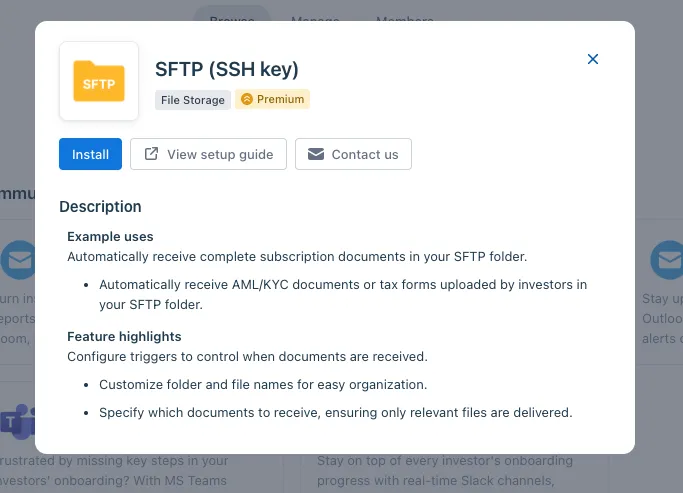
6.3 Install the solution
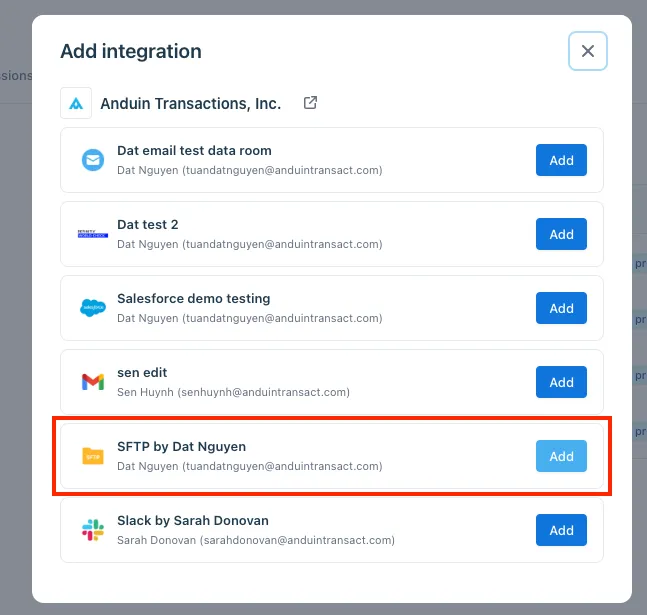
- Step 1: Click Install to begin setup
-
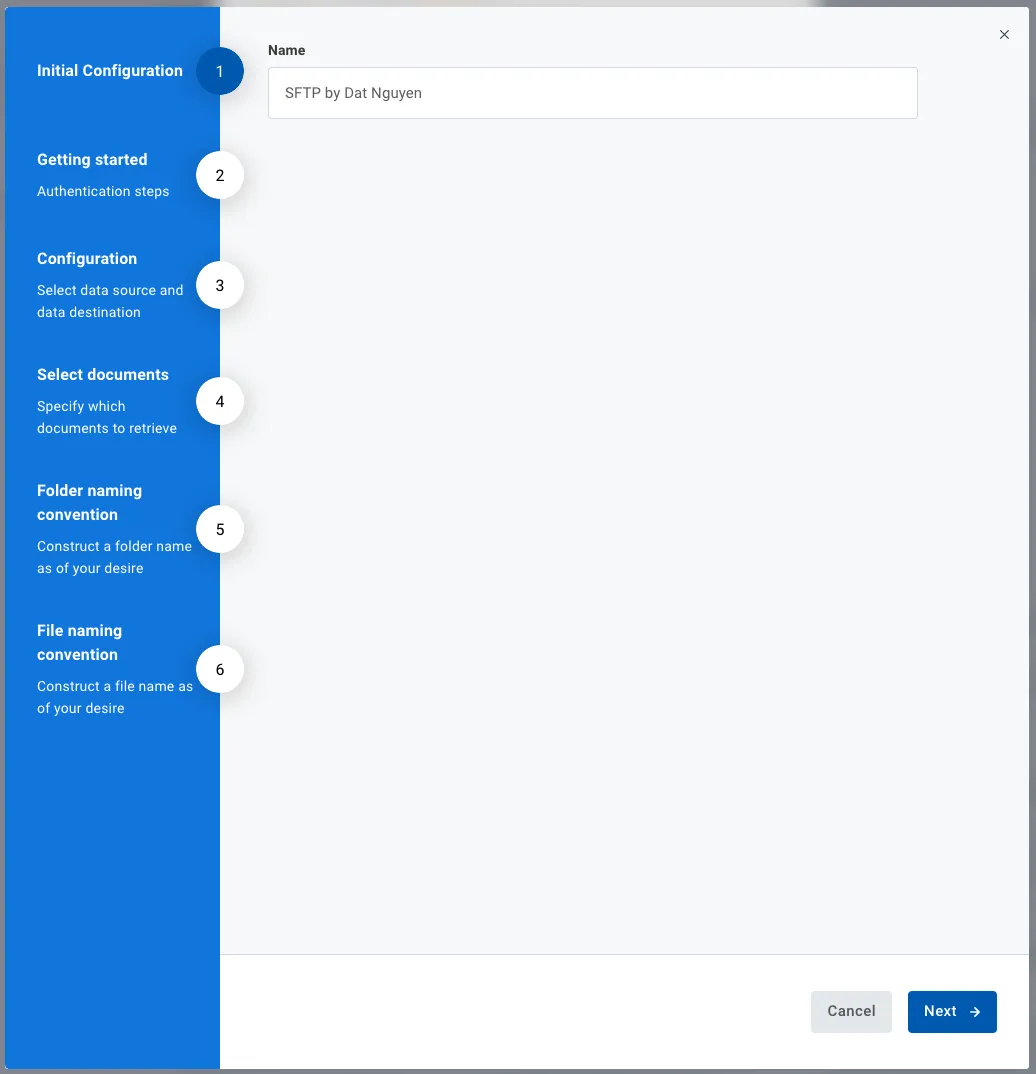
Step 2: Name the Integration
- Suggest a clear, descriptive name (e.g., “SFTP - Tax Files [Fund Name]”)
- Click Next: Link to Anduin objects
-
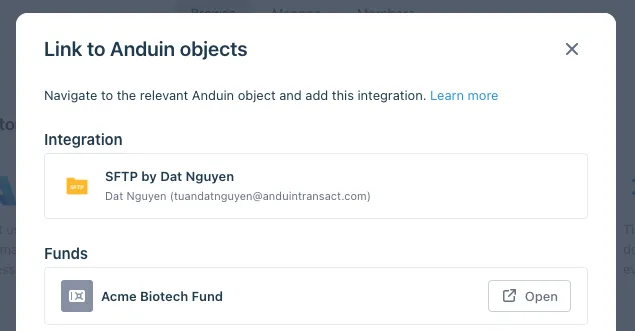
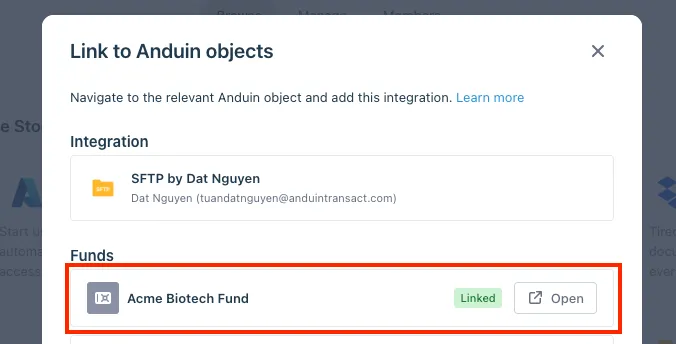
Step 3: Grant integration permission to customer’s intended objects (funds)
- Step 3.1: A list of accessible Anduin objects (e.g., Funds) will appear
- Step 3.2: Click Open next to the relevant fund
- Step 3.3: In the permission module, find the integration name and click Add
- Step 3.4: Return to the Integration Hub - the fund should now show a “Linked” tag
If the target fund is not listed, there are 2 options
- Customer needs to be added with admin role for that fund, then return to the step 3.2. Customer should be able to see the target fund there
- Customer requests their team member who has admin role in that fund to perform step 3.3 using Settings > Integrations in the FundSub app and they can continue with step 3.4
6.4 Configure the solution
- The customer may rename the integration or proceed as-is
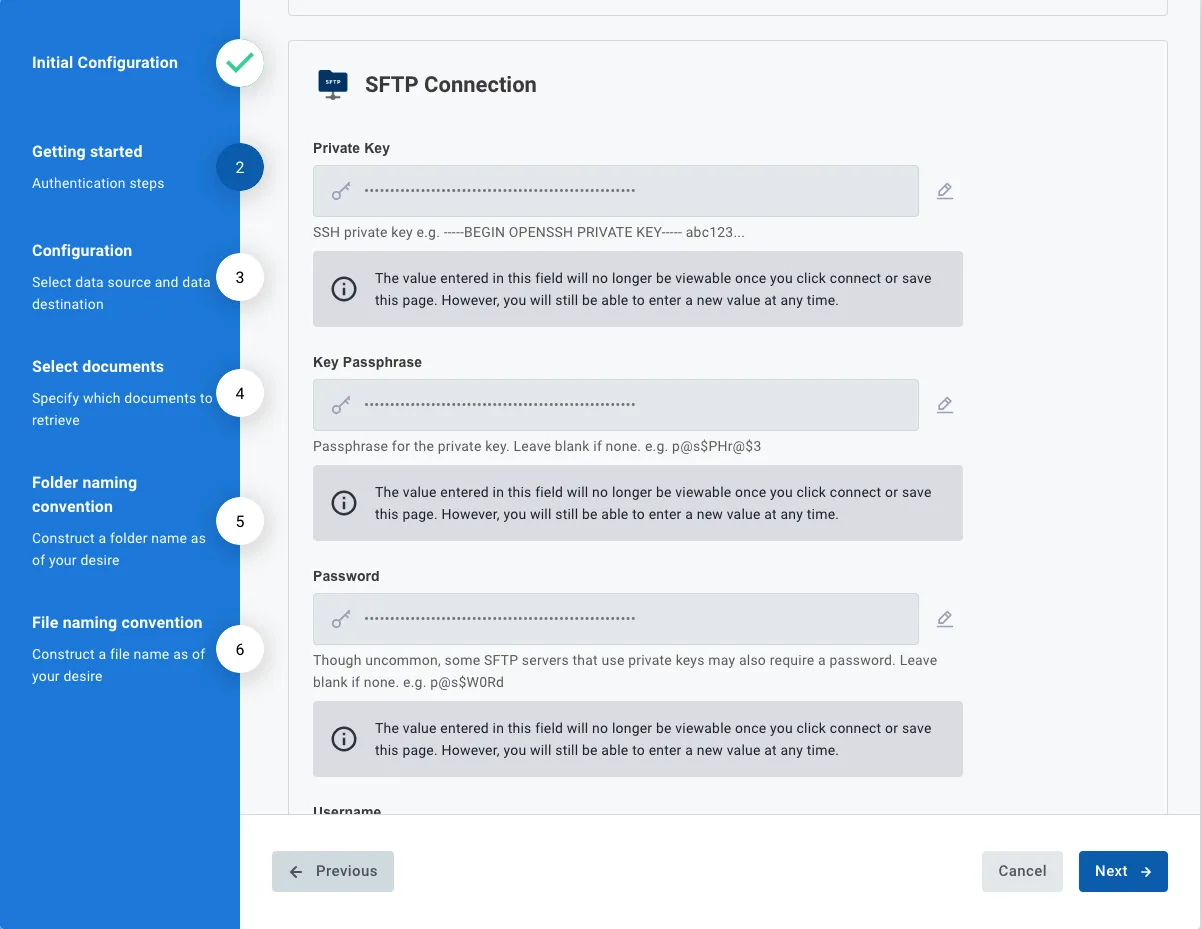
- Enter SFTP credentials
- Select a connected fund and SFTP setup

-
Configure document selection and trigger
- For subscription document, customer can select the subscription status that initiates the sending of documents to your storage
- For supporting documents, customer can select to get all with All Supporting Documents option or select the subset by picking individual ones
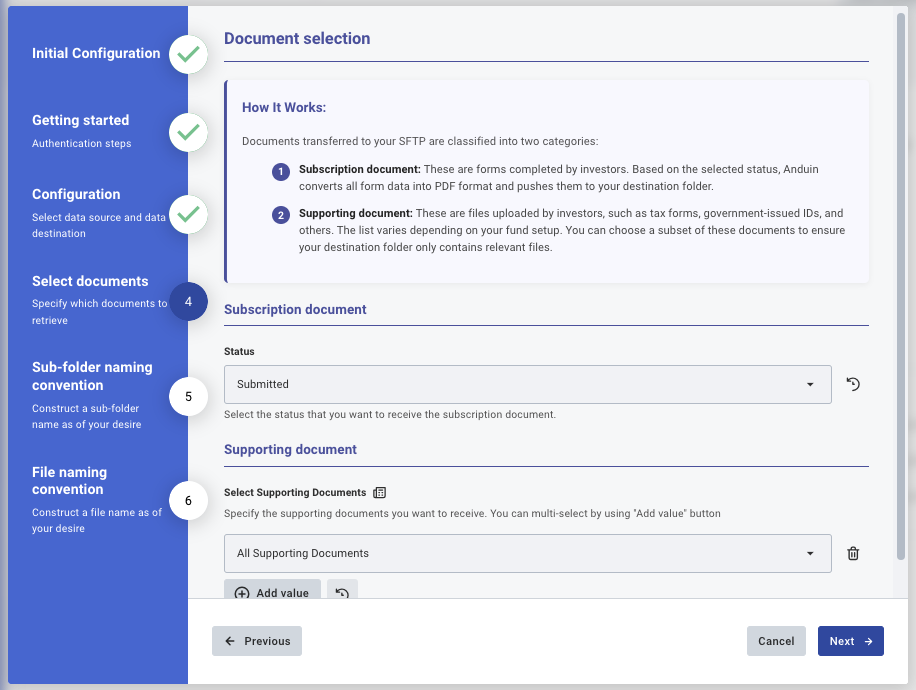
- The remaining screens are where customers can specify the naming convention for their files and folders. Going through these steps, their connection is all set.
6.5 Validate the solution
- Test by uploading a document or updating subscription status in the connected fund
- Confirm the creation of folder structure as below
- Path: [root_path]/[configurable_path]
- Master folder corresponds to the connected fund
- Name: [configurable_prefix]_[Anduin fund name]
- Child folder corresponds to the subscription
- Name: [configurable_prefix]_[configurable convention]
- Subscription documents and supporting documents contained in the child folder
- Name: [configurable convention]
- Confirm delivery to the correct folders in the SFTP destination
Updated 10 months ago
Did this page help you?